RSK w SD springs and a Dana 60

Diesel_Brad

New member
Joined
May 21, 2011
Messages
543
Reaction score
0
Location
Gilbert PA
Ok guys, bear with me while I attempt to do a write up on the INFAMOUS RSK w SD spring swap w a Dana 60
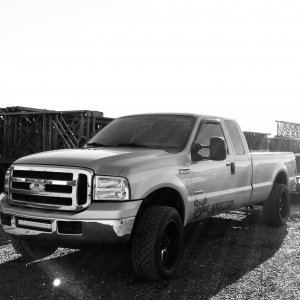
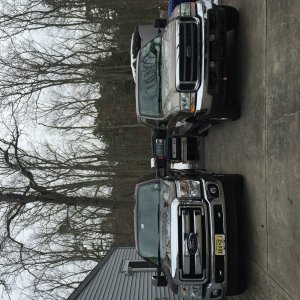
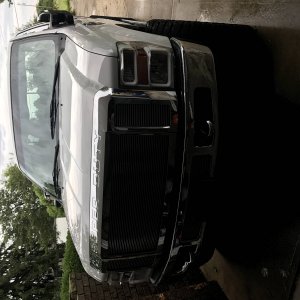
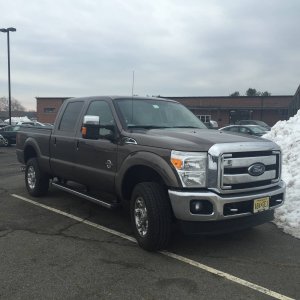
I started with this
DSC00963.jpg

Sagging front springs, beat ball joints, bad u-joints, destroyed pivot bushings, worn rotors, shot brakes, you know, your typical 100k+ TTB
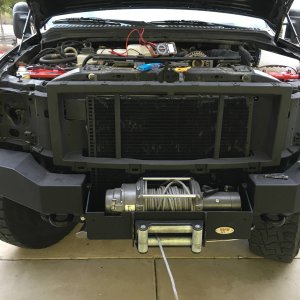
So I did this
DSC00964.jpg

DSC00965.jpg

After the axle was removed, I removed the pivot brackets, leaf springs and shackles.
I then spent about an HOUR AND A HALF cutting off the bumper brackets:eek:
Ford welded them on all 4 sides(top, bottom, front and back)
DSC00972.jpg

DSC00973.jpg

DSC00974.jpg

After I got them off
DSC00975.jpg

DSC00976.jpg

Next up is prepping your RSK to be mounted in the Forward location to use the SD springs
I cut the bushings out of the inside (2 small welds per bushing)
DSC00966.jpg

What i cut off
DSC00969.jpg

After is was cut off
DSC00968.jpg

next up is clearancing the RSK for the Military wrap of the SD springs. I removed 3/8" others have removed less, I just wanted to be sure the springs would clear.
DSC00970.jpg

DSC00971.jpg
 

Diesel_Brad

New member
Joined
May 21, 2011
Messages
543
Reaction score
0
Location
Gilbert PA
Next is mounting the RSK in the correct location for the SD springs.
Cary wants you to check the center point of your front axle before removing it. But mine was already out by the time I got that info. SO I just mounted the RSK forward 3.5" of where it would of went if I was to use OBS springs.
Should be able to see my scribe marks
DSC00979.jpg

DSC00978.jpg

DSC00977.jpg

After it was clamped in place (3.5" forward and the 5/8 hole still the same height as the original shackle hole) the 10 needed holes were drilled.(4 5/8" and 6 1/2") Pay no never mind to the 1/2" bolts on the inside of the RSK in the most forward position(don’t drill those holes, your bumper brakes will be going right over those holes)
DSC00980.jpg

DSC00981.jpg

Ass per Carys recommendations I stitch welded the RSK in place too( I welded them in places I would be able to get a grinder to them if the I needed to remove the RSK)
DSC00983.jpg

DSC00984.jpg

DSC00985.jpg

After the RSK was in place I drilled out the spring holes to 3/4" and the military wrap end of the spring to 3/4". (you need to buy (2) 3/4" x 5.5" grade 8 bolts with nuts and washers)

Also I drill out the wide end of the shackle to 5/8" to match the other end of the SD spring. (you also need to buy (2) 5/8" x 5.5 grade 8 bolts with washers and nuts here too)

Next was to install your SD springs. Before I install ANY leaf springs i thoroughly coat the spring bolts with anti seeze. Put the springs in place but DO NOT tighten the hardware YET.

Install your track bar mount and track bar drop bracket (if you are using one)

Roll the axle under the truck and U-bolt the springs to the axle.
After you have the axle u-bolted to the springs you can lower the trucks weight onto the axle. You can NOW tighten your spring to hanger hardware. Install your steering linkage . Install your brake hardware. Install your new shocks.

Roll the truck forward and backward about 20 feet or so a couple times to center the axle. Now you can connect your track bar to your mount (axle side and frame side). I did NOT use a track bare drop bracket in fear for contact with the sway bar. I just used a SKY adjustable track bar and it works just fine.

Now is time to remount your bumper brackets
DO NOT MOUNT THEM LIKE THIS (this was how i was told and it was WRONG)
DSC00982.jpg


Mount them similar to this
DSC00989.jpg

DSC00988.jpg

DSC00991.jpg

DSC00990.jpg

If you notice, the mount is about flush with the front of the RSK cross member. This will give you enough clearance to mount the bumper and NOT have it hit the cross member. I notched my bumper to clear the actual spring hanger of the RSK. I cut 5" wide x 3" deep.(but I only needed about 1" deep)
DSC00987.jpg
 

Diesel_Brad

New member
Joined
May 21, 2011
Messages
543
Reaction score
0
Location
Gilbert PA
As you can see, i cut too much out of my bumper:doh:
And you can see the mount(the flat piece that bolts to the bumper has about 1/2" clearance from the RSK crossmember
DSC00992.jpg

DSC00993.jpg


Next up was the rear. I bought a Ready lift 5" block kit for a 99-05 SD
DSC00986.jpg

Install is just a matter of swapping out the 2.5" blocks for 5" blocks. I cut about 2" off the u-bolts so i could tighten them with an impact wrench. Also intall new shocks at this time.

And here is the finished product. i gained 5" of lift in the front and 2.5" in the rear. Now i just need to get my new tires and wheels
BEFORE
DSC00963.jpg

AFTER
DSC00994.jpg


Am in the process of gathering part number and the different bolts to make up a material list
 

Diesel_Brad

New member
Joined
May 21, 2011
Messages
543
Reaction score
0
Location
Gilbert PA
The ride is better, but I can’t really say how butch better. I wish i had another STOCK CCSB to hop into now that mine is done. But my back seat used to rattle going down the road now, it is quiet

You also have to take into effect, I took out original 148k shocks, springs and worn bushing and put in new front springs and 4 new shocks.

There is roof for an intercooler just in the fact that the RSK is pushed forward 3.5" when using the SD springs. The intercooler would mount behind the RSK cross member.

Currently the truck has 285/75/16 on the 16x7 wheels. it will be getting 315/75/16 on 16x10 wheels

O yeah. Forgot. Here is a pic next to a STOCK f350. Mind you the CCSB has 285s and the yellow truck has 235s but you get the idea
DSC00995.jpg
 

Diesel_Brad

New member
Joined
May 21, 2011
Messages
543
Reaction score
0
Location
Gilbert PA
A parts list for a Dana 60 swap into a F250

One of the following FORD Dana axles, it is your choice.
85.5-91 King Pin Dana 60
91-94 Ball Joint w pin on calipers
95-97 ball Joint w bolt on style calipers

Next. A RSK. You can go with a SKY manufacturing or a ORU(off road unlimited). For the SD spring swap I used a SKY one, I would reccomend a I/C version even if not putting a I/C in for bumper mounting reasons.

Then you need a set of SD springs. casting numbers on the springs are not a big help. Your best bet is to look at the spring code sticker in the door jam of the truck they came out of.
I used "V code" springs part 2C3Z-5310-HA

An adjustable track bar is a good investment(especially if using a anti-swaybar) SKY sell this. And i use one instead of the Track bar drop bracket. I have Very little bump steer if any.

Shocks. It is up to you on what shocks you run but Bilstein shocks give the best ride.
Front 33-185552 / F4-BE5-6248-H5
Rear 33-185569 / F4-BE5-6249-H5

Stainless brake hoses(may be able to reuse your brake hoes but mine were 145k old so i bought new longer ones

Additional hardware you will need to buy because The SD springs have different spring eye diameters than the OBS springs (sky gives most of the necessary hardware to mount the RSK. (I suggest all grade 8 and SAE washers) But if you plan on bolting it in(not welding at all) You need to buy
(4) 5/8" x 1.5" bolts, 8 flat washers and 4 nylock nuts

For the front spring eye you have 2 choices
1. go to for and pay about $25 each for the 18mm nut and bolt
2. go to a hardware store and buy store and buy (2) 3/4"x5.5" bolts with 4 flat washers and 2 nylock nuts(about $18 for it all)

For the back of the rear spring(where it attaches to the shackle)
You also will need (2) 5/8"x5.5" bolts with 4 flat washers and nylock nuts.

As long as you have 2 reusable bolts from the old springs you can reuse those to attach your new shackle to the hanger (the one under the front cab mount). If not you will need (2) 9/16" x 5.5" bolts with 4 flat washers and 2 nylock nuts

Next would be track Bar mounting bolts.(SKY kit comes with this but only grade 5)
(3) 1/2" x 2" bolts with 6 flat washers and 3 nylock nuts (you may have to trim the end of the far right bolt) it may be close the pan.(I trimmed about 3/8" off mine)

I bought 2 new bolts to mount the track bar. Axle side is 1/2" x 3" and truck side is 1/2" x3.5" Also get 4 flats and 4 nylock nuts.

If using a anti-swaybar you will need (6) 7/16"x 1.25" Bolts, 12 flats, and 6 nylock nuts to attache the brackets to the frame. You will also need (2) 1/2" x 2" bolts with 4 flats and 2 nylock lock nuts, to attach the endlinks. If you did not get the drivers side axle attaching hardware you will need (2) 1/2"x 1.5" bolts with 4 flats and 2 nylock nuts

U-BOLTS. A lot of people reuse u-bolts. They are NOT designed to be reused. You will need (4) 9/16 x8"x3" squares. Jeff's bronco Graveyard has a set for about $35 but you will want to trim about 1.25" off of them.


I believe that covers all the hardware, IF not please post up what i missed.

Rear 5" blocks. I bought Ready Lift ones, because they have the wing for the bump stop built in like the factory.

The only real "specialty" tools i needed to buy was a 3/4" and 5/8" drill bits to enlarge the front spring hanger and eye(3/4) and the spring end of the shackle(5/8)

here is a LIST, what I paid and where I got them

SKY RSK (CT performance) 300
SKY track bar (CT) 145
CROWN SS brake hoses (CT ) 130
Bilsteins (all 4) (CT) 330
SD "V" code springs (local dealer) 294(pair)
U-bolts (JBG) # 33286 39
Skyjacker end links(summit)#SBE-304 63
Moog#K8762 sway bushings (Amazon) 18
Ready Lift 5" block66-2195 (amazon) 159
Grade 8 hardware(local store) 50
--------------------------------------------------------
1511 + freight on some items

Crap.! I forgot one very important thing.
The t-case yolk
if you have a 1356(80's-95) you will need a yolk from the same vintage f350 to use the F350 front drive shaft.

If you have a 4407(96/97) you will need a yolk from the same vintage f350 to us the f350 the front drive shaft

THEY ARE NOT INTERCHANGABLE
 

Diesel_Brad

New member
Joined
May 21, 2011
Messages
543
Reaction score
0
Location
Gilbert PA
did you use the 3" or the 5" rsk?


I used the 3"


How hard was it to drill out the spring bushings?

It drilled out pretty easy, but dont try to drill thru it all in one pass. If you do the bit will get jammed, at least it did on me. Just drill in 1/4 way, then pull out, drill another 1/4 and pull out again. Keep doing that till you are thru. After all, you are drill thru 3" of material
 

Tom S

Moderator
Joined
May 20, 2011
Messages
3,365
Reaction score
1
I have the B codes on the rear of mine and think they were worth it.
 

Tom S

Moderator
Joined
May 20, 2011
Messages
3,365
Reaction score
1
Brad, why did you use a tapered block. I have not gotten a good grasp on the driveline angles stuff.
 

Diesel_Brad

New member
Joined
May 21, 2011
Messages
543
Reaction score
0
Location
Gilbert PA
Brad, why did you use a tapered block. I have not gotten a good grasp on the driveline angles stuff.

It was to get my pinion angle right. With a 5" block(which is ALOT) if it was just a straight block the pinion angle would of been too severe for my liking. NOT saying it wouldnt work, but NOT on MY truck
 

Tom S

Moderator
Joined
May 20, 2011
Messages
3,365
Reaction score
1
Brad can you do me a favor? I am wondering if there is a difference in the carrier bearing bracket from an F250 to an F350. I am specifically wondering if the F-350 sits the carrier bearing just a tad lower as I see some guys had to shim down the carrier bearing when switching to the F350 blocks. I think you have both trucks on hand to do a quick comparison.
 

Latest posts

Members online

Top