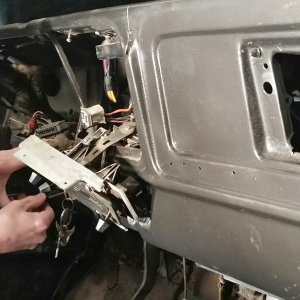
I have successfully installed hydraulic assist and want to share some information with everyone that may be interested in doing it themselves. I would say this is a 7 on a difficulty scale of 1 to 10. Maybe this can go in the library section. I do not have torque specs so hopefully someone else can give a bit of info as needed.
Before starting decide if you want to rebuild the steering box while you have it apart. I purchased a rebuild kit from NAPA since I had almost 300k miles. Be sure you get the correct kit as there are different part numbers depending on the number of splines you have on the pitman shaft.
Step 1: Make sure the front tires are straight. Note the position of the pitman arm relative to the steering box. The spline on mine would only allow installation of the arm in 90* increments.
Step 2: Remove the plastic cover over the input shaft and rag joint and slide up on the shaft. Disconnect the power steering lines and drain the fluid into a catch pan. I was able to access this easily with some minor trimming inside the fender well and the extra space with my lift kit.
Step 3: Remove the link end from the pitman arm. They can be removed with some persuation (Hammer) on the arm NOT the link end. This may require a separater available for rent at some local parts stores.
Step 4: the steering box has three bolts through the frame into the box on the back side. Mine had locktight and rust and were a pain to break loose. Remove the top bolt and then rethread it back in by hand a turn or so to hold the box. You can remove the other bolts completely. The box will shift when the oter two are taken out. Lay on your back and remove the remaining bolt and lower the box.
Step 5: If the steering box is dirty plug the box where the lines go and wash it. It is almost impossible to keep things clean on the inside if it is dirty outside.
Step 6: Remove the pitman arm from the shaft. This should require a puller. (Also available at the local parts store)
Step 7: Have another catch pan available. It will get messy in a hurry. Clamp the box in a vise if available. Remove the bolts in the box directly above the pitman shaft. The adjustment bolt and lock nut can be left alone. With a rubber mallot break the cap plate loose. Do not try to rotate the cap only loosen it. You may need to pry with a screwdriver around several sides to get the cap up. As the cap moves up the pitman arm will follow it up. The fluid inside the box will drain when the pitman shaft gets high enough. Pull the shaft and cap out all together. NOTE: The pitman arm will not come out if the box has been turned off center.
Step 8: Now remove the 4 bolts around the valve housing (Where the lines hook up). With the bolts removed tap with a mallot to break it loose. There is a small O-ring where the housings meet together. When separated slide the input shaft and valve housing out together. The input shaft will spin when you pull it out. Once it bottoms out one direction the piston will come out also on the same shaft. If you are not rebuilding the box just put the input assembly in a clean area to await reassembly.
Step 9: Clean out the housing with carb cleaner. You can see on the top of the housing where it has a port in the housing from the valve housing all the way to the end of the box. This will be one of the tap points. The other is at the area close to the pitman shaft.
Step 10: Tap the box in the locations with 1/8th inch pipe tap. Once tapped make sure all shards of metal are removed from the threads and clean out the housing again. Be sure the fitting at the top will not restrict the flow through the port in the casting. Some minor grinding may be needed. I used a 90* fitting in the top and a straight on the side since there is not enough room to turn a 90*. Put caps on if you are not going to install the ram at this time.
Step 11: Using new fluid, coat the inside of the housing for reassembly.
Step 12: Slide the input assembly back into the housing. The piston will turn as you put it in since it is heavy on one side. Check that the larger O-ring on the valve housing is in place and put the small O-ring in place and put the housings together. Install and tighten the bolts.
Step 13: Turn the piston from the upper opening in the housing till the teeth on the piston face the pitman shaft side. You will need to turn the input shaft back to center to get the piston back to mid bore.
Step 14: Clean the pitman shaft where the seal seats. Clean with carb cleaner and a wire brush and then rinse with carb cleaner. When dry coat with fluid. Check O-ring on the aluminum cap. Drop the pitman shaft into the housing turning the pitman shaft slightly to align teeth. Tap the cap down easily and install the bolts with hand tools. The cap is aluminum and you don't want to bind it. Turn each bolt a 1/4 trun till each is tight.
Step 15: Turn the input shaft from lock to lock. If you feel no increased tighening through the middle of the range you need to adjust the gear lash.
Gear Lash Adjustment: You should use an inch pound torque wrench. Loosen the lock nut and unscrew the adjuster a full turn. Rotate the input shaft lock to lock several times. Start screwing the adjuster inward 1/4 turn at a time. Rotate input shaft several times between adjustments. Adjust till there is no more than 15 inch pounds through the mechanical center. Adjusting too tight will result in a cracked housing. Be Carefull!
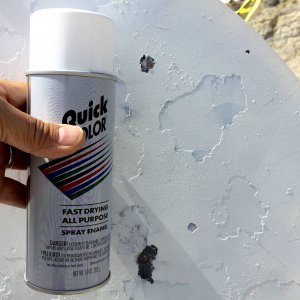
Step 16: Paint the housing to make it look purdy!
Step 17: Reinstall the pitman arm. I recommend using some locktight on the pitman arm nut to keep it from backing off.
Step 18: Reinstall the steering box. Put the steering shaft on last so you can make sure the wheel is straight.
If you installed caps on the fittings fill the powersteering reservoir and start working out the air.
When the cylinder is installed do the same as above. The port on the box close to the pitman arm is pressure turning right the top is left.
Parts list:
O-ring kit (If needed)
3 quarts of fluid
2 cans of carb cleaner ( More may be needed if it is real dirty)
Roll of towels
10' Hydraulic hose ( 1/4" ID preffered 2000psi rated)
1-90* fitting 1/8" NPT for the box other end what you preffer
1-Straight 1/8" NPT for the box other end what you preffer
Fittings for the cylinder
Ty-straps
1 hydraulic cylinder 1-1/2 Bore X 8" stroke
I was not able to take pics as I did the tapping due to having very greasy hands and being home alone.


With this done I do not have to struggle to turn the wheel when sitting still. You may feel some slight resistance turning sharp quickly while rolling. My total cost was right around $200.00. I had all tools needed and even some scrap metal to fab the brackets for attaching the ram. I will gladly answer any questions anyone has on this.
Before starting decide if you want to rebuild the steering box while you have it apart. I purchased a rebuild kit from NAPA since I had almost 300k miles. Be sure you get the correct kit as there are different part numbers depending on the number of splines you have on the pitman shaft.
Step 1: Make sure the front tires are straight. Note the position of the pitman arm relative to the steering box. The spline on mine would only allow installation of the arm in 90* increments.
Step 2: Remove the plastic cover over the input shaft and rag joint and slide up on the shaft. Disconnect the power steering lines and drain the fluid into a catch pan. I was able to access this easily with some minor trimming inside the fender well and the extra space with my lift kit.
Step 3: Remove the link end from the pitman arm. They can be removed with some persuation (Hammer) on the arm NOT the link end. This may require a separater available for rent at some local parts stores.
Step 4: the steering box has three bolts through the frame into the box on the back side. Mine had locktight and rust and were a pain to break loose. Remove the top bolt and then rethread it back in by hand a turn or so to hold the box. You can remove the other bolts completely. The box will shift when the oter two are taken out. Lay on your back and remove the remaining bolt and lower the box.
Step 5: If the steering box is dirty plug the box where the lines go and wash it. It is almost impossible to keep things clean on the inside if it is dirty outside.
Step 6: Remove the pitman arm from the shaft. This should require a puller. (Also available at the local parts store)
Step 7: Have another catch pan available. It will get messy in a hurry. Clamp the box in a vise if available. Remove the bolts in the box directly above the pitman shaft. The adjustment bolt and lock nut can be left alone. With a rubber mallot break the cap plate loose. Do not try to rotate the cap only loosen it. You may need to pry with a screwdriver around several sides to get the cap up. As the cap moves up the pitman arm will follow it up. The fluid inside the box will drain when the pitman shaft gets high enough. Pull the shaft and cap out all together. NOTE: The pitman arm will not come out if the box has been turned off center.
Step 8: Now remove the 4 bolts around the valve housing (Where the lines hook up). With the bolts removed tap with a mallot to break it loose. There is a small O-ring where the housings meet together. When separated slide the input shaft and valve housing out together. The input shaft will spin when you pull it out. Once it bottoms out one direction the piston will come out also on the same shaft. If you are not rebuilding the box just put the input assembly in a clean area to await reassembly.
Step 9: Clean out the housing with carb cleaner. You can see on the top of the housing where it has a port in the housing from the valve housing all the way to the end of the box. This will be one of the tap points. The other is at the area close to the pitman shaft.
Step 10: Tap the box in the locations with 1/8th inch pipe tap. Once tapped make sure all shards of metal are removed from the threads and clean out the housing again. Be sure the fitting at the top will not restrict the flow through the port in the casting. Some minor grinding may be needed. I used a 90* fitting in the top and a straight on the side since there is not enough room to turn a 90*. Put caps on if you are not going to install the ram at this time.
Step 11: Using new fluid, coat the inside of the housing for reassembly.
Step 12: Slide the input assembly back into the housing. The piston will turn as you put it in since it is heavy on one side. Check that the larger O-ring on the valve housing is in place and put the small O-ring in place and put the housings together. Install and tighten the bolts.
Step 13: Turn the piston from the upper opening in the housing till the teeth on the piston face the pitman shaft side. You will need to turn the input shaft back to center to get the piston back to mid bore.
Step 14: Clean the pitman shaft where the seal seats. Clean with carb cleaner and a wire brush and then rinse with carb cleaner. When dry coat with fluid. Check O-ring on the aluminum cap. Drop the pitman shaft into the housing turning the pitman shaft slightly to align teeth. Tap the cap down easily and install the bolts with hand tools. The cap is aluminum and you don't want to bind it. Turn each bolt a 1/4 trun till each is tight.
Step 15: Turn the input shaft from lock to lock. If you feel no increased tighening through the middle of the range you need to adjust the gear lash.
Gear Lash Adjustment: You should use an inch pound torque wrench. Loosen the lock nut and unscrew the adjuster a full turn. Rotate the input shaft lock to lock several times. Start screwing the adjuster inward 1/4 turn at a time. Rotate input shaft several times between adjustments. Adjust till there is no more than 15 inch pounds through the mechanical center. Adjusting too tight will result in a cracked housing. Be Carefull!
Step 16: Paint the housing to make it look purdy!
Step 17: Reinstall the pitman arm. I recommend using some locktight on the pitman arm nut to keep it from backing off.
Step 18: Reinstall the steering box. Put the steering shaft on last so you can make sure the wheel is straight.
If you installed caps on the fittings fill the powersteering reservoir and start working out the air.
When the cylinder is installed do the same as above. The port on the box close to the pitman arm is pressure turning right the top is left.
Parts list:
O-ring kit (If needed)
3 quarts of fluid
2 cans of carb cleaner ( More may be needed if it is real dirty)
Roll of towels
10' Hydraulic hose ( 1/4" ID preffered 2000psi rated)
1-90* fitting 1/8" NPT for the box other end what you preffer
1-Straight 1/8" NPT for the box other end what you preffer
Fittings for the cylinder
Ty-straps
1 hydraulic cylinder 1-1/2 Bore X 8" stroke
I was not able to take pics as I did the tapping due to having very greasy hands and being home alone.
With this done I do not have to struggle to turn the wheel when sitting still. You may feel some slight resistance turning sharp quickly while rolling. My total cost was right around $200.00. I had all tools needed and even some scrap metal to fab the brackets for attaching the ram. I will gladly answer any questions anyone has on this.


