ah makes sense, good to know from people having it!! i just want to make it right and best i can if some people have pics then want to post would be awesome!!
How's this......
I've got roughly $475 in mine.
Parts List:
1. Super Duty 7.3 single fuel pump & bracket - $80
2. Aeromotive Regulator (Jeg's Part #: 27-13109) - $144.99
3. Jeg's 1" Liquid Filled 0-100 PSI Gauge (Jeg's Part #: 555-41013) - $18.99
4. Holly Fuel Pressure Safety Switch (Jeg's Part #: 510-12-810) - $25.99
5. Jeg's -6AN to 3/8" Hose Barb (Jeg's Part #: 799-670300) - $7.99
6. Painless Wiring Relay Base (Jeg's Part #: 764-80133) - $5.99
7. Mr. Gasket Fuel "Y" Block (Jeg's Part #:720-2961) - $23.99
8. Misc. fittings (locally sourced) - $50
9. 2x Filter Heads (FleetFilter.com) - $50
10. WIX/Napa Gold 30 Micron Fuel/Water Separator (FleetFilter.com) - $18
11. WIX/Napa Gold 2 Micron Fuel Filter (FleetFilter.com) - $25
12. 3/8" Fuel Injection rated fuel hose (O'Reilly Auto Parts) - $50 total
I used the factory return lines and some fittings to connect to the fuel pressure regulator.
I also used the factory steel lines (for now) and some 1/4" fuel injection rated hose slid over them and the clamped down. This is only temporary until I upgrade the lines to the head.
REMEMBER, when you use the hose clamps, double clamping is a good idea on fuel injection. If you turn a clamp one way and turn the other the opposite direction, you will get better clamping.
-------------------------------------------------------------------------------------
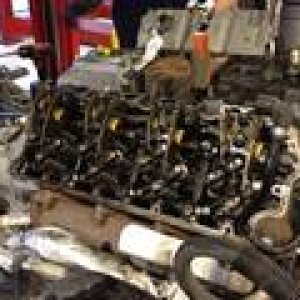
Factory Fuel Bowl Removal:
There are a lot of people who "say" they have to cut the IPR and fuel bowl wiring harness to get the fuel bowl out. That is NOT true.
If you unplug the IPR and trace the harness back to where it plugs in by the glow plug relay, the harness will come out with the fuel bowl. Once it is out with the fuel bowl, you can snake it out of the fuel bowl. This will keep you from having to cut the harness and makes the install a bit cleaner.
-----------------------------------------------------------------------------------------------------------------------------------------------------------------
Wiring:
This is the wiring diagram I used. Thanks to Tom S. for the diagram.
For the ignition key source, I used an unused terminal on the glow plug solenoid.
For the starter trigger wire, I came off the starter solenoid and ran the wire across the top of the motor and down to the oil pressure switch. This allowed me to put all the wiring in wire loom to make it nice and tidy.
For power, I used a wire terminal and connected it to where the main power wire connects to the under hood fuse block. Then I put a 20A MAXI fuse in the power wire going to the relay.
Power for the pump was ran down the frame rail and to the pump power terminal.
Ground was acquired for the relay at a factory ground location on the inner fender on the driver side.
Ground for the pump was put to a bolt for the fuel filter base mounted to the factory frame.
I still haven't got an inertia switch in the wiring yet, but will as soon as I get one out of a wrecked Ford.
In the future, I will be adding the relay and fuse to the factory fuse box.
The wiring is literately the EASIEST part of the whole install.
--------------------------------------------------------------------------------------
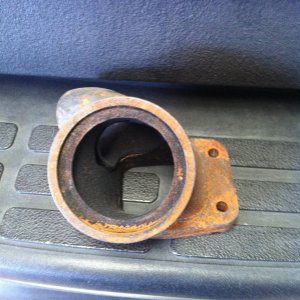
Mechanical Pump Hole Plug:
I used a 7/8" freeze plug to seal the hole in the block that the mechanical fuel pump occupied previously.
IF you use a 7/8" freeze plug, you will need to use a punch to dimple out the sides of the plug. A 7/8" plug is about .003" too small to seal the hole.
When I put the freeze plug in, I also used some black Permatex to help seal the hole.
--------------------------------------------------------------------------------------
Oil Pressure Switch:
I had to use a 1/8" close nipple and a 1/8" coupling to space the fuel pressure switch out so it didn't hit the oil cooler when installed.
--------------------------------------------------------------------------------------
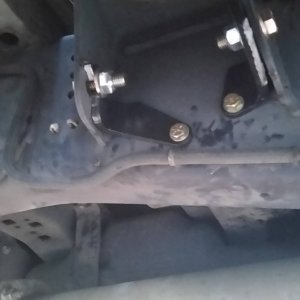
Fuel Pressure Regulator:
I used the mount for the fuel pressure regulator, slightly modified, to mount the fuel pressure regulator.
I mounted it with a single hole drilled in the mount. I removed the engine cover mount and put the regulator on the stud for the mount. I then used the mount and its bolt to hold the regulator in place. This would allow me to still use the engine cover to some what conseal the regulator.
I used a 1/8" close 90* to turn the fuel pressure gauge so it was visible from the side of the truck.
--------------------------------------------------------------------------------------
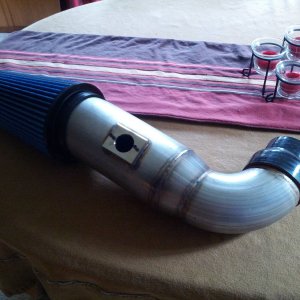
Filters & Pump:
I used the carrier bearing cross member to hold the filters. I didn't have a whole lot of room between the rear of the transfer case and the cross member to put the pump and filters, so I made a mount for each filter to go on the cross member. The final filter's mount is actually off level to match the cross member, but the filter base itself is leveled on the mount.
The plumbing to the pre-filter/water separator comes straight from the fuel selector switch. On the selector switch, the top outer (one closest to the frame rail) is the one that is the supply to the engine. I took it completely off the selector valve so the hose coming off the selector valve was a complete hose from the valve to the pre-filter. The stock hose has a special lock fitting that is clamped to the hose. Once the clamp is removed, the fitting pulls out. I used this fitting in the new hose so it is factory and no need to "rig" up a way to connect to the selector switch.
From the pre-filter the plumbing goes to the inlet of the pump.
From the outlet of the pump the plumbing goes to the inlet on the final filter.
From the outlet on the final filter the plumbing goes to the factory hard supply line. I cut the line up the frame rail so the hose wouldn't have any sharp bends.
I used a single factory Super Duty 7.3 fuel pump and factory mount for my pump.
I mounted the pump to the inner frame rail. I drilled the 3 holes in the frame rail to mount the pump. The pump itself fits inside the frame "C" and doesn't protrude out in the way.
--------------------------------------------------------------------------------------
Results:
I was completely shocked when the truck fired up with no problems. It started faster the first time after the install faster than it ever did with the mechanical fuel pump.
The fuel pressure regulator was set at a factory setting of 45 PSI. Once I got it adjusted to 70 PSI it idled and ran smoother than before. I would imagine that this has to be because of the constant fuel flow to the injectors instead of waiting on the mechanical pump to pump when the cam shaft rotated.
The throttle response was AMAZING! It takes much less throttle now than what it did before. I can tell a huge difference in the amount of black smoke that blows when at WOT.
The truck builds boost faster now than it did before also.
As far as fuel mileage goes, I haven't gained anything from this. If anything the way I have been driving it I have actually lost about .5 mpg. I am sure once I get used to it that my mileage will be the same as before.
All in all, the modification is worth it, especially if you are needing to replace the factory mechanical pump. This makes upgrading to better injectors in the future cheaper as well since this modification is already done.
If anyone has any questions, feel free to PM me to ask. I am always willing to help.

 imp: so from there fuel T's into the front of the heads and then regulated back into the tank correct? easier said then done but just the jist