97 PSD to 58 C60

markfuga

Member
Joined
Apr 25, 2013
Messages
164
Reaction score
0
Location
Leesburg, VA
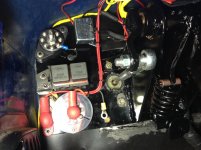
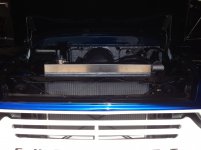
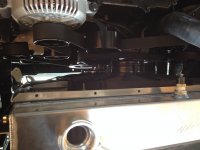
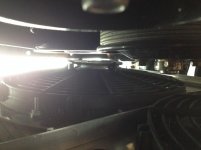
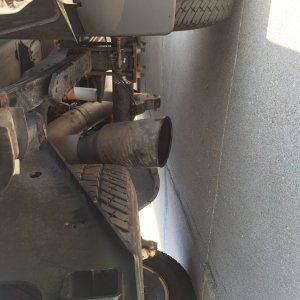
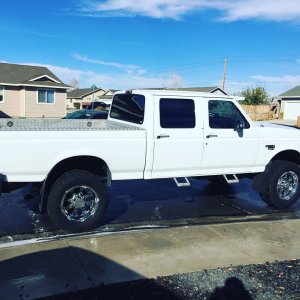
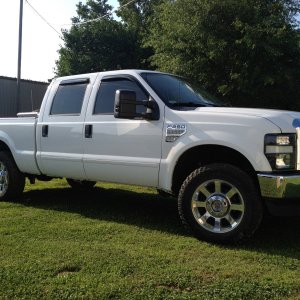
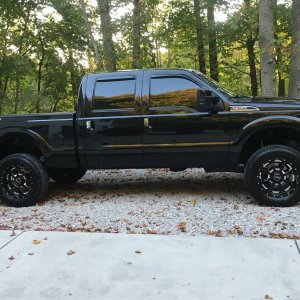
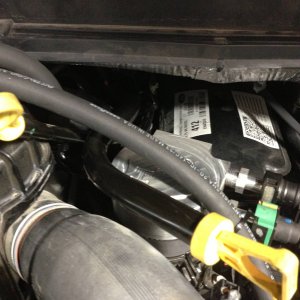
Getting closer, I set the cab down yesterday! I made another video prior to setting the cab so I could explain everything done to transplant the drivetrain. It's 34 minutes of fact filled information (I try to avoid tangents and random babbling). Hopefully some of this info is helpful to someone esle that's wanting to transplant these engines into an old truck; Ford, Chevy or maybe a Dodge :eek:

https://www.youtube.com/watch?v=WciOGXFiN-c
 

markfuga

Member
Joined
Apr 25, 2013
Messages
164
Reaction score
0
Location
Leesburg, VA
Oh man don't temp me! I have a friend that (essentially) wants to give me a 65 GMC 6500 which is the same size truck as this one. Ideas have been bouncing around in my head about it. The 65 should have an outboarded steering box which would make stuffing things in there easier :naughty:
 

backwoodsboy

New member
Joined
Mar 9, 2012
Messages
1,507
Reaction score
0
Location
Merica
Oh man don't temp me! I have a friend that (essentially) wants to give me a 65 GMC 6500 which is the same size truck as this one. Ideas have been bouncing around in my head about it. The 65 should have an outboarded steering box which would make stuffing things in there easier :naughty:

*cough* DT466 *cough*
 

mandkole

Active member
Joined
Jan 14, 2012
Messages
2,303
Reaction score
2
Location
Northwest
very nice-- way cool. Id never spent a lot of time under the hood of these old trucks, but they are surprisingly shallow front to back. You could not have planned the fit any better. The V8 may be the best fit from a packaging standpoint..
 

markfuga

Member
Joined
Apr 25, 2013
Messages
164
Reaction score
0
Location
Leesburg, VA
Very close to starting the engine for the first time in its new home, just need to do the POR15 restoration on the inside of the fuel tank. I'm hoping to get that done this weekend.

Here's a couple pictures of the "power distribution" panel I came up with. Top left is a ground terminal block, top right is the horn relay, middle section is a pair of relays I salvaged from the donor truck, they were the trailer tow package relays. One relay is for switched +12v and connects to the large red terminal block at the bottom. The other relay is switched by the headlight switch and connects to the small red terminal lug on the lower right (missing in the picture). I'll attach auxiliary lights to that lug (cab roof lights, trailer lights, gauge lights, etc). The single stud red block on the lower left is the battery lug (live +12v always). This setup will make adding and removing stuff easy now and in the future.
 

Attachments

  • IMG_0297.jpg
    IMG_0297.jpg
    893.7 KB · Views: 70
  • IMG_0298.jpg
    IMG_0298.jpg
    875.9 KB · Views: 69
  • IMG_0301.jpg
    IMG_0301.jpg
    700.5 KB · Views: 65
  • IMG_0302.jpg
    IMG_0302.jpg
    762.3 KB · Views: 74
  • IMG_0303.jpg
    IMG_0303.jpg
    851.6 KB · Views: 75

markfuga

Member
Joined
Apr 25, 2013
Messages
164
Reaction score
0
Location
Leesburg, VA
Set the radiator this weekend and everything looks good. I have about a half inch of clearance between the harmonic balancer and the fan motor. The bottom fan is a Spal 13” medium duty and the top fan is a Spal 13” heavy duty. The placement of the motor for the top fan worked out nice by fitting just inside the serpentine belt system where there’s large open space between pulleys. I forgot to snap pics of the upper and lower hoses, but they fit great too. The top hose is the original from the donor truck and the lower hose is the original from the donor with a small modification.
 

Attachments

  • IMG_0314.jpg
    IMG_0314.jpg
    592.5 KB · Views: 66
  • IMG_0315.JPG
    IMG_0315.JPG
    1.7 MB · Views: 57
  • IMG_0316.jpg
    IMG_0316.jpg
    811.6 KB · Views: 64
  • IMG_0317.jpg
    IMG_0317.jpg
    897.7 KB · Views: 66
  • IMG_0318.jpg
    IMG_0318.jpg
    826.4 KB · Views: 61

markfuga

Member
Joined
Apr 25, 2013
Messages
164
Reaction score
0
Location
Leesburg, VA
Fired it up for the first time today! I still need to finish the brakes before taking it for a spin but its nice to hear it run again.

How does it sound to the more trained ears out there? It's rough for sure but I don't believe there's a miss in it. The oil system was completely drained (HPOP res and head rails) so I know its gonna be rough for a while, just like to know if it sounds "normal" for a first start.

https://www.youtube.com/watch?v=TVGu2xMrA8A
 

markfuga

Member
Joined
Apr 25, 2013
Messages
164
Reaction score
0
Location
Leesburg, VA
Still no brakes in the truck but I could no longer resist the temptation to drive it. I did a couple laps between the shop and the front yard to warm it up so I can find any remaining bugs. My eldest son filmed as I raced around on the final lap. You can see the rear tires break loose as I hit 3rd gear coming past him.

https://www.youtube.com/watch?v=G3TKFQ5FJjc
 

markfuga

Member
Joined
Apr 25, 2013
Messages
164
Reaction score
0
Location
Leesburg, VA
Thanks all. "nuts" is an understatement :) If it was an auto trans I would never have driven it without brakes but the stick makes is totally safe..... right ??

Hoping to get the brakes working this coming weekend. I was about to bleed them out this past weekend when I rememberd I need to add 10 pound residual valves to both the front and rear lines (4 wheel drum brakes). The valves are on order and hopefully show up this week. I'll do a "ride along" video when I get it out on the open road.
 

markfuga

Member
Joined
Apr 25, 2013
Messages
164
Reaction score
0
Location
Leesburg, VA
The brakes are now operational! The pedal isn’t as high as I wanted it to be but the feel and function is perfect. On a test run down the road I was able to easily lock up the rear tires. The 10 pound valves work great, the pedal response is consistent each time the brakes are applied. Overall the brakes are smooth, not sudden/jerky or slow in response; I’m very pleased with the outcome.

Also: the power and acceleration is INSANE! It’s a completely different truck and a total adrenaline rush. The amazing part is, I don’t have the Swamps IDM or the TS chip installed yet…. Holy smokes, not sure I can handle it!

Here are a couple personal notes to anyone who’s doing all new brake lines into a truck (these are seen in the pictures marked with red arrows or circled). These tips (I consider them requirements) will eliminate pre-mature failure of the brake lines at the fittings. I mention these only because I see alot of guys neglect these steps.

1. Tie the lines at the back of the master cylinder to some sort of bracket. This prevents the lines from moving at the fittings when the body and frame flex in different angles from each other.
2. Make a small coil of brake line shortly after the master cylinder. This acts like a spring to absorb the flex of the body and frame. The coils need to be on both front and rear lines.
3. Make a bracket to hold the lines to the frame, close to the fitting. Again, this prevents the line from flexing at the fitting.
 

Attachments

  • brake1.jpg
    brake1.jpg
    1,011.1 KB · Views: 75
  • brake2.jpg
    brake2.jpg
    750.6 KB · Views: 68
  • brake3.jpg
    brake3.jpg
    1.8 MB · Views: 65
  • IMG_0354.jpg
    IMG_0354.jpg
    759.7 KB · Views: 73

markfuga

Member
Joined
Apr 25, 2013
Messages
164
Reaction score
0
Location
Leesburg, VA
Went out on the maiden voyage today and swung by the bulk mulch yard so I could get on the scale while the dump bed is still off the truck. It weighed in at 7800 pounds which surprised me because it weighed 9000 pounds with the bed. I thought the bed weighed closer to 2500 pounds, so surprised to learn it only weighs around 1200 to 1500 pounds. I’ll get back on the scale after the bed is back on to confirm the actual weight.

The brakes are great and the truck cruises effortlessly in any gear. I went up a long, reasonably steep grade in 5th (overdrive) and accelerated the whole way up, never had to down shift.

Next on the “to do” list is to close up the hole around the shifter boot. The noise coming in got a little unbearable by the time I got home. I’ll need to fab up a piece of sheet metal to close in around the top of the transmission so the shifter boot can be screwed back down.
 

Latest posts

Members online

Top