GoMopar440
New member
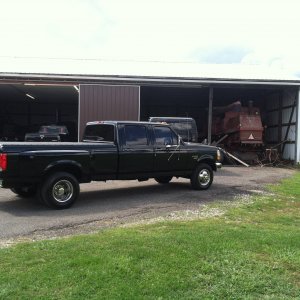
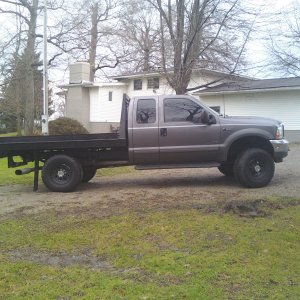
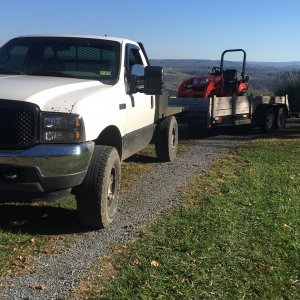
I picked up this truck at the beginning of last month, and a few issues were noticed with it right off the bat.
First, the fuel gauge keeps reading whatever it wants to, whenever it wants to. The dealer took a look at it and said the fuel level sender and wiring all checked out good on it. Apparently something inside the gauge cluster is at fault, so I'm still using the truck while I wait for them to get the new gauge cluster in. For now I just use the trip meter to keep track of my mileage, and I don't let it fall below half a tank.
Second, I was also getting the regen cycle popping up constantly. It would even occasionally go into limp mode for a few seconds at a time causing a dead gas pedal for a few seconds. The dead pedal scared the dookie out of my wife when she drove it for the first time. The dealer checked out this problem as well, but didn't really explain very well what they did and what exactly they replaced while they were in there. The dead pedal issue hasn't happened since I got the truck back, but the regen cycle is still happening constantly.
That led me here to see if I could find out for myself what might be going on. Whooo boy, did I ever get a wake up call I wasn't expecting...:doh: I now have a basic idea of what went on regarding the problems with Ford and the engine MFG, as well as the related "Dirty Pickle Filter" and "Eggs & Gravy Recipie" systems (I'd like to see the auto correct word filter try to figure that one out. ). I have no qualms about doing what needs to be done to fix those two systems, and already have a tuner (H&S Mini Maxx) to keep the ECU happy.
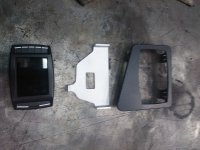
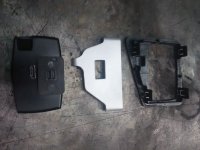
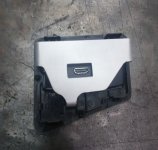
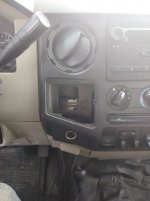
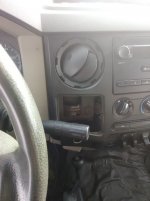
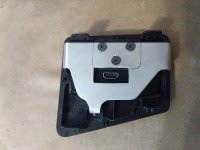
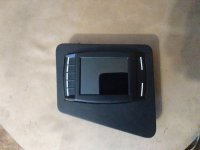
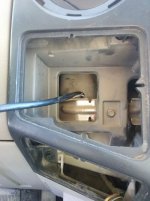
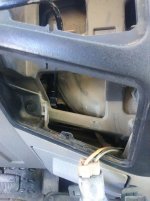
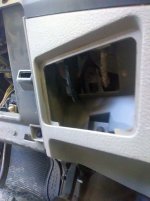
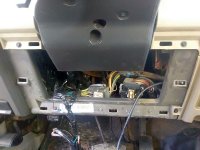
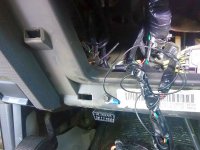
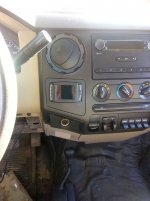
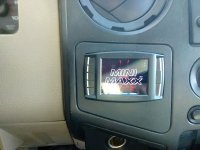
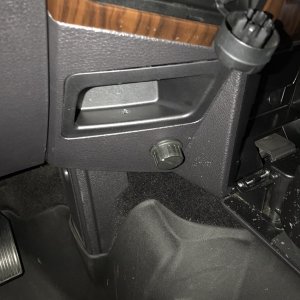
I've heard quite a few good reviews about the tuner, but the same can't be said for the suction mount that comes with it. Rather than dealing with that, I'm making a semi-permanent mount to fit in an empty space in the center of the dash. My truck is a XL model, so there are lots of unused spots in the dash to put it. I chose the little insert panel just above the 12V socket on the left for it's new home. A few minutes of quality Dremel time later and I had a Mini Maxx sized hole in the panel. To hold it in there I had to make a mount for the back of the panel. I started out by cutting the end off the suction cup mount and sanding the back side of it smooth. Today I brought those two pieces to work (machine shop) and fabbed up an aluminum bracket to mate the parts together. The bracket has a little window in the middle of it to clear the HDMI plug. I just need to drill and tap the aluminum in a few places to attach the bracket to the panel, and also attach the mount I cut off the suction cup to the bracket. I set the height of the bracket so the seam in the MM housing is lined up with the front face of the panel insert.
I'll be working on wiring the tuner in this weekend after the mount is finished. I probably won't set it up yet, because I still need to deal with that big restriction in the exhaust system. Currently I'm looking at getting a full stainless turbo back kit, with a muffler, most likely a Flo-Pro 4" setup to keep it somewhat civilized noise wise.
First, the fuel gauge keeps reading whatever it wants to, whenever it wants to. The dealer took a look at it and said the fuel level sender and wiring all checked out good on it. Apparently something inside the gauge cluster is at fault, so I'm still using the truck while I wait for them to get the new gauge cluster in. For now I just use the trip meter to keep track of my mileage, and I don't let it fall below half a tank.
Second, I was also getting the regen cycle popping up constantly. It would even occasionally go into limp mode for a few seconds at a time causing a dead gas pedal for a few seconds. The dead pedal scared the dookie out of my wife when she drove it for the first time. The dealer checked out this problem as well, but didn't really explain very well what they did and what exactly they replaced while they were in there. The dead pedal issue hasn't happened since I got the truck back, but the regen cycle is still happening constantly.
That led me here to see if I could find out for myself what might be going on. Whooo boy, did I ever get a wake up call I wasn't expecting...:doh: I now have a basic idea of what went on regarding the problems with Ford and the engine MFG, as well as the related "Dirty Pickle Filter" and "Eggs & Gravy Recipie" systems (I'd like to see the auto correct word filter try to figure that one out.
). I have no qualms about doing what needs to be done to fix those two systems, and already have a tuner (H&S Mini Maxx) to keep the ECU happy.I've heard quite a few good reviews about the tuner, but the same can't be said for the suction mount that comes with it. Rather than dealing with that, I'm making a semi-permanent mount to fit in an empty space in the center of the dash. My truck is a XL model, so there are lots of unused spots in the dash to put it. I chose the little insert panel just above the 12V socket on the left for it's new home. A few minutes of quality Dremel time later and I had a Mini Maxx sized hole in the panel. To hold it in there I had to make a mount for the back of the panel. I started out by cutting the end off the suction cup mount and sanding the back side of it smooth. Today I brought those two pieces to work (machine shop) and fabbed up an aluminum bracket to mate the parts together. The bracket has a little window in the middle of it to clear the HDMI plug. I just need to drill and tap the aluminum in a few places to attach the bracket to the panel, and also attach the mount I cut off the suction cup to the bracket. I set the height of the bracket so the seam in the MM housing is lined up with the front face of the panel insert.
I'll be working on wiring the tuner in this weekend after the mount is finished. I probably won't set it up yet, because I still need to deal with that big restriction in the exhaust system. Currently I'm looking at getting a full stainless turbo back kit, with a muffler, most likely a Flo-Pro 4" setup to keep it somewhat civilized noise wise.