I'm 6'1"+ and 215 pounds.
I find that on long trips I am craving a little bit more room to stretch out, especially my legs. So I remounted the driver's seat in my 08 F350 a little further back (about 1.5") on the power seat base. I did this on my old truck ('99 F250) too.
1.5" doesn't sound like a lot, but it makes a world of difference to me, comfort wise.
Here is how I did it. Total time start to finish was 2 hours.
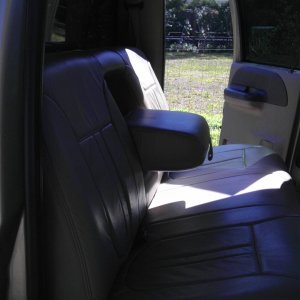
The starting point is a 2008 F350 King Ranch. The seat is all the way back in this picture. 90% of the time I am driving my truck with the seat in the full back position, with the power pedals fully forward.

The first thing you need to do is remove the seat. Put it all the way back and remove the two front mounting bolts. (18mm socket)

Next, remove the back seat "bolts". My old truck ('99) has two studs sticking out of the floor. My 08 has 1 stud and 1 bolt. There are probably other variations.
I put the seat all the way forward prior to removing these bolts and left it that way for the rest of the procedure. Once you disconnect power to the seat, there is no easy way to move the seat track.
To get the caps off the "bolts", put a screwdriver under the metal washer that is on the "nut". Don't just pry directly on the plastic pieces, you'll probably break them.

Next up, unplug the seat wiring. All the seats have a bit of wiring, even the manual seats. (Seat belt sensor). My truck has heated, power seats with memory, so I have 3 plugs to disconnect.
The plugs come out easily if you have the latch disengaged. Use a screwdriver to do so. Do not force the issue.
I used some sticks to hold up the seat for better access under the seat from the back.

With the seat out we can now start working on it.
The pickiest part about this whole project is keeping the seat clean. I put cardboard on my welding table and then blanket to protect it. I find working on the seat on a good work bench much better than working on it on the floor, but that would work too.
The seat is held to the base by 4 bolts, 10mm socket. This was the same as on my '99. Remove them.
Then disconnect the wiring harness from the seat to the base. I recommend using a good forked split groove panel "screwdriver" for removing any of the push pin mounted connectors. <--- I don't know how else to describe that !

You'll also need to remove the bracket that mounts the front trim piece. (2 Phillips screws.)

When you are done, the seat will be separated from the base, but not entirely so. That is fine. Set the base to the side for now.

The seat gets moved back by remounting the seat itself on the seat base. Fortunately, Ford made the seat bottom large enough that one is able to do this.
The first thing you need to do is figure out how much to move the base FORWARD relative to the seat itself. DO NOT GET THIS WRONG OR YOU WILL BE MOVING YOUR SEAT FORWARD INSTEAD OF BACK. (Emphasis, not shouting, btw.)
I recommend checking out the rear inboard mount, because it is the trickiest. The 10mm seat mounting bolts all screwed into "blind" nuts in the seat base. It turns out that the rear inboard mount has an untapped "blind" nut built into it a bit less than 1.5" forward of the stock mount.
I chose to drill right into and through this nut and use it as my relocation point for that mount. One could also tap it. This position creates a convenient amount of seat relocation, as you'll see later.
Whatever you do, thoroughly check what is behind wherever you are going to drill the new mount hole, before you drill.

I resecured my seat with grade 5 3/8" bolts with lock nuts and washers. You might need to drill out some of the holes in the seat base to allow them to fit.

Once the first hole is located and loosely secured, drill the other 3 holes. The rear inboard hole is the only one that cannot be reached with the base on. The rest can be. Its a reach biatch getting at some of the nuts on the inside of the seat structure.
You'll probably need to lightly bolt everything while drilling, then undo everything, redo all the electrical connections and bolt it "for real". That is what I did.
The bolts pretty much have to go into the seat base, with the nuts inside the seat structure. If you put them the other way, nuts down, they might drag on the carpet when the seat is in the lowest position.

Here is the hardware I used. It helps to have spares of everything so that if you drop a nut or washer in the seat you don't have to fish it out until you turn the seat upright.
I didn't use the lock washers, the larger flat washers or the regular nuts in the final assembly.
If you drill through the "blind" nut on the rear inboard mount, you'll need a longer bolt to reach through it.

Once you get the base remounted to the seat, trim the trim holder such that fits. If you move the seat less than 1.5", you can just cut off the rear mounting hole and secure it with one screw instead of 2.

Miscellaneous completed mount pictures.
RECONNECT ALL THE WIRING BEFORE YOU SECURE THE BASE TO THE SEAT FOR THE FINAL TIME.
Note: none of the base to seat wiring moves relative to each other, so you don't have to worry about over extending it. The only wiring that moves on the whole seat assembly is the cab connector to the seat base. We'll discuss that later.


You can now mount the seat back into the truck.
Here are 2 reasons not to move the seat back much more than 1.5".
It will hit the B pillar cover if you move it back much more. Compare this distance to that in the first picture in this post.

The cab to seat connector harness will over stretch if you move it back much more than 1.5". Its fine at 1.5 inches, but I wouldn't want to put it back much more.

Enjoy !
I find that on long trips I am craving a little bit more room to stretch out, especially my legs. So I remounted the driver's seat in my 08 F350 a little further back (about 1.5") on the power seat base. I did this on my old truck ('99 F250) too.
1.5" doesn't sound like a lot, but it makes a world of difference to me, comfort wise.
Here is how I did it. Total time start to finish was 2 hours.
The starting point is a 2008 F350 King Ranch. The seat is all the way back in this picture. 90% of the time I am driving my truck with the seat in the full back position, with the power pedals fully forward.
The first thing you need to do is remove the seat. Put it all the way back and remove the two front mounting bolts. (18mm socket)
Next, remove the back seat "bolts". My old truck ('99) has two studs sticking out of the floor. My 08 has 1 stud and 1 bolt. There are probably other variations.
I put the seat all the way forward prior to removing these bolts and left it that way for the rest of the procedure. Once you disconnect power to the seat, there is no easy way to move the seat track.
To get the caps off the "bolts", put a screwdriver under the metal washer that is on the "nut". Don't just pry directly on the plastic pieces, you'll probably break them.
Next up, unplug the seat wiring. All the seats have a bit of wiring, even the manual seats. (Seat belt sensor). My truck has heated, power seats with memory, so I have 3 plugs to disconnect.
The plugs come out easily if you have the latch disengaged. Use a screwdriver to do so. Do not force the issue.
I used some sticks to hold up the seat for better access under the seat from the back.
With the seat out we can now start working on it.
The pickiest part about this whole project is keeping the seat clean. I put cardboard on my welding table and then blanket to protect it. I find working on the seat on a good work bench much better than working on it on the floor, but that would work too.
The seat is held to the base by 4 bolts, 10mm socket. This was the same as on my '99. Remove them.
Then disconnect the wiring harness from the seat to the base. I recommend using a good forked split groove panel "screwdriver" for removing any of the push pin mounted connectors. <--- I don't know how else to describe that !
You'll also need to remove the bracket that mounts the front trim piece. (2 Phillips screws.)
When you are done, the seat will be separated from the base, but not entirely so. That is fine. Set the base to the side for now.
The seat gets moved back by remounting the seat itself on the seat base. Fortunately, Ford made the seat bottom large enough that one is able to do this.
The first thing you need to do is figure out how much to move the base FORWARD relative to the seat itself. DO NOT GET THIS WRONG OR YOU WILL BE MOVING YOUR SEAT FORWARD INSTEAD OF BACK. (Emphasis, not shouting, btw.)
I recommend checking out the rear inboard mount, because it is the trickiest. The 10mm seat mounting bolts all screwed into "blind" nuts in the seat base. It turns out that the rear inboard mount has an untapped "blind" nut built into it a bit less than 1.5" forward of the stock mount.
I chose to drill right into and through this nut and use it as my relocation point for that mount. One could also tap it. This position creates a convenient amount of seat relocation, as you'll see later.
Whatever you do, thoroughly check what is behind wherever you are going to drill the new mount hole, before you drill.
I resecured my seat with grade 5 3/8" bolts with lock nuts and washers. You might need to drill out some of the holes in the seat base to allow them to fit.
Once the first hole is located and loosely secured, drill the other 3 holes. The rear inboard hole is the only one that cannot be reached with the base on. The rest can be. Its a reach biatch getting at some of the nuts on the inside of the seat structure.
You'll probably need to lightly bolt everything while drilling, then undo everything, redo all the electrical connections and bolt it "for real". That is what I did.
The bolts pretty much have to go into the seat base, with the nuts inside the seat structure. If you put them the other way, nuts down, they might drag on the carpet when the seat is in the lowest position.
Here is the hardware I used. It helps to have spares of everything so that if you drop a nut or washer in the seat you don't have to fish it out until you turn the seat upright.
I didn't use the lock washers, the larger flat washers or the regular nuts in the final assembly.
If you drill through the "blind" nut on the rear inboard mount, you'll need a longer bolt to reach through it.
Once you get the base remounted to the seat, trim the trim holder such that fits. If you move the seat less than 1.5", you can just cut off the rear mounting hole and secure it with one screw instead of 2.
Miscellaneous completed mount pictures.
RECONNECT ALL THE WIRING BEFORE YOU SECURE THE BASE TO THE SEAT FOR THE FINAL TIME.
Note: none of the base to seat wiring moves relative to each other, so you don't have to worry about over extending it. The only wiring that moves on the whole seat assembly is the cab connector to the seat base. We'll discuss that later.
You can now mount the seat back into the truck.
Here are 2 reasons not to move the seat back much more than 1.5".
It will hit the B pillar cover if you move it back much more. Compare this distance to that in the first picture in this post.
The cab to seat connector harness will over stretch if you move it back much more than 1.5". Its fine at 1.5 inches, but I wouldn't want to put it back much more.
Enjoy !
Last edited:

