PSDEng
New member
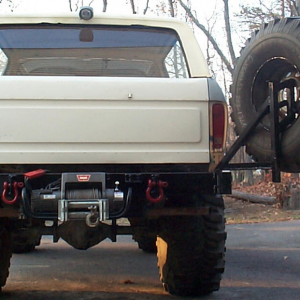
I just finished doing a bunch of front end work on my CCLB, so I figured I would document the process for replacing the ball joints. It may help out some newer guys who have never done it.
Tools needed:
1) 13/16" socket for caliper bracket bolts and tie rod nut
2) 9/64" allen wrench if you have Warn manual hubs
3) Spindle lock nut socket. Mine took a 4 prong socket with a 2.5" diameter
4) Jack and jack stands
5) 1 1/8" socket for upper ball joint retaining nut
6) 1 5/16" socket for lower ball joint retaining nut
7) 7/8" socket to remove lug nuts
8) 4lb sledge hammer
9) Various pliers and picks
10) 6" C-clamp
11) Ball joint press
12) Torque wrench good to 150 ft-lbs
Removal:
1) Jack up the vehicle and place on jack stands. Remove the wheel.
2) Loosen the upper and lower caliper bracket bolts

3) Place a 6" C-clamp with the pressure screw on the outer pad and the other end on the back of the caliper. This will bottom the piston out in its bore making the caliper assembly easier to remove. Set the caliper on the spring pack. DO NOT let the caliper hang.

4) Remover the hub cover with the appropriate sized allen wrench or torx socket. This is what you will see.

5) Remove the spiral lock ring by prying it up out of its groove then pulling it out with a small pair of pliers.

6) Remove the hub body assembly and set aside in a clean area.

7) Using the spindle lock nut socket that you have (either rented or bought) remove the outer lock nut, the washer, and the inner lock nut. At this point the hub and rotor assembly should slide off. Be sure to catch the outer bearing as it will fall out.

8) Remove the nuts that retain the spindle.

9) There are a few ways to remove the spindle. I used a spindle adapter with a slide hammer. Others are fortunate enough to be able to beat on the spindle with a dead blow hammer and it come off. Others beat on the back of it to get it to come off as well. Any way you choose, remove the spindle and set it aside in a clean area. Once the spindle is out you can remove the dust shield and the axle shaft will slide out. I replaced u-joints at this time since everything was already torn apart.

10) Remove the tie rod from the steering knuckle.

11) Take note of the position of the camber bushing on the upper ball joint. Notch the steering knuckle so you can replace the sleeve in the same position.

12) Remove the upper ball joint nut. Loosen the lower nut and pound down on the steering knuckle. Once it is loose remove the lower nut and place the steering knuckle in a vise as shown.

13) Remove the snap ring on the lower ball joint.

14) Now it's time to remove the ball joints. In order to remove the upper, the lower must be removed first. This holds true for installation as well, the upper must be installed, then the lower. Here is how to rig up your press to remove the lower.

15) Now remove the upper.

16) Clean out the areas where the ball joint sits, including the lip on the top of the bore. Now install the upper.

17) Install the lower.

18) Place the steering knuckle back onto the tube yoke and install the camber bushing in its previous orientation Loosely screw on the upper and lower nuts to hold the knuckle in place.
IMPORTANT: Follow this tightening sequence.
i) Tighten the lower nut to 35 ft-lbs
ii) Tighten the upper nut to 70 ft-lbs
iii) Tighten the upper nut to the next castellation and install a NEW cotter pin
iv) Tighten the lower nut to 150 ft-lbs
19) Install the rest of the pieces in the order they were removed. I replaced the rolling diaphragm seals on the outer axle shaft, as well as the grease seal on the back of the hub. Tighten the nuts that hold the spindle on to 50-60 ft-lbs and the tie rod nut to 70 ft-lbs and install a NEW cotter pin.
20) To properly seat the hub bearings follow this procedure:
i) Using spanner lock nut wrench while rotating the front disc brake hub and rotor back and forth, tighten the inner lock nut to 50 ft-lbs to seat the bearing.
ii) Back off the lock nut 90 degrees.
iii) Install the outer lock nut and tighten to 160-205 ft-lbs
**There has been some discussion relating to the torque value of this outer lock nut. Hopefully those who have done this will chime in.**
Tighten lug nuts to 140 ft-lbs
After this job an alignment is probably in order.
This is just my rendition of the job. Some may do it differently. I know Zilla68 just completed this job so he may have some different advice, which is welcome.
Tools needed:
1) 13/16" socket for caliper bracket bolts and tie rod nut
2) 9/64" allen wrench if you have Warn manual hubs
3) Spindle lock nut socket. Mine took a 4 prong socket with a 2.5" diameter
4) Jack and jack stands
5) 1 1/8" socket for upper ball joint retaining nut
6) 1 5/16" socket for lower ball joint retaining nut
7) 7/8" socket to remove lug nuts
8) 4lb sledge hammer
9) Various pliers and picks
10) 6" C-clamp
11) Ball joint press
12) Torque wrench good to 150 ft-lbs
Removal:
1) Jack up the vehicle and place on jack stands. Remove the wheel.
2) Loosen the upper and lower caliper bracket bolts
3) Place a 6" C-clamp with the pressure screw on the outer pad and the other end on the back of the caliper. This will bottom the piston out in its bore making the caliper assembly easier to remove. Set the caliper on the spring pack. DO NOT let the caliper hang.
4) Remover the hub cover with the appropriate sized allen wrench or torx socket. This is what you will see.
5) Remove the spiral lock ring by prying it up out of its groove then pulling it out with a small pair of pliers.
6) Remove the hub body assembly and set aside in a clean area.
7) Using the spindle lock nut socket that you have (either rented or bought) remove the outer lock nut, the washer, and the inner lock nut. At this point the hub and rotor assembly should slide off. Be sure to catch the outer bearing as it will fall out.
8) Remove the nuts that retain the spindle.
9) There are a few ways to remove the spindle. I used a spindle adapter with a slide hammer. Others are fortunate enough to be able to beat on the spindle with a dead blow hammer and it come off. Others beat on the back of it to get it to come off as well. Any way you choose, remove the spindle and set it aside in a clean area. Once the spindle is out you can remove the dust shield and the axle shaft will slide out. I replaced u-joints at this time since everything was already torn apart.
10) Remove the tie rod from the steering knuckle.
11) Take note of the position of the camber bushing on the upper ball joint. Notch the steering knuckle so you can replace the sleeve in the same position.
12) Remove the upper ball joint nut. Loosen the lower nut and pound down on the steering knuckle. Once it is loose remove the lower nut and place the steering knuckle in a vise as shown.
13) Remove the snap ring on the lower ball joint.
14) Now it's time to remove the ball joints. In order to remove the upper, the lower must be removed first. This holds true for installation as well, the upper must be installed, then the lower. Here is how to rig up your press to remove the lower.
15) Now remove the upper.
16) Clean out the areas where the ball joint sits, including the lip on the top of the bore. Now install the upper.
17) Install the lower.
18) Place the steering knuckle back onto the tube yoke and install the camber bushing in its previous orientation Loosely screw on the upper and lower nuts to hold the knuckle in place.
IMPORTANT: Follow this tightening sequence.
i) Tighten the lower nut to 35 ft-lbs
ii) Tighten the upper nut to 70 ft-lbs
iii) Tighten the upper nut to the next castellation and install a NEW cotter pin
iv) Tighten the lower nut to 150 ft-lbs
19) Install the rest of the pieces in the order they were removed. I replaced the rolling diaphragm seals on the outer axle shaft, as well as the grease seal on the back of the hub. Tighten the nuts that hold the spindle on to 50-60 ft-lbs and the tie rod nut to 70 ft-lbs and install a NEW cotter pin.
20) To properly seat the hub bearings follow this procedure:
i) Using spanner lock nut wrench while rotating the front disc brake hub and rotor back and forth, tighten the inner lock nut to 50 ft-lbs to seat the bearing.
ii) Back off the lock nut 90 degrees.
iii) Install the outer lock nut and tighten to 160-205 ft-lbs
**There has been some discussion relating to the torque value of this outer lock nut. Hopefully those who have done this will chime in.**
Tighten lug nuts to 140 ft-lbs
After this job an alignment is probably in order.
This is just my rendition of the job. Some may do it differently. I know Zilla68 just completed this job so he may have some different advice, which is welcome.
Last edited: