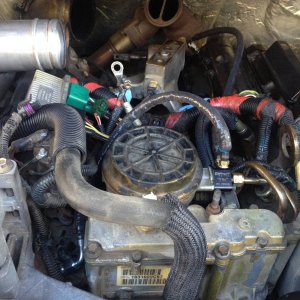
After searching the Web for days trying to find a detailed and pictured write up on installing a power-steering pump on a 6.0 diesel, I gave up. I'm a driveway mechanic at best, and never worked on a 6.0 in my life, (I own only 7.3s). While buying the Power-steering pump at Ford, the idea hit me on making a detailed write up so Driveway mechanics like myself wouldn't have to go in blind anymore. I may say the wrong name for some of the parts removed, but bare with me.
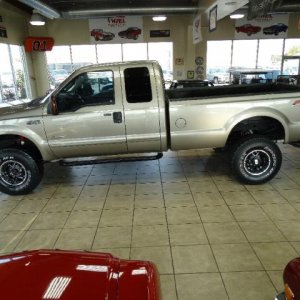
The truck is a 2003 F-350 4x4 with a 2004 engine replaced under warranty. The 2005-2007 trucks might be a bit different because of the coil spring front suspension, but for the most part this write up should work for all years.
WARNING: I am not a real mechanic, use this write up at your own risk.
Tools needed:
1/4in ratchet
1/4in extension
8mm 6point socket 1/4in
3/8in ratchet
12in long 3/8 extension
4in long 3/8 extension
7/8in 3/8 deep wheel socket
1/2in 3/8 socket
10mm 3/8 socket
18mm wrench
3/4in wrench
Flat head screwdriver
power steering pump pulley puller
big catch tray
brake cleaner
shop towels
Vise grip pliers
3/4in crow foot wrench customized in 3/8in size
18mm crow foot wrench customized in 3/8in size
Good Luck!
Step 1: Disconnect the Negative battery cable on the passenger side battery, it has a 8mm nut, Then move to the driver side battery and disconnect both negative and positive battery cables, disconnect the negative FIRST. 8mm nuts as well


Step 2: Remove battery clamp for the driver side battery using a 8mm socket, next remove battery and set aside

Step 3: Now we move to the air filter housing, disconnect the top air intake rubber hose using a pair of vise grip pliers.

Step 4: There are two electrical connectors the need to be disconnected, one is connected to the air filter minder, and the other is on the turbo tube going to the air box next to the oil dip stick.


Step 5: Disconnect the airfilter box from the turbo intake tube, next to the connector you just disconnected(next to the oil dip stick) you'll see a worm drive clamp. Loosen using a 8mm socket.

Step 6: Remove the coolant overflow hose connected to the degas bottle using a vise grip pliers on the spring clamp, ( removing this helps when removing the air filter box).

Step 7: The air filter box isn't bolted in, to remove, unclip the front cover of the air filter box. After you unclip the front cover, the rest of the air filter box will come out(takes a little persuasion). After the air filter box is out the front cover comes out easily.

Step 8: Remove the battery tray, it's held on by four bolts, two on the bottom and two on the fender, use a 1/2in socket to remove all four.


Step 9: Remove the Driver side inter cooler tube by loosening the clamps on the inter cooler boots, use a 7/16in deep socket for the clamps.


I removed the lower radiator hose and drained the coolant because of a deep wear mark on the hose. I noticed it made it a ton easier removed, while trying to remove the power-steering pump. You MIGHT be able to take the pump off while leaving the radiator hose on, But I personally would remove it. If you want to remove it, go to step 10. If you do not skip to step 12.
Step 10: Drain coolant from the drain valve located on the bottom of the radiator. The plastic bolt on the drain is 3/4in( Be EXTREMELY careful with the valve, it is made entirely out of plastic, DO NOT over tighten).

Step 11: After the coolant stops falling out of the drain valve, remove the lower radiator hose from the radiator. I had worm drive clamps, but you might have a spring clamp. BE CAREFUL, coolant will still fall out from the hose when disconnecting from the radiator, do not stay directly under the hose when removing. It's best to stay to the side as far as possible. After it's all drained, loosen the opposite side of the hose connected to the Water pump.


Step 12: Now we move to the top of the engine. Remove the plastic belt shield, it's snapped in. Use a flat blade screw driver to remove.


Step 13: Loosen belt, the way to do this on 6.0's is to grab the belt with two hands where it drops off of the alternator pulley towards the tensioner pulley. Using two hands, lift up on the belt causing the tensioner to release, as soon as you can't pull anymore on the tensioner, if you look, you'll see a small tab that locks the tensioner pulley in. After i got the belt off the alternator, i zip-tied it to the alternator so the belt doesn't fall off all the pulleys in the engine. You can now remove the belt off of the power steering pump pulley.


Step 14: Now we move to the dreaded High Pressure Power Steering line. I was able to remove it using a 3/8 Ratchet with a 1 foot long extension and a 18mm Crow foot wrench(some modification was done to the crow foot seen in pics at the end of the write up). You're now able to get in there and slowly loosen it, I was able to only go about half a turn at a time. Have a catch container on the bottom, ATF will come out when removed. The other connector going into the hydro boost is removed using the 18mm crow foot with one foot extension and a 18mm wrench holding the hard line going into the hydro boost. Pics show 3/4in crowfoot because the line is from Napa, if you have OEM it is 18mm.


Step 15: Now we move to the return line going from the pump to the Power-steering pump reservoir. Both ends have spring clamps installed, use vise grip pliers to remove. Watch for ATF spillage.


Step 16: Remove the three bolts holding the pump on. One on the top and two on the bottom. 10mm bolts.


Step 17: Remove Pump from truck.
If you used the Power-steering pump pulley more than three times, it is recommended you buy a new one.
Step 18: Using a power steering pump pulley remover kit (rented from auto-zone), remove the pulley off the old pump and install on the new one. Use the kit when reinstalling. DO NOT USE A HAMMER OR IMPACT to reinstall the pulley. Doing so will cause the housing to crack. I used a ratchet. It helps to use a vise to hold the pulley while reinstalling.
Step 19: Reinstall in reversed order.
Step 20: I Replaced the ford High pressure line with one from Napa, It already came with Teflon O rings installed which made it a ton easier. I HIGHLY recommend you replace the line even if it doesn't leak. $27.00 won't set you back too much. Only difference in the line is the end nuts are 3/4in instead of 18mm, requiring a new 3/4in crowfoot to be customized.
Step 21: Add ATF, I used mobile 1 synthetic about 2 quarts IIRC.
Step 22: Bleeding the power steering pump. This Link explains it perfectly, it's meant for a 7.3 but can be used for the 6.0. I recommend turning the wheels lock to lock 60 times. Just make sure the tires are OFF the ground.
Not my write up on how to bleed your PS system. Belongs to NorCalDiesel on PSN
http://powerstrokenation.com/forums/showthread.php?t=84681
Step 22: If you removed the lower radiator hose, then you drained all the coolant. After you refill the coolant, turn the truck on with the heater turned on max. Run the heater till hot air comes from the vents. This will greatly help in getting the air out of the system.
Optional: If you want to make sure you have new fluid everywhere then I would recommend flushing the system, this link explains it perfectly. It shows a 7.3 but works for a 6.0 as well.
http://www.superdutypsd.com/power_steering_flush.php
Pictures on Crowfoot Wrenches customized(these were bought from Oriellys and Autozone, maybe Snap-on doesn't need to be customized?) before grinding them, I would check to see if you can fit them and turn the HP oil line.

This is the 18mm From oriellys, it required being ground down to make it slimmer.


The truck is a 2003 F-350 4x4 with a 2004 engine replaced under warranty. The 2005-2007 trucks might be a bit different because of the coil spring front suspension, but for the most part this write up should work for all years.
WARNING: I am not a real mechanic, use this write up at your own risk.
Tools needed:
1/4in ratchet
1/4in extension
8mm 6point socket 1/4in
3/8in ratchet
12in long 3/8 extension
4in long 3/8 extension
7/8in 3/8 deep wheel socket
1/2in 3/8 socket
10mm 3/8 socket
18mm wrench
3/4in wrench
Flat head screwdriver
power steering pump pulley puller
big catch tray
brake cleaner
shop towels
Vise grip pliers
3/4in crow foot wrench customized in 3/8in size
18mm crow foot wrench customized in 3/8in size
Good Luck!
Step 1: Disconnect the Negative battery cable on the passenger side battery, it has a 8mm nut, Then move to the driver side battery and disconnect both negative and positive battery cables, disconnect the negative FIRST. 8mm nuts as well
Step 2: Remove battery clamp for the driver side battery using a 8mm socket, next remove battery and set aside
Step 3: Now we move to the air filter housing, disconnect the top air intake rubber hose using a pair of vise grip pliers.
Step 4: There are two electrical connectors the need to be disconnected, one is connected to the air filter minder, and the other is on the turbo tube going to the air box next to the oil dip stick.
Step 5: Disconnect the airfilter box from the turbo intake tube, next to the connector you just disconnected(next to the oil dip stick) you'll see a worm drive clamp. Loosen using a 8mm socket.
Step 6: Remove the coolant overflow hose connected to the degas bottle using a vise grip pliers on the spring clamp, ( removing this helps when removing the air filter box).
Step 7: The air filter box isn't bolted in, to remove, unclip the front cover of the air filter box. After you unclip the front cover, the rest of the air filter box will come out(takes a little persuasion). After the air filter box is out the front cover comes out easily.
Step 8: Remove the battery tray, it's held on by four bolts, two on the bottom and two on the fender, use a 1/2in socket to remove all four.
Step 9: Remove the Driver side inter cooler tube by loosening the clamps on the inter cooler boots, use a 7/16in deep socket for the clamps.
I removed the lower radiator hose and drained the coolant because of a deep wear mark on the hose. I noticed it made it a ton easier removed, while trying to remove the power-steering pump. You MIGHT be able to take the pump off while leaving the radiator hose on, But I personally would remove it. If you want to remove it, go to step 10. If you do not skip to step 12.
Step 10: Drain coolant from the drain valve located on the bottom of the radiator. The plastic bolt on the drain is 3/4in( Be EXTREMELY careful with the valve, it is made entirely out of plastic, DO NOT over tighten).
Step 11: After the coolant stops falling out of the drain valve, remove the lower radiator hose from the radiator. I had worm drive clamps, but you might have a spring clamp. BE CAREFUL, coolant will still fall out from the hose when disconnecting from the radiator, do not stay directly under the hose when removing. It's best to stay to the side as far as possible. After it's all drained, loosen the opposite side of the hose connected to the Water pump.
Step 12: Now we move to the top of the engine. Remove the plastic belt shield, it's snapped in. Use a flat blade screw driver to remove.
Step 13: Loosen belt, the way to do this on 6.0's is to grab the belt with two hands where it drops off of the alternator pulley towards the tensioner pulley. Using two hands, lift up on the belt causing the tensioner to release, as soon as you can't pull anymore on the tensioner, if you look, you'll see a small tab that locks the tensioner pulley in. After i got the belt off the alternator, i zip-tied it to the alternator so the belt doesn't fall off all the pulleys in the engine. You can now remove the belt off of the power steering pump pulley.
Step 14: Now we move to the dreaded High Pressure Power Steering line. I was able to remove it using a 3/8 Ratchet with a 1 foot long extension and a 18mm Crow foot wrench(some modification was done to the crow foot seen in pics at the end of the write up). You're now able to get in there and slowly loosen it, I was able to only go about half a turn at a time. Have a catch container on the bottom, ATF will come out when removed. The other connector going into the hydro boost is removed using the 18mm crow foot with one foot extension and a 18mm wrench holding the hard line going into the hydro boost. Pics show 3/4in crowfoot because the line is from Napa, if you have OEM it is 18mm.
Step 15: Now we move to the return line going from the pump to the Power-steering pump reservoir. Both ends have spring clamps installed, use vise grip pliers to remove. Watch for ATF spillage.
Step 16: Remove the three bolts holding the pump on. One on the top and two on the bottom. 10mm bolts.
Step 17: Remove Pump from truck.
If you used the Power-steering pump pulley more than three times, it is recommended you buy a new one.
Step 18: Using a power steering pump pulley remover kit (rented from auto-zone), remove the pulley off the old pump and install on the new one. Use the kit when reinstalling. DO NOT USE A HAMMER OR IMPACT to reinstall the pulley. Doing so will cause the housing to crack. I used a ratchet. It helps to use a vise to hold the pulley while reinstalling.
Step 19: Reinstall in reversed order.
Step 20: I Replaced the ford High pressure line with one from Napa, It already came with Teflon O rings installed which made it a ton easier. I HIGHLY recommend you replace the line even if it doesn't leak. $27.00 won't set you back too much. Only difference in the line is the end nuts are 3/4in instead of 18mm, requiring a new 3/4in crowfoot to be customized.
Step 21: Add ATF, I used mobile 1 synthetic about 2 quarts IIRC.
Step 22: Bleeding the power steering pump. This Link explains it perfectly, it's meant for a 7.3 but can be used for the 6.0. I recommend turning the wheels lock to lock 60 times. Just make sure the tires are OFF the ground.
Not my write up on how to bleed your PS system. Belongs to NorCalDiesel on PSN
http://powerstrokenation.com/forums/showthread.php?t=84681
Step 22: If you removed the lower radiator hose, then you drained all the coolant. After you refill the coolant, turn the truck on with the heater turned on max. Run the heater till hot air comes from the vents. This will greatly help in getting the air out of the system.
Optional: If you want to make sure you have new fluid everywhere then I would recommend flushing the system, this link explains it perfectly. It shows a 7.3 but works for a 6.0 as well.
http://www.superdutypsd.com/power_steering_flush.php
Pictures on Crowfoot Wrenches customized(these were bought from Oriellys and Autozone, maybe Snap-on doesn't need to be customized?) before grinding them, I would check to see if you can fit them and turn the HP oil line.
This is the 18mm From oriellys, it required being ground down to make it slimmer.

