Possible cracked block?

Lt.Dan

Member
Joined
Dec 29, 2015
Messages
421
Reaction score
1
Location
Visalia, CA
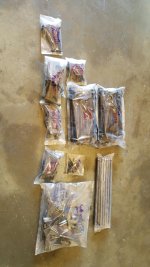
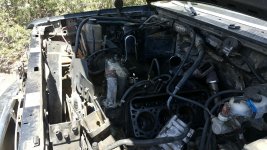
Well, I kinda started to get to work on it. Even though im not in a position to be putting money into it right now, in my free time ive been prepping everything on the truck. I started with the engine harness. Pulled all the loom off, and wiped down all the wires with a clean towel (as everything has been soaked in oil, grease and grime) and put new loom and tape it up. Im not finished yet, but its looking good!

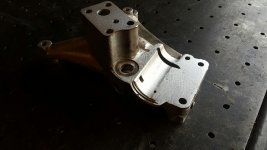
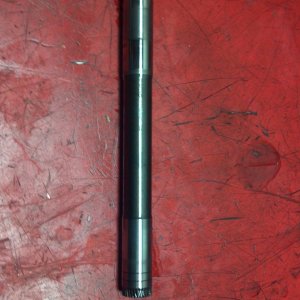
I also got our steam parts washer at work going again. It hasnt worked in a few years! So i put a new 220v plug on it, cleaned out all the water jets, filled it up with water and fixed some wiring, and its working great! So im putting all the parts through there, including bolts, push rods, etc etc...

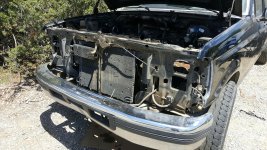
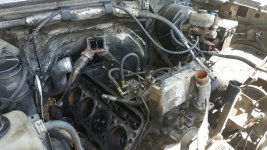
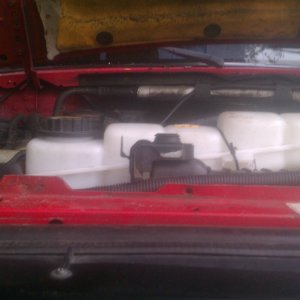
My next move after all this is finished is to pull the radiator out, and start prepping to remove the motor. I want to clean it all up and fix some oil leaks i have. Maybe soon i can get the heads to the machine shop...

Wish me luck guys!
 

Lt.Dan

Member
Joined
Dec 29, 2015
Messages
421
Reaction score
1
Location
Visalia, CA
Well, i got the heads off to my buddy who owns his own Diesel shop, hes sending the heads to a machine shop he uses routinely. Theyre going to clean them up, Magnaflux them, and then inspect valves and see if i will need a valve job done. They said without the valve job, im looking at maybe $150. So I dropped the heads off today. My buddy said he is going to try and test the injector cups that are in it, see if he can rig up something to pressurize them and see if they are cracked, (all because my dumbass didnt do any diagnosis, and just pulled the heads...), he is also going to install the new injectors cups i have for free.

More good news today, i went to go pull the radiator out of the truck (as it is cracked), i went to drain it, and the coolant that was in the radiator was still perfectly green, smelled like only coolant, not mixed with anything. So its probably safe to say the cooling system didnt get damaged. If it did, it would have either oil or fuel or something in it correct?

I also started organizing all the bolts and parts i had in boxes. Cool to have a bag sealer at work, so i bagged up each set of parts and labeled them for future reference. And i got some pics of the parts after they came out of the parts washer, before they were solid black, covered in grease/oil/tar and such.

Going to finish pulling the radiator and turbo, along with the rest of the exhaust tomorrow, ill take pics, and wish me luck...
 

Attachments

  • 20160516_124759_resized.jpg
    20160516_124759_resized.jpg
    857.4 KB · Views: 89
  • 20160516_124924_resized.jpg
    20160516_124924_resized.jpg
    1.8 MB · Views: 78
  • 20160516_124931_resized.jpg
    20160516_124931_resized.jpg
    532.9 KB · Views: 72
  • 20160516_124956_resized.jpg
    20160516_124956_resized.jpg
    638.3 KB · Views: 79
Last edited:

Lt.Dan

Member
Joined
Dec 29, 2015
Messages
421
Reaction score
1
Location
Visalia, CA
Didnt get to work on it today other than pull the radiator hoses out, and one of the stock hose clamps literally broke in half when i grabbed it with pliers, so im gonna order some nice hose clamps and all new hoses.

Tomorrow morning im also taking both valve covers and the intake spyder to our powder coater to get coated semi gloss black, just to make them look newer again.
 

Lt.Dan

Member
Joined
Dec 29, 2015
Messages
421
Reaction score
1
Location
Visalia, CA
Got the radiator out, wasnt too hard, took all of about an hour, and i left the fan attached to the motor. It is real dirty, and old looking. Theres a local radiator shop i am going to try and take it down to, and see if they can find/fix the leak. If not, my buddy has a 96 f250 parts truck with a good radiator i can probably pick up for $40.

I also dropped off the valve covers and intake spyder at powercoat today, decided to go with a Mini-Texture Black. And the valve covers and intake spyder are steel btw if anybody was wondering. I welded up the hole that my boost gauge was threaded into so i could relocate it in a better spot, and my valve cover had a dent, so after some massaging and a little TIG weld, it looked brand new.
 

Lt.Dan

Member
Joined
Dec 29, 2015
Messages
421
Reaction score
1
Location
Visalia, CA
Well, i went to the shop this morning and spent a few hours on her. I removed the entire front grill/headlight/bezel assembly, found a few bolts missing and some plastic broken, so ill most likely be ordering a new grill/headlight/bezel combo. I also got the turbo out, (really easy with no heads on the truck lol.

Next is to just remove the rest of the exhaust, and then i can start pulling the actual motor. After that, a good deep clean is in order!
 

Attachments

  • 20160521_141945_resized.jpg
    20160521_141945_resized.jpg
    1.6 MB · Views: 73
  • 20160521_141941_resized.jpg
    20160521_141941_resized.jpg
    1.1 MB · Views: 71
  • 20160521_141930_resized.jpg
    20160521_141930_resized.jpg
    1.1 MB · Views: 78

Lt.Dan

Member
Joined
Dec 29, 2015
Messages
421
Reaction score
1
Location
Visalia, CA
Thanks benjamindurtka!

I also tore down the turbo today, completely stripped it down, and put most of it in the parts washer, came apart pretty easily, and a lot of the seals still looked good. Thinking about doing a rebuild but im not sure if i should just reseal it? What are your guys opinions? Ive never done one before.

Thanks.
 

Lt.Dan

Member
Joined
Dec 29, 2015
Messages
421
Reaction score
1
Location
Visalia, CA
Okay, so the 360 bearing upgrade seems to be the thing to do, now where should i order it from? I see them on ebay for $35, but then from places like pureturbos.com for $150. Is there any difference? Im looking at getting this one, as it includes the compressor side large o ring, and ALL of the 12 pt bolts. What do you guys think? http://www.spturboost.com/products/...0-thrust-rebuild-repair-kit-tp38-gtp38-ford-2

I also figured since i had the turbo apart, i would buy the blank pedestal and high flow exhaust port from Riffraff, then stumbled upon a youtube video of guys cutting the stock pedestal and doing some welding. So i figured after work at the shop i would do mine. It was either buy the parts for $250+, or modify mine for free? So i cut the pedestal, going to weld the holes tomorrow, and then took out the ebpv valve out of the exhaust housing, and welded the hole closed (instead of opting for the 3/4" freeze plug).

I picked up a new radiator from a friend of mine last night, $40, and it looks to be relatively newer. I also picked up the front headlight support (plastic piece that runs the entire width of the front) for another $20.

Thanks for the help guys!
 

Attachments

  • 20160524_191423_resized.jpg
    20160524_191423_resized.jpg
    785.7 KB · Views: 67
  • 20160524_191427_resized.jpg
    20160524_191427_resized.jpg
    1,021.1 KB · Views: 74
  • 20160524_194140_resized.jpg
    20160524_194140_resized.jpg
    1.1 MB · Views: 66
  • 20160524_194146_resized.jpg
    20160524_194146_resized.jpg
    682.9 KB · Views: 64

79jasper

Active member
Joined
Feb 2, 2012
Messages
2,685
Reaction score
4
Location
skiatook, Oklahoma
Are those the finished pics of the pedestal?
I hope not. Those holes need sealed up. Lol

Far as who's rebuild kit, I don't know.
I have my eye on one that's also a d66 type upgrade.

Sent from my SAMSUNG-SM-G935A using Tapatalk
 

Lt.Dan

Member
Joined
Dec 29, 2015
Messages
421
Reaction score
1
Location
Visalia, CA
Are those the finished pics of the pedestal?
I hope not. Those holes need sealed up. Lol

Far as who's rebuild kit, I don't know.
I have my eye on one that's also a d66 type upgrade.

Sent from my SAMSUNG-SM-G935A using Tapatalk

No its not finished, as i stated in my above post, "So i cut the pedestal, going to weld the holes tomorrow".

Now that i reread my post, my wording is a little jumbled up and hard to understand though... lol
 

benjamindurtka

New member
Joined
Mar 7, 2016
Messages
251
Reaction score
0
It's really simple. Just a better bearing on the turbine shaft and of course new rings. I bought a kit that came with a new wheel too. Wasn't much. I think you can upgrade the wheel. Not really sure what difference you get for the money though.

2001 F-250 cclb
7.3l 4x4
forged rods,
ebpv, muffler, dp80hp dd.
 

benjamindurtka

New member
Joined
Mar 7, 2016
Messages
251
Reaction score
0
You already did that. Just order the turbo rebuild kit with the 360° bearing and new rings.

2001 F-250 cclb
7.3l 4x4
forged rods,
ebpv, muffler, dp80hp dd.
 

Lt.Dan

Member
Joined
Dec 29, 2015
Messages
421
Reaction score
1
Location
Visalia, CA
Yeah i already have the wicked wheel 2 from RiffRaff, so i think im going to order the kit from SPTurboBoost.

I also got my valve covers and intake spyder back from powder today. Cost me $80 to have them completely sand blasted and powdercoated Mini-Tex Black. I love the way it turned out!
 

Attachments

  • 20160525_165119_resized.jpg
    20160525_165119_resized.jpg
    882.4 KB · Views: 73
  • 20160525_165124_resized.jpg
    20160525_165124_resized.jpg
    837.7 KB · Views: 62
  • 20160525_165130_resized.jpg
    20160525_165130_resized.jpg
    836.3 KB · Views: 68

Lt.Dan

Member
Joined
Dec 29, 2015
Messages
421
Reaction score
1
Location
Visalia, CA
Ok, so i welded up the holes in the pedestal today, and it was surprisingly easy for being cast aluminum. I thought with the TIG it was going to get porosity and pin holes all over the place, but its actually a very clean and good quality aluminum. +1 for Ford.

My only concern now is the hole where the solenoid/sensor/switch whatever it was goes. Do i weld that hole up too? Do i put the sensor thing back in? I know it continues to the other oil passages, because you can blow compressed air into it, and it comes out both of the other holes.
 

79jasper

Active member
Joined
Feb 2, 2012
Messages
2,685
Reaction score
4
Location
skiatook, Oklahoma
I'm trying to remember what I did on mine. I think you can just weld it closed.
I think I tapped it for a plug.

Sent from my SAMSUNG-SM-G935A using Tapatalk
 
Top