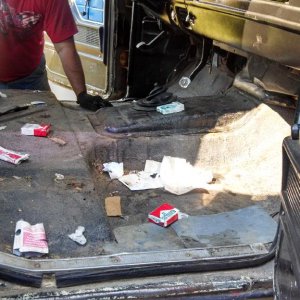
2014 Sema project

packin45

New member
Joined
Jul 31, 2014
Messages
68
Reaction score
0
Been getting :eek:wned: this week, we've been working late and coming in extra early like its the week before we leave (pretty much is). I got it going late last night so I will make sure to catch everyone up in the thread later this weekend for those who care. Thanks


Wow I can't imagine what it must feel like to finally get to turn the key after all that work. Congrats man!!!


Sent from my iPhone
 

jordan572

New member
Joined
Mar 17, 2013
Messages
487
Reaction score
1
:drool::drool::drool:,

IMG_1737.jpg

IMG_1558.jpg

IMG_1560.jpg

IMG_1561.jpg

IMG_1575.jpg

IMG_1576.jpg

IMG_1577.jpg
 

jordan572

New member
Joined
Mar 17, 2013
Messages
487
Reaction score
1
I stressed like no other when we dropped the motor in, way too high off the ground, and way too close to sema for a catastrophe here. We fabricated a redesigned bracket to attach to the body mounts so we could literally just drop the motor right in. Not one scratch went into the engine cross member, nice!

IMG_1604.jpg

IMG_1606.jpg


We got to work right away installing the coolers, brake hard lines, main wire harness and the majority of the other stuff. Realize many of the lines ran are just temporary, we will clean all of this up but you have to start somewhere. Still a ton of electrical, air and fuel lines to run.

That fuel cooler looking awesome,
IMG_1619.jpg

IMG_1622.jpg


Steering gear re worked from PSC and tapped to run the hydraulic assist ram,
IMG_1623.jpg

IMG_1624.jpg


IMG_1631.jpg

IMG_1632.jpg
 

jordan572

New member
Joined
Mar 17, 2013
Messages
487
Reaction score
1
Time to paint all the link arms so we can get the axles under this thing,

We taped off the arms and painted the inside of the arms black,

IMG_1641.jpg


After that all the tape came off and we sanded off the tape line/overspray the black left. Then I taped all the windows off to spray the outside of the arm red. Taping a prep time was insane on these but they look pretty cool red and black,

IMG_1643.jpg

IMG_1650.jpg

IMG_1651.jpg


IMG_1660.jpg

IMG_1666.jpg

IMG_1668-1.jpg

IMG_1669.jpg

IMG_1670.jpg

IMG_1671.jpg

IMG_1672.jpg

IMG_1673.jpg

IMG_1674.jpg

IMG_1688.jpg

IMG_1689.jpg


Painted fuel cooler lines :wtf:,

IMG_1665.jpg
 

jordan572

New member
Joined
Mar 17, 2013
Messages
487
Reaction score
1
Yes we did decide to paint some parts black, the red was becoming a little much but when you crawl underneath and look at it against the all black cab floor it looks awesome,

IMG_1654.jpg

IMG_1656.jpg

IMG_1657.jpg

IMG_1658.jpg
 

jordan572

New member
Joined
Mar 17, 2013
Messages
487
Reaction score
1
Time to get busy and get all the arms installed, Trevor nailed the length on every link arm. Heims are threaded in just right and the pinions are already sitting very close to where they need to be,

IMG_1699.jpg

IMG_1700.jpg


Little high steer knuckle action from Reid Racing, beware this knuckle is only for a 2005-2012 not a 2005-present like advertised. I've spent quite some time figuring out our caliper mounting issues because of this.

IMG_1708.jpg


IMG_1721.jpg

IMG_1733.jpg
 

jordan572

New member
Joined
Mar 17, 2013
Messages
487
Reaction score
1
Finally starting to look like a truck again,

IMG_1734.jpg

IMG_1735.jpg


Crazy looking rear trans mount, Trevor doesn't overlook any parts,

IMG_1711.jpg

IMG_1693.jpg

IMG_1695.jpg
 

Stangr8cr

New member
Joined
Jan 17, 2014
Messages
408
Reaction score
0
That frame is so pretty, I think I'd drive it around without the body for a while just to show it off!! Damn nice work


Keith
 

Latest posts

Members online

Top