EverettWV
New member
Here is my write-up on doing a dana 60 swap with PMF’s RSK. I choose to go with the 2.25” kit. I decided to go with swap since I had a cracked stub joint from a frozen ujoint and the brakes were shot. Also, my truck has never ridden that great so I wanted to change that. I went with PMF’s rsk since I did not want to cut my bumper or cut the bumper mounts off.
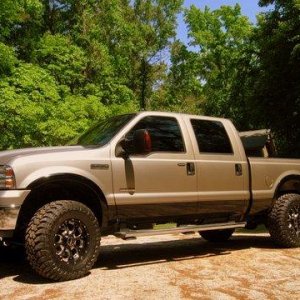
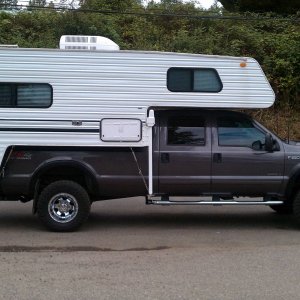
Forgot to take a before picture, this is not a very recent picture but it’s the best I have.

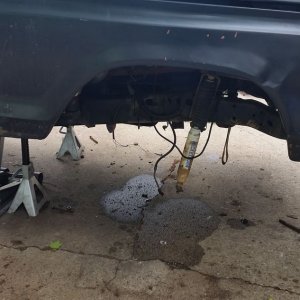
The removal of the dana 50 has been covered so I won’t go into great detail. Support the truck behind the spring hanger. After you have the tires off, remove your shocks, tie your brake caliper out of the way if you’re reusing it, and cut / remove the u-bolts and unhook the drive shaft. I did not have the axle that high off the ground so I let it rest on the ground.
I chose to remove the axle pivot brackets with the axle since I could not get the pivot bolt loose. I removed the driver’s side of the axle first. Unbolt the top of the bracket first. You will have to fish a 15mm wrench between the cross member and the oil pan. I used one of the holes in the cross member and stuck an extension to hold the wrench while I loosed the nut. Next, remove the 2 side nuts and push the top bolts up as you pry the axle in. Make sure you clip one side of the boot on the axle shaft so the axle can separate. Pull the driver’s side axle out and then remove the other half. It may be easier to do the passenger side first.
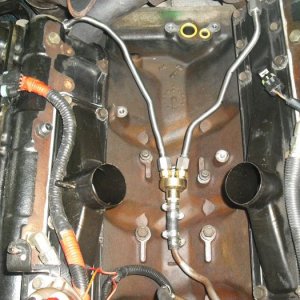
I was able to remove 2/4 bolts from the cross member. You can cut them out or just run the nut back on.
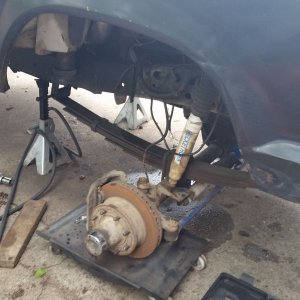
Then remove the springs and shackles. And you should have something that looks like this.

To say the bushings were bad would be an understatement.


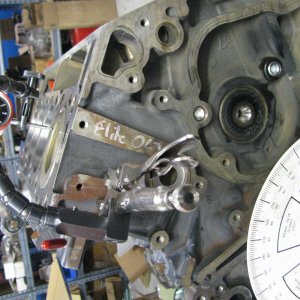
Now, mount the new front hanger. Depending on what year your truck is, determines what bolt holes you will use. You will not use all of them.


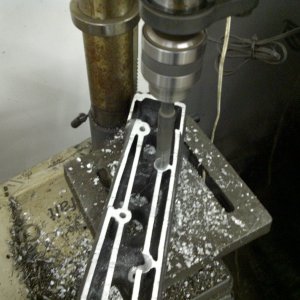
Go ahead and mount your track bar mount. Now, install the new rear shackles. You will have to drill out the old hanger to ¾” to mount them, 5.5 or 6 inch grade 8 bolts will work. Next mount the springs, I went with V codes. If you’re using your old shock mounts, you will have to grind the driver’s side down, otherwise it will hit the axle housing. Do not tight the spring hardware yet. Then you can slide your axle under the truck.

Next bolt the axle to the springs. Get the passenger side first, then do the driver’s side. Then get your shocks and calipers bolted up. For shocks, I believe mine are the original ones. They were about 2-3 inches to short with no weight on the axle. You may be able get by with your current shocks, but I know I will be going with new ones. You may also want to get longer brake lines. Mine are very close to the point of being too short.
Next hook up your steering linkage, put the tires on, and then let the axle hold the truck up. Tighten the spring bolts and drive the truck straight backward and forward to center the axle and then put the track bar on. I am using an adjustable one, otherwise you would need a drop bracket as the stock one is too short.

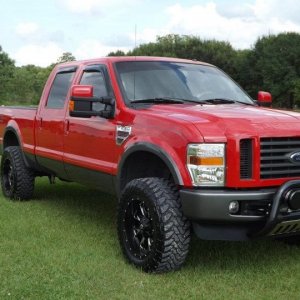
Now you can put you bumper back on and enjoy your new smooth ride. You may have to adjust your
My opinion on the kit, It is a very well made kit. It includes the bolts for mounting the new hanger and the new bushings for the new shackles. For me, I could not get the all the bolts to line up on the new hanger. I had to grind some on the frame where it curves up to get it to fit, even then, I barely got the bolts in. Other than that, that’s the only problem I had.
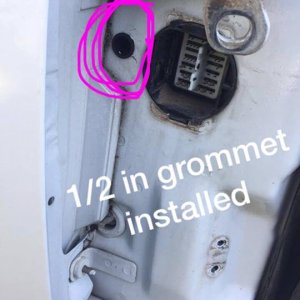
Did not have time to get the sway bar mounted. The holes are not in the frame for the mounts for me since my truck is an extended cab. Though, it looks like I cannot get the passenger side axle mount because the nut will hit the track bar.

Have not driven the truck much, but can already tell the ride is better. I believe the previous owner took a leaf from the rear and added it to the front, so the different from that to the v codes is extremely noticeable. Now just have to lift the rear. Lifted the front around 2-3 inches.
Forgot to take a before picture, this is not a very recent picture but it’s the best I have.
The removal of the dana 50 has been covered so I won’t go into great detail. Support the truck behind the spring hanger. After you have the tires off, remove your shocks, tie your brake caliper out of the way if you’re reusing it, and cut / remove the u-bolts and unhook the drive shaft. I did not have the axle that high off the ground so I let it rest on the ground.
I chose to remove the axle pivot brackets with the axle since I could not get the pivot bolt loose. I removed the driver’s side of the axle first. Unbolt the top of the bracket first. You will have to fish a 15mm wrench between the cross member and the oil pan. I used one of the holes in the cross member and stuck an extension to hold the wrench while I loosed the nut. Next, remove the 2 side nuts and push the top bolts up as you pry the axle in. Make sure you clip one side of the boot on the axle shaft so the axle can separate. Pull the driver’s side axle out and then remove the other half. It may be easier to do the passenger side first.
I was able to remove 2/4 bolts from the cross member. You can cut them out or just run the nut back on.
Then remove the springs and shackles. And you should have something that looks like this.
To say the bushings were bad would be an understatement.
Now, mount the new front hanger. Depending on what year your truck is, determines what bolt holes you will use. You will not use all of them.
Go ahead and mount your track bar mount. Now, install the new rear shackles. You will have to drill out the old hanger to ¾” to mount them, 5.5 or 6 inch grade 8 bolts will work. Next mount the springs, I went with V codes. If you’re using your old shock mounts, you will have to grind the driver’s side down, otherwise it will hit the axle housing. Do not tight the spring hardware yet. Then you can slide your axle under the truck.
Next bolt the axle to the springs. Get the passenger side first, then do the driver’s side. Then get your shocks and calipers bolted up. For shocks, I believe mine are the original ones. They were about 2-3 inches to short with no weight on the axle. You may be able get by with your current shocks, but I know I will be going with new ones. You may also want to get longer brake lines. Mine are very close to the point of being too short.
Next hook up your steering linkage, put the tires on, and then let the axle hold the truck up. Tighten the spring bolts and drive the truck straight backward and forward to center the axle and then put the track bar on. I am using an adjustable one, otherwise you would need a drop bracket as the stock one is too short.
Now you can put you bumper back on and enjoy your new smooth ride. You may have to adjust your
My opinion on the kit, It is a very well made kit. It includes the bolts for mounting the new hanger and the new bushings for the new shackles. For me, I could not get the all the bolts to line up on the new hanger. I had to grind some on the frame where it curves up to get it to fit, even then, I barely got the bolts in. Other than that, that’s the only problem I had.
Did not have time to get the sway bar mounted. The holes are not in the frame for the mounts for me since my truck is an extended cab. Though, it looks like I cannot get the passenger side axle mount because the nut will hit the track bar.
Have not driven the truck much, but can already tell the ride is better. I believe the previous owner took a leaf from the rear and added it to the front, so the different from that to the v codes is extremely noticeable. Now just have to lift the rear. Lifted the front around 2-3 inches.