You are using an out of date browser. It may not display this or other websites correctly.
You should upgrade or use an alternative browser.
You should upgrade or use an alternative browser.
DIY Retrofit Headlights
- Thread starter higherlife
- Start date
TrickTruck
Member
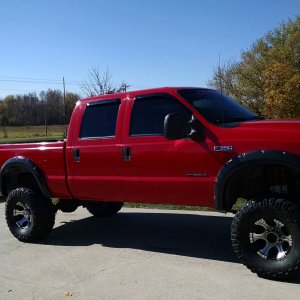
Luv the pic. May I have/use it?
higherlife
New member
- Joined
- Oct 16, 2014
- Messages
- 439
- Reaction score
- 0
Luv the pic. May I have/use it?
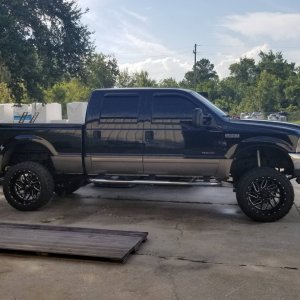
Yes you can. I still get more comments on the Unlimited Engineering Bumper than anything else done to the truck.
TrickTruck
Member
thank you.
If you have any more good ones please email them to me.
If you have any more good ones please email them to me.
higherlife
New member
- Joined
- Oct 16, 2014
- Messages
- 439
- Reaction score
- 0
thank you.
If you have any more good ones please email them to me.
Ill take some with an actual camera instead of my phone and send them your way.
ImAti0n
Member
- Joined
- May 8, 2016
- Messages
- 225
- Reaction score
- 0
Still waiting for the rest of the write up ")
Still waiting for the rest of the write up
X2!!
Sent from my iPhone using Tapatalk
smcox1
New member
- Joined
- Sep 14, 2012
- Messages
- 1,661
- Reaction score
- 0
Headlights look great! A painted grill surround would also look nice.
higherlife
New member
- Joined
- Oct 16, 2014
- Messages
- 439
- Reaction score
- 0
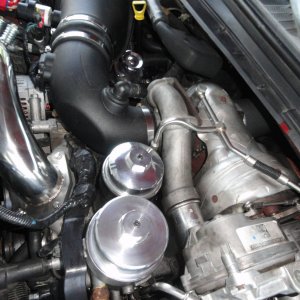
So.... I didn't get a chance to do a full write up as i would have liked. Here is one:
http://powerstrokearmy.com/forums/showthread.php?t=50654&showall=1
However, I still want to comment on a few hurdles that were very time consuming. To start off here is a parts list:
Bi-Xenon: Morimoto Mini H1 Stage III 2
Bi-Xenon Projectors
2 x Morimoto Mini H1 LHD (7.0) $120.00
Shroud Preference
2 x Apollo 2.0 Flat $25.00
HID Ballasts
2 x 50W: Morimoto XB55 Computer $70.00
Ballast Igniters
2 x Morimoto XB Igniter (AMP) $30.00
H1 HID Bulbs
2 x H1: XB 5500K $25.00
Wire Harness
1 x MotoControl Bi-Xenon: H13/9008 $25.00
Optional Housing Sealant
1 x Black: RetroRubber $12.00
Optional LED Halos
2 x 110mm Switchback: Morimoto XSB 2.0 $75.00
Shroud Centric Rings 2
Rings
2 x Mini H1 Centric Rings $10.00
Halos: Morimoto XSB 2.0 (Switchback) 1
XSB Ring Size
2 x 80mm Switchback: Morimoto XSB 2.0 $60.00
This was everything I think, i Just copied and pasted from emails.
Firts, Morimoto is a company that has everything you need to do a complete build. However, i was not impressed with the quality of their products. Everything was made in China and i did have some defective parts. The Retrofit Source was great to deal with but the conversation i had with Morimoto themselves was pretty ugly. Thats neither here nor there because TRS got everything sorted out and everything working. Overall I Might
use morimoto products again but am looking for alternatives.
The shrouds all have to be cut and sanded to fit inside the headlight. This was expected so I would recommend a good dremel, plastic cutting bits and lots of patience. I was able to get one side perfect and then replicate for the other.
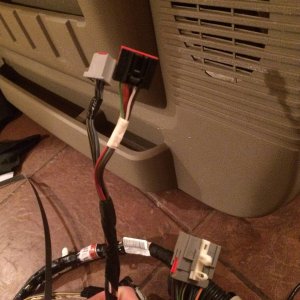
The biggest hurdle i ran into was making the back side of the headlight air tight again since the bulb connectors stick out and there are a handful of wires coming out of the headlight. I'm still looking for a solution to this as i have neatly taped everything up but I don't like it. I am stumped on this one.
Again, I thought i would have more time to do a nice neat writeup but things got busy again. I will be tackling the taillights next and also installing a ipad in the dash next week so I might do a write-up for those but no promises.
http://powerstrokearmy.com/forums/showthread.php?t=50654&showall=1
However, I still want to comment on a few hurdles that were very time consuming. To start off here is a parts list:
Bi-Xenon: Morimoto Mini H1 Stage III 2
Bi-Xenon Projectors
2 x Morimoto Mini H1 LHD (7.0) $120.00
Shroud Preference
2 x Apollo 2.0 Flat $25.00
HID Ballasts
2 x 50W: Morimoto XB55 Computer $70.00
Ballast Igniters
2 x Morimoto XB Igniter (AMP) $30.00
H1 HID Bulbs
2 x H1: XB 5500K $25.00
Wire Harness
1 x MotoControl Bi-Xenon: H13/9008 $25.00
Optional Housing Sealant
1 x Black: RetroRubber $12.00
Optional LED Halos
2 x 110mm Switchback: Morimoto XSB 2.0 $75.00
Shroud Centric Rings 2
Rings
2 x Mini H1 Centric Rings $10.00
Halos: Morimoto XSB 2.0 (Switchback) 1
XSB Ring Size
2 x 80mm Switchback: Morimoto XSB 2.0 $60.00
This was everything I think, i Just copied and pasted from emails.
Firts, Morimoto is a company that has everything you need to do a complete build. However, i was not impressed with the quality of their products. Everything was made in China and i did have some defective parts. The Retrofit Source was great to deal with but the conversation i had with Morimoto themselves was pretty ugly. Thats neither here nor there because TRS got everything sorted out and everything working. Overall I Might
use morimoto products again but am looking for alternatives.
The shrouds all have to be cut and sanded to fit inside the headlight. This was expected so I would recommend a good dremel, plastic cutting bits and lots of patience. I was able to get one side perfect and then replicate for the other.
The biggest hurdle i ran into was making the back side of the headlight air tight again since the bulb connectors stick out and there are a handful of wires coming out of the headlight. I'm still looking for a solution to this as i have neatly taped everything up but I don't like it. I am stumped on this one.
Again, I thought i would have more time to do a nice neat writeup but things got busy again. I will be tackling the taillights next and also installing a ipad in the dash next week so I might do a write-up for those but no promises.
thats one of the benefits i tell people if wanting to do DIY, is to order through someone that has accounts or is a legit builder. You WILL get defective parts/ backorders / issues etc and its 10x easier for a account to deal with them rather then regular joe & also save a few bucks. im still waiting over 40 days for a replacement on switchbacks turn singles halos (shorted out and died or something )
tail lights, all i can say is practice on a old set and go very, very,very slow.
tail lights, all i can say is practice on a old set and go very, very,very slow.
Coueshunter
New member
Great write up. I want to do a headlight retro. Can't decide if I want to pay someone or do it myself with some paint work
drservo
New member
- Joined
- Sep 30, 2011
- Messages
- 410
- Reaction score
- 0
What did you do the orange blinker lens?