Forums
New posts
Search forums
What's new
New posts
New media
New media comments
New profile posts
Latest activity
New showcase items
New showcase comments
Media
New media
New comments
Search media
Members
Current visitors
New profile posts
Search profile posts
Showcase
New items
New comments
Latest content
Latest reviews
Latest updates
Search showcase
Log in
Register
What's new
Search
Search
Search titles only
By:
New posts
Search forums
Menu
Log in
Register
Install the app
Install
Forums
Power Strokes
6.0 Tech
Bulletproof Diesel Oil Cooler INSTALL
JavaScript is disabled. For a better experience, please enable JavaScript in your browser before proceeding.
You are using an out of date browser. It may not display this or other websites correctly.
You should upgrade or use an
alternative browser
.
Reply to thread
Message
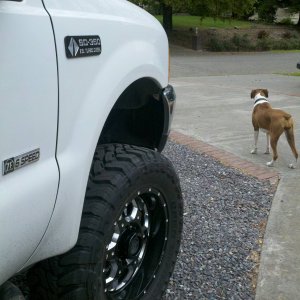
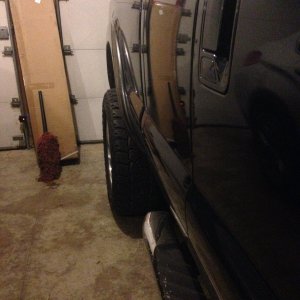
[QUOTE="Snake, post: 461081, member: 97"] 51. Install the degas bottle. Connect the engine vent hose (EGR cooler to degas bottle), radiator overflow hose, and degas bottle supply hose (underside of degas bottle). Slide the degas bottle into it’s mounting location and secure the bottle near the wiper cowl using two 8mm bolts. Torque the bolts to 89 in/lbs. Also see picture for Step 9. 52. Install the alternator. Place the alternator on the mounting bracket that is part of the intake manifold and thread in the three 13mm bolts that hold the alternator in place. Torque these bolts to 35 ft/lbs. Slide the ring terminal (for the cable that connects the alternator and passenger side battery) back on the post at the top of the alternator and secure the terminal using a 10mm nut. Finally, plug the two pin connector into the back of the alternator. Also see picture for Step 16. 53. Replace the accessory drive belt. Reference the picture for Step 15, and install the belt as shown in the insert. Release the catch on the tensioner pulley and ensure the belt is fully seated on the pulleys. 54. Install the intercooler pipes. Clean the insides of the intercooler pipes where they will connect with the intercooler, the intake manifold, and the turbo and also clean the surfaces where the pipes will connect. **TIP** After the surfaces are clean, apply a light coat of aerosol hair spray to help prevent the intercooler pipes from blowing off during vehicle operation. Slide the intercooler pipes back in place. Tighten the worm style clamps to 71 in/lbs and the spring style clamps to 9 ft/lbs. Also see the picture for Step 8. 55. Install the air filter assembly. As mentioned previously, the popularity of aftermarket intakes doesn’t make it feasible to provide the OEM steps and this documentation is for an Airaid CAI. Ensure the 8mm clamp is positioned on the air filter assembly tube and slide the air filter assembly tube over the turbo intake tube while aligning the front of the air filter assembly with the core support. Tighten the clamp securely. Insert the filter minder assembly into the air filter assembly tube and then connect the Mass Airflow sensor electrical connector. Also see the picture for Step 7. 56. Install the passenger side battery (or both batteries if both were removed). **NOTE** On the passenger side, the battery lugs should be oriented towards the windshield and not the front of the truck. Connect the positive battery connector on the truck to the positive terminal of the battery and the negative battery connector on the truck to the negative terminal of the battery. Tighten both connectors securely. To secure the battery to the tray, thread the long 7mm bolt with the wedge shaped piece at the end into bottom of the battery tray in front of the battery. 57. Replace fluids. Ensure the oil drain plug has been installed in the oil pan. Fill the engine with approximately 20 quarts (4 gallons) of clean motor oil. This amount includes what has already been used to prime the system. Confirm the engine oil level is correct on the oil dipstick. Next, fill the cooling system with a 50/50 mix of coolant and distilled water. **NOTE** Coolant can be purchased as a 50/50 pre-mix or as a concentrate. If concentrate was purchased, dilute it to a 1:1 ratio with distilled water before adding it to the truck. Add the coolant through the top of the degas bottle until the correct cold coolant level is reached. 58. Final inspection. The only parts that should have not been installed at this stage are the grill, the front bumper, and the sight shield. Search the engine bay for any tools that may have been left, electrical connectors that have not been plugged in, clamps that may not have been tightened, and anything that looks like it may interfere with proper vehicle operation. 59. Check for leaks. It’s time to start the engine. Ensure the batteries are fully charged, cross your fingers, say a prayer, bring out the lucky rabbit foot, or conduct whatever ritual brings you favor. Crank the engine for 30 seconds, then stop cranking and wait for 30 seconds. Repeat the 30 seconds cranking / 30 seconds waiting as needed until the engine starts. If the engine hasn’t started after six 30 second attempts, wait for 3-5 minutes before cranking the engine again. Once the engine starts, inspect all connections for leaks and fix as needed. **NOTE** The purpose of the 30 second cycles is to prevent the starter from burning up. The injectors are dependent on engine oil to operate, and nearly all of the engine oil was drained during this procedure. The process outlined in this step may have to be repeated numerous times until the engine starts. Once the engine starts, it will likely run rough for an extended period of time as a result of air in the system. This is normal and will usually resolve itself once the vehicle has been driven for 15-30 minutes. 60. Install the front bumper. **NOTE** This is another step that is much easier if some assistance is provided. Remove the two 18mm bolts next to the driver side tow hook holding the Bulletproof Diesel oil filter adapter in place and allow that assembly to temporarily hang by the oil hoses. Position the bumper to the front of the truck and insert the four 18mm bolts through the four holes near the tow hooks (two holes on the passenger side and two holes on the driver side). Use the OEM hardware to loosely secure the two bolts on the passenger side (the bumper still needs to be positioned correctly). On the driver side, install the oil filter assembly and bracket as before. Evaluate the routing of the oil hoses again and adjust as needed (excess hose pushed into the engine bay, not rubbing on any sharp edges, etc.). **TIP** Do not attempt to make final adjustments to the bumper mounting location until the grill is installed. [ATTACH=full]95444[/ATTACH] [ATTACH=full]95445[/ATTACH] 61. Install the grill. **TIP** Lay a towel across the top of the bumper to prevent scratches on the bumper and/or grill. Position the bottom of the grill in front of the core support and line up the clips that hold the bottom of the grill in place. Start at one side of the grill and insert the first clip, then gently push on the grill until it clicks in place. Repeat the process with the clips from one side of the grill to the other. Locate the four 5.5mm bolts that hold the top of the grill to the core support and hand tighten until the top of the grill is secured. DO NOT OVER TIGHTEN. Install the passenger side OEM bumper support bracket in the passenger side wheel well using the 13mm bolts. Finally, install the Bulletproof Diesel rock shield using the OEM 13mm bolts. This replaces the OEM bumper support bracket in the driver side wheel well and protects the oil filter from damage. [ATTACH=full]95446[/ATTACH] 62. Recharge Air Conditioning [/QUOTE]
Insert quotes…
Verification
Post reply
Random media
Latest posts
Ford 7.3 Passenger Bank Dead
Latest: 6.0 Tech
19 minutes ago
7.3 Tech
J
6.4 spartan
Latest: jmathews90
Today at 6:16 PM
6.4 Performance
Show & Go/Going to Try this Out combo Build
Latest: Powerstroke Cowboy
Today at 9:06 AM
6.4 Aftermarket
Y
Fuel sending unit and wheel studs
Latest: Yojih123
Today at 1:00 AM
7.3 Tech & FAQ
Truck slipping into 4th
Latest: ju015dd
Wednesday at 10:39 PM
6.7 Tech
Members online
Lugger007
Forums
Power Strokes
6.0 Tech
Bulletproof Diesel Oil Cooler INSTALL
Top