mf2775guy
New member
Hey everybody! I lost my password and username so had to make a new account :fustrate: Some of the OBS guys on here should know me. So here comes story time!
The tranny from my truck was rebuilt right before I bought it (stock rebuild, nothing special at all, lol) and that was 45k miles ago. 20k miles ago I pulled it and put a dual disk Hughes converter in it (couldn't pass up the deal!) Ive been running a TS for 2 years and AD code injectors for a year now. I started to get a vibration after shifts and slipping started. Then in the last 2 months Id after driving awhile and I would stop Id have to rev it up and then itd take off. After doing some talking we came to the conclusion is was a bad lip seal not holding anough line pressure when warm to keep it in gear at idle.
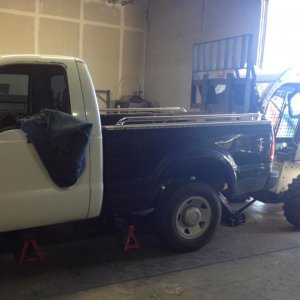
Last week I was driving And I stopped, when I went to back up I had to rev the piss out of it to get it moving and it spun and moved (thinkin to myself uh-oh) I drove a mile up the road and started to smell burnt tranny fluid, stop, get out and it was pissing tranny fluid out of the inspection plate...then it wouldn't move. Got it towed back to campus to figure out what Im going to do.
After a few phone calls and talking to some people I decided to do it myself. I have space out here to pull the tranny and rebuild it, along with some resources. I go to college at Penn College of Tech for diesel tech and talking to some my instructors and other people I decided to take the plunge (am I nervous, hell ya..haha)
I got some parts and stuff in mind and looked at prices and talked to some people, I decided since Im doing it myself Id have alittle extra to throw some goodies in it. This is a budget build no doubt but think itll be sturdy.
Parts:
-ATS clutch kit (got it today! Has a Transtar gasket kit, filter and Reaybosto clutches) I wasn't sure on the whole ATS thing (as their customer service and everything has an iffy past) but was talked into it.
-Transgo Tugger shift kit.
-Triple disk TC from Valair (supposedly DPC makes the converters for them)
-Billet input shaft from Racer X
I also ordered an ATSG E40D manual.
I figured Id make a post here and add pictures and whatnot for others to use, as it seems hard as hell to find this kind of stuff. Im really looking forward to this and be back and on the road soon!
-Sean
The tranny from my truck was rebuilt right before I bought it (stock rebuild, nothing special at all, lol) and that was 45k miles ago. 20k miles ago I pulled it and put a dual disk Hughes converter in it (couldn't pass up the deal!) Ive been running a TS for 2 years and AD code injectors for a year now. I started to get a vibration after shifts and slipping started. Then in the last 2 months Id after driving awhile and I would stop Id have to rev it up and then itd take off. After doing some talking we came to the conclusion is was a bad lip seal not holding anough line pressure when warm to keep it in gear at idle.
Last week I was driving And I stopped, when I went to back up I had to rev the piss out of it to get it moving and it spun and moved (thinkin to myself uh-oh) I drove a mile up the road and started to smell burnt tranny fluid, stop, get out and it was pissing tranny fluid out of the inspection plate...then it wouldn't move. Got it towed back to campus to figure out what Im going to do.
After a few phone calls and talking to some people I decided to do it myself. I have space out here to pull the tranny and rebuild it, along with some resources. I go to college at Penn College of Tech for diesel tech and talking to some my instructors and other people I decided to take the plunge (am I nervous, hell ya..haha)
I got some parts and stuff in mind and looked at prices and talked to some people, I decided since Im doing it myself Id have alittle extra to throw some goodies in it. This is a budget build no doubt but think itll be sturdy.
Parts:
-ATS clutch kit (got it today! Has a Transtar gasket kit, filter and Reaybosto clutches) I wasn't sure on the whole ATS thing (as their customer service and everything has an iffy past) but was talked into it.
-Transgo Tugger shift kit.
-Triple disk TC from Valair (supposedly DPC makes the converters for them)
-Billet input shaft from Racer X
I also ordered an ATSG E40D manual.
I figured Id make a post here and add pictures and whatnot for others to use, as it seems hard as hell to find this kind of stuff. Im really looking forward to this and be back and on the road soon!
-Sean