Urgent: Do I Have The Right Parts

sniper_101

New member
Joined
May 22, 2011
Messages
1,253
Reaction score
0
Location
rural SK
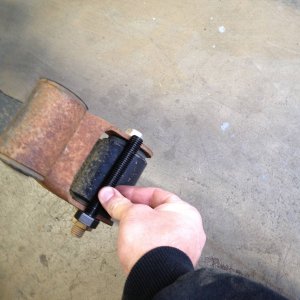
Are these the correct sway bar links and trac-bar bracket for a 2000? (it's a BDS front 2" leaf kit)

8195840812_ffbefd5372_b.jpg

20121118-IMG_8314 by sniper_101, on Flickr

8194747717_ff182724cc_b.jpg

20121118-IMG_8311 by sniper_101, on Flickr

The sway bar ends look too small and the kit came with square u-bolts, not the radious/rounded ones I need. Just wondering what else was screwed up with this order . . .

My truck is in the shop at work so I can't go look, but I need to start the install tomorrow, assuming these are the right parts.
 

GreenF350

Member
Joined
Aug 19, 2012
Messages
203
Reaction score
3
Location
Near Pensacola, FL
Looks right to me too from the pictures. I know my buddies kit we installed came with two different sway bar links and said to match them to whatever type was on the truck, so might want to take a quick look there, but yours match the style on my truck.
-Aaron
 

Betarocker

Member
Joined
May 18, 2011
Messages
815
Reaction score
0
Location
Sea to Sky, BC
Front u-bolts are square-ish. They install from the top and hold the lower shock mount/leaf spring cap in place. They are not square though, but have a slight bend.
 

sniper_101

New member
Joined
May 22, 2011
Messages
1,253
Reaction score
0
Location
rural SK
Thanks guys.

*Edit - The leveling kit raised the front about 3.7" so it is perfectly level with the rear bags at 10psi, those little V-codes were pretty bad, lol. The driver-side sag is reduced to less than 1/2" now.*

The truck is rolling again. The BDS sway bar links were like 1.5" shorter than stock, so I stuck with the stock ones and put in all poly sway bar bushings. Also poly bushings in the Zone adjustable trac bar.

The only real PIA of the whole thing was the axle side trac bar bolt that took a lot of heating, and the angle (forward most) frame bolt for the trac bar drop bracket. The nut started to turn in the boxed frame, lol. Luckily I got an 18mm on a breaker bar down the frame far enough to rig up a prying system to get it done. There is now an 18mm socket in there for all eternity . . .

A few pics for the hell of it.

8210036046_6dd04e949e_b.jpg

20121121-IMG_8393-3 by sniper_101, on Flickr

8208954757_f977e6b239_b.jpg

20121118-IMG_8343 by sniper_101, on Flickr

8208958329_9ccb9a9c10_b.jpg

20121118-IMG_8363 by sniper_101, on Flickr

8210050448_060a99b4b0_b.jpg

20121120-IMG_8375 by sniper_101, on Flickr

Getting the angled bolt on the trac bar mount. This pry bar was pushing down onto the socket in the frame:
8208964647_901e7d9253_b.jpg

20121120-IMG_8381 by sniper_101, on Flickr

8208966957_b9a2c8cd50_b.jpg

20121121-IMG_8390 by sniper_101, on Flickr

8208965877_8f9b58c158_b.jpg

20121120-IMG_8387 by sniper_101, on Flickr

The ride is noticeably improved. It still rides like a leaf sprung 1-ton, but a lot less harsh over the ruts and rail-road crossings. Now I just have to spend the next two months adjusting my drag link to have my wheel absolutely perfectly clocked . . .
 
Last edited:

GreenF350

Member
Joined
Aug 19, 2012
Messages
203
Reaction score
3
Location
Near Pensacola, FL
FYI, my upper track bar nut plates did the same thing...one of the bolts was actually loose when I bought it. Not sure what you would want to call it, but you can go buy that plate with the two nuts tack welded to it at the dealer for a decent cost and swap it out. That was what I ended up doing with mine. Took about 5 minutes or so. Then again....if it's tight, why mess with it. Haha.

Anyway....looks like it will turn out pretty sharp. Dont forget a "finished" picture or two to show the new stance! :thumbup:
-Aaron
 

sniper_101

New member
Joined
May 22, 2011
Messages
1,253
Reaction score
0
Location
rural SK
FYI, my upper track bar nut plates did the same thing...one of the bolts was actually loose when I bought it. Not sure what you would want to call it, but you can go buy that plate with the two nuts tack welded to it at the dealer for a decent cost and swap it out. That was what I ended up doing with mine. Took about 5 minutes or so. Then again....if it's tight, why mess with it. Haha.

Anyway....looks like it will turn out pretty sharp. Dont forget a "finished" picture or two to show the new stance! :thumbup:
-Aaron

I would have taken the little plate out, but the tin must have twisted up, because it didn't want to leave that frame rail. Also, I was afraid of moving/loosing that nut and potentially really f-ing myself over, lol.

Will grab some pictures tomorrow, has been freezing rain and snowing for the last 30 hours.
 

Latest posts

Members online

Top