2014 Sema project

Bustedknuckles

Active member
Joined
Aug 15, 2011
Messages
1,503
Reaction score
0
I know what you mean. It's an absolute ridiculous amount of money for lights. My plans to do my own retrofit never panned out for some reason, most likely from me being terrified. I later heard about PlainAnSimple and then found out they were located 15 minutes away on the other side of town, so it seemed as though fate had brought us together. I was NOT expecting to bend over and take it as hard as I did though. I'm still ashamed of myself...
How hard is hard? I would love to get my truck done but it seems crazy expensive to get done and a total pita to do yourself!
 

Dantron

New member
Joined
Feb 21, 2014
Messages
186
Reaction score
0
Location
Texas
Im in houston too, but i would rather drive around with stock lighting and HID's than fork out the money for P&S. I plan to do my own retrofit as well, just have to find the week off work to pull my lights apart, or find someone who has done it and will do it for me for a 24 pack
I had Recon's before with halos that went out every time it rained. I wanted to wrap my exterior build up and the lights were the last thing on my list. I was sold when he told me everything comes with full warranty. Don't get me wrong, it was still too much to pay for lighting but a better job than I could have ever done.
 

Dantron

New member
Joined
Feb 21, 2014
Messages
186
Reaction score
0
Location
Texas
How hard is hard? I would love to get my truck done but it seems crazy expensive to get done and a total pita to do yourself!
It all depends on what you want done. Here's a ballpark figure with me in the middle: $1000 --> $2400 --> Beyond
 

bricewise

New member
Joined
Mar 9, 2013
Messages
937
Reaction score
0
Holy ****. Thats insane. I'll stick with my stock ****ty lights for the next year
 

smcox1

New member
Joined
Sep 14, 2012
Messages
1,661
Reaction score
0
You just need to buy the paint and projectors and do them yourself.
 

STROKIN N STYLE

Moderator
Joined
May 18, 2011
Messages
3,286
Reaction score
0
Location
GOM via NC
ok.. You said we'd get updated pictures today of more aswesomeness... I think it's time! Those headlights and everything else on this build is gorgeous! You and your team ( I assume you have a team) have done an amazing job!
 

jljoyner766

New member
Joined
Aug 25, 2014
Messages
31
Reaction score
0
Location
Somewhere in NC
how hard is it to take the speedo housing out of 08 f250? I seen you done all your pieces inside which is what i dont except that and was wondering how much is it to getting out? thanks
 

jordan572

New member
Joined
Mar 17, 2013
Messages
487
Reaction score
1
ok.. You said we'd get updated pictures today of more aswesomeness... I think it's time! Those headlights and everything else on this build is gorgeous! You and your team ( I assume you have a team) have done an amazing job!

Should of said tonight, give me a few I'll get more up tonight. I've done nearly everything so far. I don't paint and I won't be welding and fabricating on this one. But all the motor work, wiring, tear down, fitting, reassembly, taping, prepping, planning, ordering, grinding, etc. has been me. About 90% of the total hours put in so far is my work, this will go way down though as the deadline comes. Still a lot to learn but hopefully I'll get there someday.
 

jordan572

New member
Joined
Mar 17, 2013
Messages
487
Reaction score
1
how hard is it to take the speedo housing out of 08 f250? I seen you done all your pieces inside which is what i dont except that and was wondering how much is it to getting out? thanks

In my 14, I'm pretty sure very similar in an 08-10, is rather easy. Pull the fuse panel trim below the steering column, you may have to pull the woodgrain trim around the cluster trim ring (part I mounted my mini maxx to). I can't even recall for sure though you may be able to pull the cluster trim without pulling the woodgrain trim. Total of 4 screws/bolts, then you work that cluster trim piece slowly out. A few other clips and sensors connected to that piece but you'll see em. Then you can work the cluster out far enough to unplug it, and finally pull it out. Everything is clipped, if it doesn't come out pretty easy chances are its hung up on the trim piece next to it.
 

jordan572

New member
Joined
Mar 17, 2013
Messages
487
Reaction score
1
Holy ****. Thats insane. I'll stick with my stock ****ty lights for the next year

Yea Plainansimple is on the higher end but I'll be the first to say this takes way longer and is a lot harder than it looks. Unless your okay with not perfectly aimed projectors it is a decent amount easier. Not saying that professional retro guys get theirs aimed perfect either though. Check out Jeremy at the retro shop, I've heard he does real nice work and is more reasonable.
 

jordan572

New member
Joined
Mar 17, 2013
Messages
487
Reaction score
1
Another rather large round of paint work, consisting of both black and red parts. Crazy how much time and stuff all these little parts take to tape and prep, and reassemble. These are all pictures of sealer only so far,

Lug nut tips :wtf:,

IMG_2353.jpg

IMG_2354.jpg

IMG_2355.jpg


:bowfast:
IMG_2356.jpg


IMG_2357.jpg

IMG_2358.jpg

IMG_2359.jpg

IMG_2360.jpg
 

jordan572

New member
Joined
Mar 17, 2013
Messages
487
Reaction score
1
The final spray, never disappoints. The painter was real pleased when he had to spray those lug nut tips, they turned out so good though. They should really accent the wheels well, it is so nice to be able to do all this work in house. I can't imagine the struggle other builders have to put up with involving paint work. I'm very nervous and will be until this truck is sitting inside the LV convention center, I would be a mess if I had to rely on someone else for our painting.

IMG_2368.jpg

IMG_2369.jpg

IMG_2370.jpg

IMG_2371.jpg


IMG_2374.jpg


:thumbup:
IMG_2376.jpg


IMG_2377.jpg

IMG_2378.jpg

IMG_2381.jpg

IMG_2404.jpg
 
Last edited:

jljoyner766

New member
Joined
Aug 25, 2014
Messages
31
Reaction score
0
Location
Somewhere in NC
Ok thanks so much, I have everything done on inside in a blue carbon fiber hydro dipped and wanted that as well. Will post pics. Thanks so much for ur help

Jeremy
 

jordan572

New member
Joined
Mar 17, 2013
Messages
487
Reaction score
1
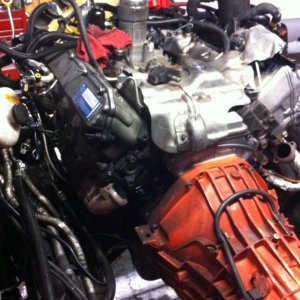
Sorry, I meant to post again by now. Anyway we sprayed the next booth full of parts. This one contained more parts for the compressor (crankcase, filter housing) and a slew of bumper parts including all the mounting brackets. We also sprayed the inside of the rear truss going over the rear axle before we weld it on for obvious reasons. The motor mounts and the amp/processor mount plate we worked up was also sprayed black.

The bumpers before tear down, the 4 wheel drive valence is laughable imo.
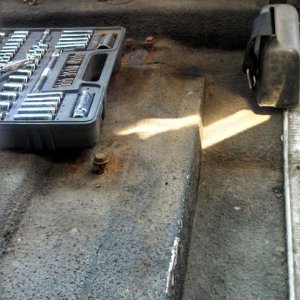
IMG_2413.jpg

IMG_2416.jpg


Ready for paint,
IMG_2429.jpg

IMG_2434.jpg

IMG_2433.jpg

IMG_2423.jpg

IMG_2422.jpg

IMG_2425.jpg

IMG_2426.jpg

IMG_2432.jpg

IMG_2437.jpg

IMG_2439.jpg


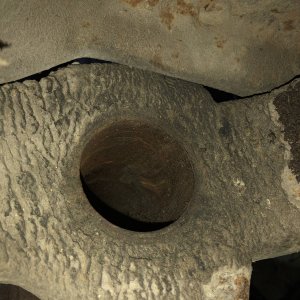
Can't touch the welds on these parts, look at the heat pattern on the back side of this truss,
IMG_2440.jpg

IMG_2441.jpg


And after paint,
IMG_2449.jpg


:naughty:
IMG_2502.jpg

IMG_2503.jpg

IMG_2505.jpg

IMG_2506.jpg

IMG_2509.jpg

IMG_2510.jpg

IMG_2512.jpg
 
Last edited:

jordan572

New member
Joined
Mar 17, 2013
Messages
487
Reaction score
1
Holding steady, putting in the time day after day. The compressors are one of my most favorite things I've done yet. I seen the new 444c all black compressors and knew I needed to do something about these sad looking things. Every part on the viair compressors were polished or chromed to a different sheen making them look pretty crappy. It took me a real long time to pull them apart, tape them, and the reassemble them but it was worth it. They looks so cool.

Head removed,
IMG_2277.jpg

IMG_2278.jpg

IMG_2279.jpg

IMG_2282.jpg

IMG_2307.jpg


And for reassembly, the fun part.
IMG_2514.jpg

IMG_2517.jpg

IMG_2518.jpg

IMG_2519.jpg

IMG_2520.jpg

IMG_2515.jpg

IMG_2516.jpg


The whole gang ready to go at it, :bowfast:
IMG_2521.jpg

IMG_2522.jpg

IMG_2523.jpg

IMG_2524.jpg

IMG_2525.jpg
 

Latest posts

Members online

Top