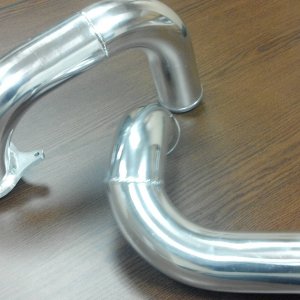
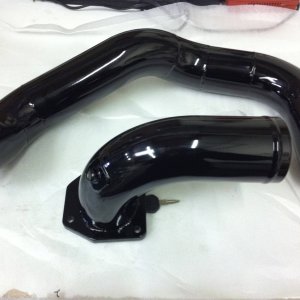
New Package today

Tncoalroller88

New member
Joined
Feb 23, 2012
Messages
611
Reaction score
0
Location
Piney Flats, Tennessee
Honestly I cant imagine doing it with an exhaust in place. When I did mine I was running just the downpipe, and I ended up pulling it completely to give us some more room. Have plenty of jackstands to support the transmission when its out, and also to spot it when you are putting it back in. Here's a quick run down on the process.

Pull into wherever you are doing it, make sure that it is someplace where you are comfortable leaving your truck overnight just in case.

Unplug the sensors and harness from the transmission and tuck up above the fuel pump on the frame rail.

Unplug the slave cylinder. Put it in the same general place as the sensors.

Get the transmission jack situated under the transmission. Make sure whatever you are on that the jack rolls easily.

Get in the cab and undo your shifter boot and manual transfer if you have it. Remove the shifter completely from the transmission, as well as the piece that actually goes into the transmission.

Hop back underneath and undo the transmission to engine bolts. Make sure you keep them somewhere safe.

Hop back up top and use either rachet straps or small chains to secure the transmission to the jack, unless you were able to rent one of the nice fancy jacks that actually bolts into your transmission.

Index both drive shafts and unbolt them. Move them off to the sides. Remember you will need red loctite for reassembly.

Remove the crossmember from the transmission, and then from the transmission. Make sure you remove all the bolts holding it on. There is a funky bracket on the passenger side. These bolts could be a real PITA.

Here's where the choice words and a couple buddies help. Get back underneath and begin to wiggle and push the transmission back. MAKE SURE TO CHALK YOUR REAR TIRES! Also before you remove the shifter put in in gear.

Once you bust your knuckles up a bit, and finally manage to wrestle the transmission back from the engine, make sure your input shaft is completely clear of the engine. Push it back another 6 inches if you can. Hop out from under the truck and enjoy a cold beverage of your choice.

Unbolt the pressure plate, remove your old clutch, and unbolt the ten bolts holding your flywheel to the crank. I believe they are 14mm.

Once you have your old clutch assembly out, remove your clutch fork and throw-out bearing if a new throw-out bearing is included in your kit. Make sure to note how it installs. The round bearing side is forward and it should snap into your clutch fork. Remove clutch fork and inspect it. Be careful with the pivot bushing, it is plastic and can break easily. I'd just buy a spare (or 2) from ford. They are only about 10 bucks a piece, and like I said are plastic and break easily (ask me how I know lol).

Install new pivot bushing if you so choose, then reinstall your clutch fork. Install new throwout bearing at the same time making sure it is the right way (again ask me how I know).

Bolt the new flywheel to the crank. You may have to either cut the alignment pin, or pound it in a bit in order to fit the new bolts in, depends on how thick your new flywheel is. I know with my southbend dual disk I had to cut about half an inch maybe a little more off of it in order to get the bolts to fit.

Line up your clutch disc using the mark on it (should be a bit of paint). Make sure that you have it facing the correct direction, it should be marked on the clutch.

Insert the alignment tool provided at this point to keep your clutch lined up with the flywheel.

Put your pressure plate on, again making sure the paint mark is lined up with the flywheel. Go ahead and start all the bolts so that you dont have to hold it, but do not tighten them more than finger tight.

Starting with one of them, tighten them in a star pattern. It helps to have someone on the front of the crank with a breaker bar turning the engine over to rotate the engine as you go. Tighten them equal amounts. Continue until they are all tight, then repeat one more time bring them to the torque specs provided in your kit.

Use some form of grease (vaseline works great) on the input shaft, making sure to wipe excess off so that it is only in the splines. DO NOT GET ANY ON YOUR CLUTCH DISC.

Have another cold beverage, you have completed the easy steps.

Prepare your vocabulary, and start moving the transmission forward. Once the input shaft is lined up and in the hole, have a buddy spin the output on the transfer case as you push the transmission forward. You should feel when it slips into the splines on your clutch. You will know it is in the clutch disc when the output does not spin freely anymore.

Keep pushing, wiggling, cussing, and doing whatever it takes to push the transmission forward until it is on the alignment pins. This will take some time. get it as close as possible to the block, if not all the way and completely flush.

Reinstall the bolts, tightening them slowly and equally. IF THEY ARE DIFFICULT TO INSTALL YOU DO NOT HAVE THE TRANSMISSION LINED UP CORRECTLY. Repeat the above step with added cussing until they insert easily.

Reinstall everything you removed, and dont forget to replug the sensors in.

While you have the top shifter assembly apart, it is a good time to change the fluid in the tranny. Remove the drain plug, let it empty, then replace the drain plug. Fill with MERCON IV ATF from the top where the shifter attaches since it is easier than the fill plug. Fill it until fluid is at the level of the fill plug. Reinstall fill plug and add a little bit more fluid to make up for the cooler.

Once it is all back together, enjoy a few more cold beverages, and then hold your breath when you start it.:toast:

If you are having problems getting the transmission to suck all the way in, you can install the slave cylinder and press the clutch in to see if that helps you. If there is any solid resistance to the clutch pedal DO NOT PUSH THROUGH IT, YOU WILL BREAK THE PIVOT BUSHING. (again ask me how I know).

Ford should have a pivot bushing on the shelf. I know when I called to get one, the guy said its something they keep stocked because it is a common part to break.


PM me if you run into any issues. I'm guessing that because it is a single disc it should be a little bit easier install than a dual disc.

Remember that your new clutch will require a break in period, and may change how it feels. Do not be surprised if it continually drives a little different every time for the first 4 or 500 miles.

ENJOY THE GOOD CLUTCH!!!!

Man thanks this is great info i this will definetly help me out a bunch when i get ready to tackle this monster.. Again thanks alot:fordoval:
 

V-Ref

Active member
Joined
May 21, 2011
Messages
1,028
Reaction score
0
Location
9 miles high @ 550 mph
Honestly I cant imagine doing it with an exhaust in place. When I did mine I was running just the downpipe, and I ended up pulling it completely to give us some more room. Have plenty of jackstands to support the transmission when its out, and also to spot it when you are putting it back in. Here's a quick run down on the process.

Pull into wherever you are doing it, make sure that it is someplace where you are comfortable leaving your truck overnight just in case.

Unplug the sensors and harness from the transmission and tuck up above the fuel pump on the frame rail.

Unplug the slave cylinder. Put it in the same general place as the sensors.

Get the transmission jack situated under the transmission. Make sure whatever you are on that the jack rolls easily.

Get in the cab and undo your shifter boot and manual transfer if you have it. Remove the shifter completely from the transmission, as well as the piece that actually goes into the transmission.

Hop back underneath and undo the transmission to engine bolts. Make sure you keep them somewhere safe.

Hop back up top and use either rachet straps or small chains to secure the transmission to the jack, unless you were able to rent one of the nice fancy jacks that actually bolts into your transmission.

Index both drive shafts and unbolt them. Move them off to the sides. Remember you will need red loctite for reassembly.

Remove the crossmember from the transmission, and then from the transmission. Make sure you remove all the bolts holding it on. There is a funky bracket on the passenger side. These bolts could be a real PITA.

Here's where the choice words and a couple buddies help. Get back underneath and begin to wiggle and push the transmission back. MAKE SURE TO CHALK YOUR REAR TIRES! Also before you remove the shifter put in in gear.

Once you bust your knuckles up a bit, and finally manage to wrestle the transmission back from the engine, make sure your input shaft is completely clear of the engine. Push it back another 6 inches if you can. Hop out from under the truck and enjoy a cold beverage of your choice.

Unbolt the pressure plate, remove your old clutch, and unbolt the ten bolts holding your flywheel to the crank. I believe they are 14mm.

Once you have your old clutch assembly out, remove your clutch fork and throw-out bearing if a new throw-out bearing is included in your kit. Make sure to note how it installs. The round bearing side is forward and it should snap into your clutch fork. Remove clutch fork and inspect it. Be careful with the pivot bushing, it is plastic and can break easily. I'd just buy a spare (or 2) from ford. They are only about 10 bucks a piece, and like I said are plastic and break easily (ask me how I know lol).

Install new pivot bushing if you so choose, then reinstall your clutch fork. Install new throwout bearing at the same time making sure it is the right way (again ask me how I know).

Bolt the new flywheel to the crank. You may have to either cut the alignment pin, or pound it in a bit in order to fit the new bolts in, depends on how thick your new flywheel is. I know with my southbend dual disk I had to cut about half an inch maybe a little more off of it in order to get the bolts to fit.

Line up your clutch disc using the mark on it (should be a bit of paint). Make sure that you have it facing the correct direction, it should be marked on the clutch.

Insert the alignment tool provided at this point to keep your clutch lined up with the flywheel.

Put your pressure plate on, again making sure the paint mark is lined up with the flywheel. Go ahead and start all the bolts so that you dont have to hold it, but do not tighten them more than finger tight.

Starting with one of them, tighten them in a star pattern. It helps to have someone on the front of the crank with a breaker bar turning the engine over to rotate the engine as you go. Tighten them equal amounts. Continue until they are all tight, then repeat one more time bring them to the torque specs provided in your kit.

Use some form of grease (vaseline works great) on the input shaft, making sure to wipe excess off so that it is only in the splines. DO NOT GET ANY ON YOUR CLUTCH DISC.

Have another cold beverage, you have completed the easy steps.

Prepare your vocabulary, and start moving the transmission forward. Once the input shaft is lined up and in the hole, have a buddy spin the output on the transfer case as you push the transmission forward. You should feel when it slips into the splines on your clutch. You will know it is in the clutch disc when the output does not spin freely anymore.

Keep pushing, wiggling, cussing, and doing whatever it takes to push the transmission forward until it is on the alignment pins. This will take some time. get it as close as possible to the block, if not all the way and completely flush.

Reinstall the bolts, tightening them slowly and equally. IF THEY ARE DIFFICULT TO INSTALL YOU DO NOT HAVE THE TRANSMISSION LINED UP CORRECTLY. Repeat the above step with added cussing until they insert easily.

Reinstall everything you removed, and dont forget to replug the sensors in.

While you have the top shifter assembly apart, it is a good time to change the fluid in the tranny. Remove the drain plug, let it empty, then replace the drain plug. Fill with MERCON IV ATF from the top where the shifter attaches since it is easier than the fill plug. Fill it until fluid is at the level of
 
Last edited:

2000wa250

Active member
Joined
Oct 15, 2011
Messages
1,048
Reaction score
0
Thanks guys.

Coal Roller, just take your time. It does not slide right in. It will be a PITA. But I promise it will be worth it. I cant stress enough how much help it is to have a few extra hands/muscle. That and a good transmission jack that can support the entire transmission/transfer case and still roll well.
 

Tncoalroller88

New member
Joined
Feb 23, 2012
Messages
611
Reaction score
0
Location
Piney Flats, Tennessee
Thanks guys.

Coal Roller, just take your time. It does not slide right in. It will be a PITA. But I promise it will be worth it. I cant stress enough how much help it is to have a few extra hands/muscle. That and a good transmission jack that can support the entire transmission/transfer case and still roll well.

Your very welcome man, and i hope ill have a few extra hands and a good trans jack.. Im supposed to rent one from a local place hopefully it will do the job
 

2000wa250

Active member
Joined
Oct 15, 2011
Messages
1,048
Reaction score
0
Just make sure it has plenty of fluid in it, and tell them what kind of truck you are using it for. It needs to support around 700-1000lbs. Also take your time when you're getting the transmission situated on the jack and attached to it. It will pay off in the long run. You may spend an extra half hour to hour on placing the jack and getting it all set up, but it will save you 5 when it comes to putting it back in
 

Tncoalroller88

New member
Joined
Feb 23, 2012
Messages
611
Reaction score
0
Location
Piney Flats, Tennessee
Just make sure it has plenty of fluid in it, and tell them what kind of truck you are using it for. It needs to support around 700-1000lbs. Also take your time when you're getting the transmission situated on the jack and attached to it. It will pay off in the long run. You may spend an extra half hour to hour on placing the jack and getting it all set up, but it will save you 5 when it comes to putting it back in

Alright thanks man i will keep this in mind too
 

Tncoalroller88

New member
Joined
Feb 23, 2012
Messages
611
Reaction score
0
Location
Piney Flats, Tennessee
Does anyone know the torque specs for this install?? I have found a few numbers here and there but would like to have them all if any of you guys that have done this job has such info id really appreciate it cuz i wanna do the job right.. Also how do i disconnect the manual t case linkage ?
 

2000wa250

Active member
Joined
Oct 15, 2011
Messages
1,048
Reaction score
0
Manual t case should just be the bolts. As far as torque specs they should have come.with the kit. I should have mine laying around and ill check when I get home tomorrow

Sent from my DROID BIONIC using Tapatalk 2
 

Latest posts

Members online

Top