JoeDaddy
New member
1st, this is a mod that will require cutting and grinding on your existing fuel bowl return. If you are not confident in your fabricating ability you might reconsider.
Total cost > $50 <
Start by removing the turbo to plenum tubing, AKA spider. Make sure you stuff it the openings with some rags, some parts are small.
Then drain your fuel bowl, it's the yellow lever at the 7 O'Clock position of the fuel bowl, push to the left. Then use a 1/2" drive and long extension to remove the 13mm bolts in the back of the FB that secure it to the block. I busted 2 good 3/8" ratchets learning this.

Once you've unbolted the FB take the braided (return) lines loose from the regulator and return line (hose) at the back. Then unbolt the reg from the bowl. Remove the top left worm clamp and hose from the fuel pump, the loosened FB should give you plenty of access. Then the lowest clamp and hose. If these 2 hose wont come don't worry they will tear off anyway once you pull th FB.

With the FB gone you can now see the fuel pump. If you are not familier with it the top left port the low pressure to the filter, the top right is inlet feed from the tanks, the bottom is inlet feed from the filter. the out the back to the back of the heads, through the heads out the front into the braided return lines you previously disconnected, and into the regulated return.

Now the factory RR, take time again to understand what is going on here. The backside is the inlet feed from the FB, when you removed this you probably noticed a nasty screen, behind that there is a plastic tube restrictor and behind that a plastic ball, these can be tossed in the trash. The fuel goes through there to the left and into the cup looking thing where it mixes with return fuel the out the nipple in back, or you may have a different model that has no cup but a lid with a nipple out the bottom. The left side is the regulated return, the large brass colored bolt is the Fuel Pressure Regulater lid, behind it you will find a spring and aluminum needle that does the regulating.

With the lid/cup removed you can see the inner chamber, the hole in the center is where reg meets ret, this is where you tap a 3/8 ntp nipple to become the new fuel return. On the cupless model you'll need to pre-drill the hole 1st with a size or 2 smaller bit than the tap.

To the right of the feed that goes down into the chamber is where you'll start cutting, spend some time making sure you fully understand this step, after the 1st cut you're all in! REMEMBER YOUR SAFTEY GLASSES AND GLOVES!!!!!

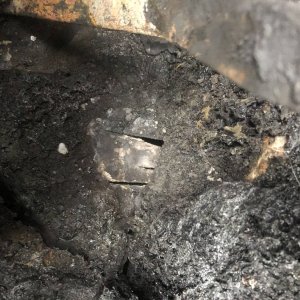
Here's what you're after, this will take many cuts and some staring to get right. You can see that I've already tapped the center and placed the new return nipple as a guide.

And the finished product. You'll want to disassemble and clean vigorously before re-assembly. This is also a good time for the FPR mod which is just a BB in the needle uder the spring.

Re-assembly is pretty self explanitory once you've come this far, the braided lines go bac where they were and the new return plugs right into where the old 1 did.

So far I haven't needed to clamp the device in place, it's so light the return hard line sorta suspends it in the valley.

Then it's your choice of filtration, I went with a 10 micron transfer tank assembly, it has a see-through sediment bowl and water drain at the bottom, it was about $30 at the tractor supply store, the fittings to go from 1" to 3/8" nipple were another $5-10 and I made the hanger out of a piece of flat stock 1"x 1/8" and used 1 1/4 U bolts to mount.

All but the fittings and reg spring/needle can be tossed.

GOOD LUCK with yours!!!!
Total cost > $50 <
Start by removing the turbo to plenum tubing, AKA spider. Make sure you stuff it the openings with some rags, some parts are small.
Then drain your fuel bowl, it's the yellow lever at the 7 O'Clock position of the fuel bowl, push to the left. Then use a 1/2" drive and long extension to remove the 13mm bolts in the back of the FB that secure it to the block. I busted 2 good 3/8" ratchets learning this.

Once you've unbolted the FB take the braided (return) lines loose from the regulator and return line (hose) at the back. Then unbolt the reg from the bowl. Remove the top left worm clamp and hose from the fuel pump, the loosened FB should give you plenty of access. Then the lowest clamp and hose. If these 2 hose wont come don't worry they will tear off anyway once you pull th FB.

With the FB gone you can now see the fuel pump. If you are not familier with it the top left port the low pressure to the filter, the top right is inlet feed from the tanks, the bottom is inlet feed from the filter. the out the back to the back of the heads, through the heads out the front into the braided return lines you previously disconnected, and into the regulated return.
Now the factory RR, take time again to understand what is going on here. The backside is the inlet feed from the FB, when you removed this you probably noticed a nasty screen, behind that there is a plastic tube restrictor and behind that a plastic ball, these can be tossed in the trash. The fuel goes through there to the left and into the cup looking thing where it mixes with return fuel the out the nipple in back, or you may have a different model that has no cup but a lid with a nipple out the bottom. The left side is the regulated return, the large brass colored bolt is the Fuel Pressure Regulater lid, behind it you will find a spring and aluminum needle that does the regulating.
With the lid/cup removed you can see the inner chamber, the hole in the center is where reg meets ret, this is where you tap a 3/8 ntp nipple to become the new fuel return. On the cupless model you'll need to pre-drill the hole 1st with a size or 2 smaller bit than the tap.
To the right of the feed that goes down into the chamber is where you'll start cutting, spend some time making sure you fully understand this step, after the 1st cut you're all in! REMEMBER YOUR SAFTEY GLASSES AND GLOVES!!!!!
Here's what you're after, this will take many cuts and some staring to get right. You can see that I've already tapped the center and placed the new return nipple as a guide.
And the finished product. You'll want to disassemble and clean vigorously before re-assembly. This is also a good time for the FPR mod which is just a BB in the needle uder the spring.
Re-assembly is pretty self explanitory once you've come this far, the braided lines go bac where they were and the new return plugs right into where the old 1 did.

So far I haven't needed to clamp the device in place, it's so light the return hard line sorta suspends it in the valley.
Then it's your choice of filtration, I went with a 10 micron transfer tank assembly, it has a see-through sediment bowl and water drain at the bottom, it was about $30 at the tractor supply store, the fittings to go from 1" to 3/8" nipple were another $5-10 and I made the hanger out of a piece of flat stock 1"x 1/8" and used 1 1/4 U bolts to mount.
All but the fittings and reg spring/needle can be tossed.

GOOD LUCK with yours!!!!

