You are using an out of date browser. It may not display this or other websites correctly.
You should upgrade or use an alternative browser.
You should upgrade or use an alternative browser.
YET ANOTHER 99 RCSB F250 BUILD
- Thread starter DEECEE
- Start date
dustinz85
Member


The gooseneck hitch was a pita as well. 3/4" bolts tack welded under the bed (where I couldn't really reach them). I just ground them off as well. Once I find a shop/store that carries the fittings I need for my fuel tank pickup assembled I will be in business.
I've broken 3 on one bolt before last time I took my bed off :banghead: I just took the grinder to the heads and replaced all of them.
Sent from my DROID X2
Yeah they're a pain in the ass.
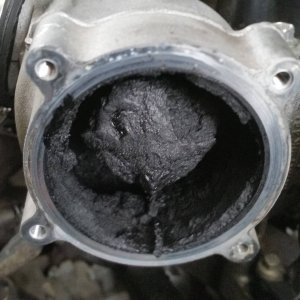
I went by Harry's hotrod shop in grand prairie today, it looks like he has just about everything I will need for my fuel lines. I'm not too worried about performance at this point so I'm just going to rig up the fuel pickup assembly the best I can, maybe I will do more with it later, but I will be happy just to get this baby chopped and glued back together. I am going to remove the in tank filter and go with a straight line and maybe mod some sort of external filter that can be changed along with the one in the bowl.
I went by Harry's hotrod shop in grand prairie today, it looks like he has just about everything I will need for my fuel lines. I'm not too worried about performance at this point so I'm just going to rig up the fuel pickup assembly the best I can, maybe I will do more with it later, but I will be happy just to get this baby chopped and glued back together. I am going to remove the in tank filter and go with a straight line and maybe mod some sort of external filter that can be changed along with the one in the bowl.
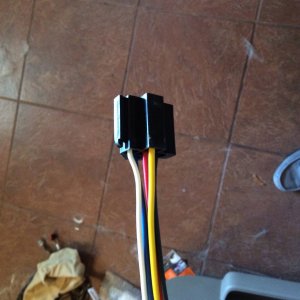
These turn signals are throwing me for a loop. I replaced the relay checked all of the fuses took apart the mfs cleaned buffed and re lubricated it and my turn signals still don't work. Hazards brake headlights and reverse all work normal but the turn signals don't blink or click or anything at all. All I can think to do now is trace out the entire wiring harness from the mfs down into the dash and under the truck.
genuineford
New member
My guess is the multifunction switch.
I took the multi function switch apart cleaned it buffed it and re-lubed it. There was nothing broken or damaged inside the switch, but it was pretty fun putting all those parts back together.My guess is the multifunction switch.
lincolnlocker
Well-known member
My truck started life as a F-350 dually, so naturally it rode rough. I swapped everything over from a SRW F-250 with no blocks, but quickly realized the ride was still terrible - but no vibration. I ended up putting the blocks back in and removed the big flat and one of the curved leafs and left the overloads on just in case. Ride height was virtually unchanged and it rode noticeably better, but its still feels like a truck. I want to get some different shocks on there next as the ones on there now were from the dually.
still have the dana 80 that was under it originally?
sorry for the side track
why not just buy a 5/8" pickup tube from dennis at strictly diesel? its like 50 bucks!
live life full throttle
lincolnlocker
Well-known member
dave, never mind... i forgot where you lived..
live life full throttle
live life full throttle
GCncsuHD
New member
These turn signals are throwing me for a loop. I replaced the relay checked all of the fuses took apart the mfs cleaned buffed and re lubricated it and my turn signals still don't work. Hazards brake headlights and reverse all work normal but the turn signals don't blink or click or anything at all. All I can think to do now is trace out the entire wiring harness from the mfs down into the dash and under the truck.
I took the multi function switch apart cleaned it buffed it and re-lubed it. There was nothing broken or damaged inside the switch, but it was pretty fun putting all those parts back together.
No where in that list did I see that you replaced the flasher unit behind the dash, unless that's what you meant by relay...
I had a similar episode several weeks back, my turn signals slowly stopped working. I would flip the signal on and it would flash maybe 3-4 times then stop flashing, flip it off then back on then it would flash 1-2 times then stop, sometimes it wouldn't flash at all. This was on both sides. I could flip the hazards on and they worked just fine. I was leaning towards the MFS being the culprit, but I was already going to have the dash bezel off doing some wiring work behind there for switches so the flasher was much cheaper and easier to replace at that point than the MFS, so I swapped one out just to see, and they have been working perfect ever since.
Yes sir, I replaced the flasher behind the dash but called it relay.No where in that list did I see that you replaced the flasher unit behind the dash, unless that's what you meant by relay...
I had a similar episode several weeks back, my turn signals slowly stopped working. I would flip the signal on and it would flash maybe 3-4 times then stop flashing, flip it off then back on then it would flash 1-2 times then stop, sometimes it wouldn't flash at all. This was on both sides. I could flip the hazards on and they worked just fine. I was leaning towards the MFS being the culprit, but I was already going to have the dash bezel off doing some wiring work behind there for switches so the flasher was much cheaper and easier to replace at that point than the MFS, so I swapped one out just to see, and they have been working perfect ever since.
Check fuse 1 (20 amp), and 24 (10 amp) of the Junction Box/Fuse Relay Panel.
Check for power to the relay on a White/Light Blue (W/LB) wire from fuse 24 and a Red/White (R/W) wire from fuse 1.
Check the Black (BK) wire of the flasher relay to verify it is a good ground and check for voltage out of the flasher on the White/Red (W/R) wire and the Light Blue (LB) wire feeding the multifunction switch.
Wow, thanks man. I will do that when I get home.Check fuse 1 (20 amp), and 24 (10 amp) of the Junction Box/Fuse Relay Panel.
Check for power to the relay on a White/Light Blue (W/LB) wire from fuse 24 and a Red/White (R/W) wire from fuse 1.
Check the Black (BK) wire of the flasher relay to verify it is a good ground and check for voltage out of the flasher on the White/Red (W/R) wire and the Light Blue (LB) wire feeding the multifunction switch.
Super Diesel
New member
Got a question about the fuel tank thing again... I just did my shortbed conversion this past weekend (it's not complete-complete, but close) and a few guys threw out the idea of getting a shortbed fuel tank (28 gallon) and heating up the end of it, and molding it to wrap around the transfer case. Would that be an option?
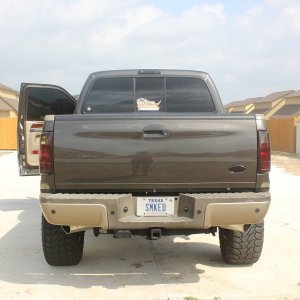
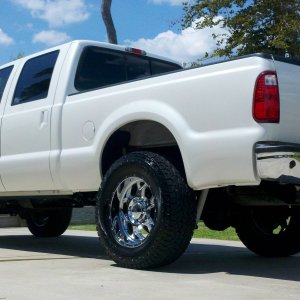
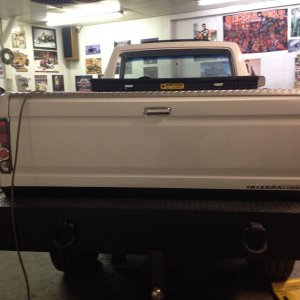
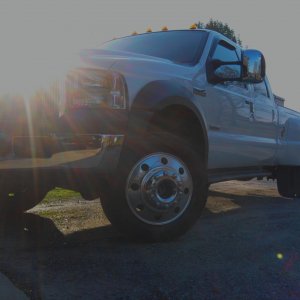
Here's mine as it sits now... this is as low as we can get it.

Here's mine as it sits now... this is as low as we can get it.
Honestly I don't think that is a good idea. It could compromise the tank heating it and beating it to shape. The f150 tank I got will give me about five inches between the tank and the transfer case. I am in the process of building the rig I'm going to use but I'm probably going to put a water seperator and 10 micron fuel filter in front of tank but before the pump. Here check this link out on the hutch harpoon setup.Got a question about the fuel tank thing again... I just did my shortbed conversion this past weekend (it's not complete-complete, but close) and a few guys threw out the idea of getting a shortbed fuel tank (28 gallon) and heating up the end of it, and molding it to wrap around the transfer case. Would that be an option?
Here's mine as it sits now... this is as low as we can get it.

http://www.guzzle7pt3.com/hutch.php
The conversion is the ideal time to do this mod, being that you already have to mod the tank and lines anyway. Taking out the in tank filter on mine is a no brainer but putting in a cheap easily replaceable fuel filter seems like a really good idea. I love the truck man, looking very good so far. The hangups I'm having from my shoulder and the parking brake and blinkers are really holding me up. I was hoping to be nearly done with mine at this point but I'm still gathering parts for the fuel tank. I picked up the fittings today (got the wrong size several times,long story). I think I'm going to use standard brass fittings since they are readily available and inexpensive, although I did buy the jic fittings as well, the flare angles are different between the two types and I already have a standard plumbing flare tool. I also had to order a part for the welder I just bought from craigslist
 the switch on the front had a cracked housing and would cause the welder to flip off. Unfortunately nobody carries the part. So I had to mail order it. I really wish I had the money to go about this differently.
Last edited:
Did you get any pictures of the frame chop and weld? I think I'm going to cut about a 45 degree angle on mine, bevel the edges weld it in place, trim the top off the removed section and bolt it into place. This way I can inspect the weld for fractures easily and I have the added security of the bolted piece if it did fracture. The 45 degree angle would also increase the length of the weld and reduce the chance of it breaking in the first place.
Yes sir, that's what I'm saying I think. If I can get a 45 degree angle out of it that's what I am going for. Basically a Z shaped cut. I'm actually considering cutting the frame here and just bolting it together and taking it to my shop (not a mechanic shop unfortunately, I work for the power company) and welding it together on the slab there, it's much flatter and more level than my rock driveway. I fear that if I weld it up here it may have a slight angle to it from being on an un-level surface. You think it could handle being driven 45 miles tack welded with 8 grade 8 bolts on both sides holding the bracket on the frame? I think if I take it easy driving it up there it should be okay. I just wish I could do the full process there, but not having a part or something not going right and leaving the truck there more that a day isn't really an option.Seems like the standard procedure is to cut a plumbed up "Z" shape (if that makes sense) versus one strait cut.
Super Diesel
New member
Honestly I don't think that is a good idea. It could compromise the tank heating it and beating it to shape. The f150 tank I got will give me about five inches between the tank and the transfer case. I am in the process of building the rig I'm going to use but I'm probably going to put a water seperator and 10 micron fuel filter in front of tank but before the pump. Here check this link out on the hutch harpoon setup.
http://www.guzzle7pt3.com/hutch.php
The conversion is the ideal time to do this mod, being that you already have to mod the tank and lines anyway. Taking out the in tank filter on mine is a no brainer but putting in a cheap easily replaceable fuel filter seems like a really good idea. I love the truck man, looking very good so far. The hangups I'm having from my shoulder and the parking brake and blinkers are really holding me up. I was hoping to be nearly done with mine at this point but I'm still gathering parts for the fuel tank. I picked up the fittings today (got the wrong size several times,long story). I think I'm going to use standard brass fittings since they are readily available and inexpensive, although I did buy the jic fittings as well, the flare angles are different between the two types and I already have a standard plumbing flare tool. I also had to order a part for the welder I just bought from craigslist
Did you get any pictures of the frame chop and weld? I think I'm going to cut about a 45 degree angle on mine, bevel the edges weld it in place, trim the top off the removed section and bolt it into place. This way I can inspect the weld for fractures easily and I have the added security of the bolted piece if it did fracture. The 45 degree angle would also increase the length of the weld and reduce the chance of it breaking in the first place.
Seems like the standard procedure is to cut a plumbed up "Z" shape (if that makes sense) versus one strait cut.
Thanks! Yeah, I've got TONS of pictures of the build. We cut the frame like a "Z". I think (we made several measurements) the frame was 7" tall, so we meausred down 3.5", then over 3.5", then down the remainder 3.5" and cut it like that. I'll try to upload pictures here in a minute. (I'm at work and the internet here is SLOOOOOOOOOOOOOOOW)