Tom@BigTimeKustomz
Active member
So got a morning to meet up with a buddy and throw the Retro Customs iPad dash kit in. First off big thanks to Joe (SmokedF747 on here) for the install. I did buy the kit pre owned for $250 shipped (retails for $375) and it came with extra felt and brand new epoxy. Mount was basically brand new and I saved some bucks. I know after I bought mine there was another posted, so they're out there.
The install is pretty straight forward. The directions they give are very detailed with color pics. Hardest/longest part of install was trimming the factory panel to accommodate the new iPad mount. Other than that it's easy. Took us about 1.5 hours and that's with taking our time and allowing the epoxy (for the charger cable) to dry.
I will say this....before you button the dash up, make sure your A/C circuitboard is plugged in and working. Joe suggested we place the board in a plastic bag so it wouldn't be touched by things inside the dash. The A/C circuit board just slides into a slot behind the panel, which seems sketchy but works. We plugged it in, but it came loose on the reinstall so we had to pop the center back off to tape it down to ensure it wouldn't go anywhere. Since there is nothing to hold it in place, we taped the plug to the bag. Definitely make sure that plug is secured and not going anywhere and use a bag for that circuit board.
The functionality and looks of this in the dash is great. I will be honest, you can see the outer edge of the iPad and it's not perfectly straight, but it works. If I feel ambitious over the winter I will take it out and rig something to straighten it out. It's awesome for now. I like having the display for the EZ Lynk in the center stack rather than on my phone mounted to the windshield. Just looks a lot cleaner.
Would I recommend this? Yes definitely. It really cleans up the inside and besides that it looks badass in there. I took a few pics, let me know if anyone wants any better ones or has any questions!
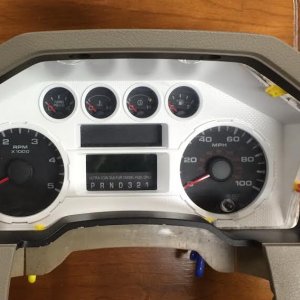
Stock center piece out, radio still in. The radio does need to be removed to run the charging cord up behind it and in the accessory panel on top of the dash.

Joe grinding the tabs and making the piece nice and smooth to accept the new iPad mount.

Radio out to run charging wire behind. Although my kit came with a new charging cord, I opted to install the supplied charging cord that came with the iPad.

Finished product!

Sent from my iPhone using Tapatalk
The install is pretty straight forward. The directions they give are very detailed with color pics. Hardest/longest part of install was trimming the factory panel to accommodate the new iPad mount. Other than that it's easy. Took us about 1.5 hours and that's with taking our time and allowing the epoxy (for the charger cable) to dry.
I will say this....before you button the dash up, make sure your A/C circuitboard is plugged in and working. Joe suggested we place the board in a plastic bag so it wouldn't be touched by things inside the dash. The A/C circuit board just slides into a slot behind the panel, which seems sketchy but works. We plugged it in, but it came loose on the reinstall so we had to pop the center back off to tape it down to ensure it wouldn't go anywhere. Since there is nothing to hold it in place, we taped the plug to the bag. Definitely make sure that plug is secured and not going anywhere and use a bag for that circuit board.
The functionality and looks of this in the dash is great. I will be honest, you can see the outer edge of the iPad and it's not perfectly straight, but it works. If I feel ambitious over the winter I will take it out and rig something to straighten it out. It's awesome for now. I like having the display for the EZ Lynk in the center stack rather than on my phone mounted to the windshield. Just looks a lot cleaner.
Would I recommend this? Yes definitely. It really cleans up the inside and besides that it looks badass in there. I took a few pics, let me know if anyone wants any better ones or has any questions!
Stock center piece out, radio still in. The radio does need to be removed to run the charging cord up behind it and in the accessory panel on top of the dash.
Joe grinding the tabs and making the piece nice and smooth to accept the new iPad mount.
Radio out to run charging wire behind. Although my kit came with a new charging cord, I opted to install the supplied charging cord that came with the iPad.
Finished product!
Sent from my iPhone using Tapatalk

