My 96 CCSB - Superduty Coil swap and other mods

JayTee013

New member
Joined
Dec 6, 2016
Messages
61
Reaction score
0
Location
Northeast CT
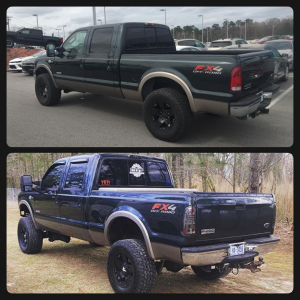
So not sure if I'm posting this in the right place, but I'm starting to Tear into my '96 again, Originally frame off restored about 8 years ago with a few suspension and other changes since. This was my first vehicle and was bought from my father at 188k and all rusted out when I was 16 (he bought it in '97 with 7K on it). Truck now has 270k and runs like a top.

Truck has a lower mileage 7.3 that was never rebuilt (prolly 180K now), rosewood 160cc with stock fuel and HPOP, 6.0 intercooler, and a BTS trans.

As part of this I'm trashing the old 5" aluminized straight pipe exhaust (already sold on CL) in favor for a Stainless 5" with muffler and going e-fuel as well a T500 Hpop.

The first time I did the restoration I had it on 8 in of lift (skyjacker springs) with 40's. After a few years of banging my teeth out and some maturity I decided to go to RSK with a 5.5" sky kit and 35's. That's how it sat up until a couple weeks ago when I sold my axles and susp and picked up a 2005 5.4l F250 superduty and began the swap. I also have a set of 2008 king ranch 18" with stock size tires. This will have a 2.5" carli starter Bilstein kit when complete, with PMF 2.5" drop brackets. The donor radiu brackets where pretty rusted anyway and I don't like the castor shims and couldn't justify the PMF 3 links. Rather put the money in E fuel and Terminator, they are both long overdue.

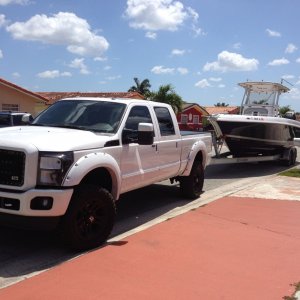
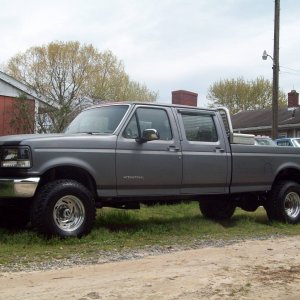
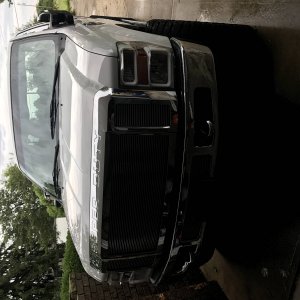
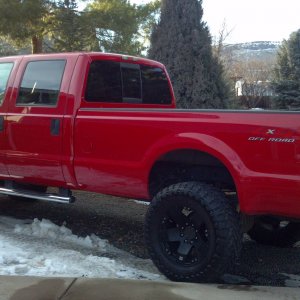
The truck as it sat 2 weeks ago:
IMG_3648.jpg
[/URL][/IMG]

IMG_3664.jpg


And some old pics of the resto from years ago:
IMG_3742.jpg
[/URL][/IMG]

IMG_3743.jpg
[/URL][/IMG]

IMG_3744.jpg
[/URL][/IMG]

Young me sandblasting:
IMG_3670.jpg


After paint and motor install (again ~8 yrs ago):
IMG_3671.jpg
[/URL][/IMG]


How she sits now in my garage:
IMG_3679.jpg
[/URL][/IMG]

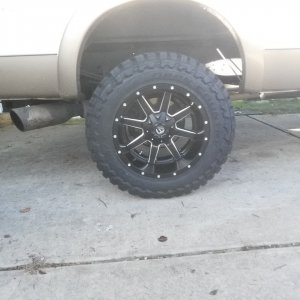
The old dana 60, sterling 10.25, RSK and wheels/tires on their way to new home:
IMG_3686.jpg
[/URL][/IMG]

The old rear perch of the front spring ground off the frame (what a pain without torches):

IMG_3747.jpg
[/URL][/IMG]

The 2005 donor, (picked her up off CL for $700):
IMG_3738.jpg
[/URL][/IMG]

And the new owner of my axles was nice enough to send me a picture of them in their new home. this is 2wd Texas work truck getting some new life:
IMG_3748.jpg
 

Attachments

  • IMG_3648.JPG
    IMG_3648.JPG
    836.9 KB · Views: 161
  • IMG_3664.JPG
    IMG_3664.JPG
    1 MB · Views: 179
  • IMG_3737.JPG
    IMG_3737.JPG
    796.7 KB · Views: 169
  • IMG_3738.JPG
    IMG_3738.JPG
    933.8 KB · Views: 165
  • IMG_3686.JPG
    IMG_3686.JPG
    638.9 KB · Views: 156

JayTee013

New member
Joined
Dec 6, 2016
Messages
61
Reaction score
0
Location
Northeast CT
That door badge was designed and machined by me @ 16 years old in high school on a CNC machine. Which is how I got started in the profession that finances all my toys.

If not for the sentimental value it would be long gone... Its also covering two gaping holes from old towing mirrors...
 

JayTee013

New member
Joined
Dec 6, 2016
Messages
61
Reaction score
0
Location
Northeast CT
Does anyone have any dimensions or better pics of the exact location they mounted the superduty coil buckets. It seems to be the one area people gloss over when documenting the coil swap. I'm wondering if that is because once you get them against the frame its pretty intuitive and they only really go in one spot...

I'm planning to space out the Radius arm brackets (using fabb'd PMF 2.5" drop units) by 3/8" each side to make up for the narrower OBS frame and butt up against the body mount, but I'm not sure about exact location of the coil buckets.

I have seen some pics where guys notched the buckets around one of the corss member rivets, overlapping by about an 1".

Also, Any need to space out the superduty buckets? I'm hoping to gut the donor this weekend and get the measurements needed but any suggestions or experience would be awesome!
 

JayTee013

New member
Joined
Dec 6, 2016
Messages
61
Reaction score
0
Location
Northeast CT
Got most of my parts in yesterday.

New takeoff OEM takeoff Radius arms of Ebay - really didn't feel like messing around with cleaning/painting the ones off the donor.
IMG_3763.jpg


New diff covers - Just cheapo aluminum
IMG_3766.jpg


My carli bilstein kit came in as well, trackbar, rear leaf packs, Coils and brake line relocation brackets, also the castor shims which i will not be using, If anyone needs them let me know:

image_3.jpg

image_2.jpg


Also got my powersteering line for the superduty box and one of the two needed conversion U-joints. I want to make sure I've got the right one before ordering the second one:
image.jpg


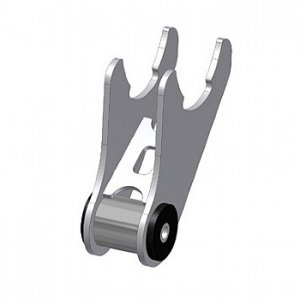
And here are the new PMF 2.5" drop radius arm mounts. I needed new radius brackets (donors were pretty crusty) and am not a huge fan of the shims so bought these instead. Pretty heavy duty, kind of pricey for a couple big hunks of steel but oh well. If I had more time I'd probably fab my own. But time is money.
image_4.jpg
 

JayTee013

New member
Joined
Dec 6, 2016
Messages
61
Reaction score
0
Location
Northeast CT
Also got my new stainless exhaust in:

Its just a diamond eye straight system and I ordered a flopro stainless muffler seperately. I'll probably tig it together with a couple stainless 5" band clamps in favor for the crap galv steel c clamps provided with the kit:
image_6.jpg
 

JayTee013

New member
Joined
Dec 6, 2016
Messages
61
Reaction score
0
Location
Northeast CT
Not yet. Still haven't gotten around to pulling the old stuff off the superduty. My new daughter is mostly responsible for that. Lol. I did get some more parts in and did fart around a bit this weekend with mounting up the PMF radius arm mounts. Going to machine up some spacers for the frame rail width and a small wedge at work this week.
 

JayTee013

New member
Joined
Dec 6, 2016
Messages
61
Reaction score
0
Location
Northeast CT
Radius arm brackets

I messed around with the radius arm brackets a bit last night.

Decided to just butt it up to the body mount, I know some others have trimmed either the bracket and/or the mount, but many others have just butt it up without issue so that's the route I'm going to take.

Hole marked in the frame. Also ground out the rust that had collected under the old front spring mount. Just drilling one first to make sure everything works before going too crazy:
IMG_3786.jpg


Hole drilled:
IMG_3787.jpg


PMF fabricated bracket mocked into position:
IMG_3788_1.jpg


From the inside of the frame rail. Notice the wedge gap towards the back of the frame where one of the bolts from underneath goes. I'm going to machine a wedge to go in there. Not that its really all that necessary (a washer would probably work just fine but it can't hurt. I'm also going to make a 3" solid spacer to run along the outside of the framerail to better match the width of the superduty frame. I know a lot of people have had no issues with just bolting them tight but a few people have mentioned issues with having to fight the radius arms since they wanted to be narrower. I have the resources so I'm going to make spacers.

IMG_3789.jpg


Threw the radius arm in there for the fun of it. Still not sure which way is up on those or if there is an up or down. Going to take note of that when I tear down the superduty.
IMG_3790.jpg


IMG_3791.jpg
 

JayTee013

New member
Joined
Dec 6, 2016
Messages
61
Reaction score
0
Location
Northeast CT
Had some time and drew up my fancy frame spacer "washers". Got fancy and added a ford emblem as well:


IMG_3794.jpg


Unfortunately didn't have any scrap steel lying around, so they are aluminum. They are really just acting like a washer anyway so I'm sure they will be fine. I'll probably paint black and sand off the emblem and then clear coat. Should look kind of cool from below, don't mind the holes in one of them. That what happens when using scrap material:

IMG_3795.jpg


IMG_3797.jpg


And up against the PMF bracket:

IMG_3796.jpg
 

JayTee013

New member
Joined
Dec 6, 2016
Messages
61
Reaction score
0
Location
Northeast CT
Machined my angle spacers today for the back of the radius arm brackets.

Unfortunately only had aluminum so that is what they are. Will go home and test them tonight. added a fillet to clearance against the weld of the PMF fabbed brackets.

IMG_3800.jpg


IMG_3801.jpg
 

JayTee013

New member
Joined
Dec 6, 2016
Messages
61
Reaction score
0
Location
Northeast CT
Had thurs and friday off and with the nice weather and a few hours in between family commitments I got started ripping down the donor.

Started in the rear:
IMG_3803.jpg


a few hours later the sterling is resting on the ground. I also torched off the spring hangers. Not sure If I will use them but they are so much heavier duty than my obs stuff. I guess thats why they are a 'superduty'.
IMG_3805.jpg


I'm also still deciding if I will make a custom hybrid driveshaft I cut the superduty one as I will only need the axle side yoke. I'm not sure my current one will be short enough. Its a custom one piece that I had made after the original two exploded not long after the original 6"lift. It may too long for my future 2.5" lift. If its short enough I'll probably just end up using the conversion Ujoint I bought.

IMG_3806.jpg


moved to the front:

IMG_3814.jpg


everything came apart fairly easily. pulled the steering box & trac bar bracket:
IMG_3816.jpg

IMG_3819.jpg


Even with the torch The coil buckets came off hard. The rivets in the bottom of the frame tend to hold them in there, even with some blows of the sledge. I did get a bad surprise, the coil buckets are in way worse shape than they looked. Not that I should have been surprised, its a northern NH truck and I had already figured out the radius arm brackets were rusty beyond use. The spring locators are completely shot and rusted through. Not sure if I'm going to machine up and weld in new locators or just order new buckets. My father was dropping his '16 off at the local ford dealer for a nasty death wobble that just developed and he priced them out. $130/ea. I'll see if I have time to make up some new pieces and if not I'll just order them. Pics of the rot:
IMG_3818.jpg

IMG_3817.jpg


I also took a liking to the power-steering cooler and though completely unnecessary I may try to implement so I pulled that as well.
IMG_3820.jpg


The rest of the parts, I also pulled the master and booster from the truck. I've heard others having issues after the disc conversion with pedal feel and if it works out or the pedal doesn't feel right, I might throw the original superduty vacuum unit in my truck, I know lots of people throw a hydro unit in, but I have this, and figured I might try it:
IMG_3828.jpg


And axles on the trailer ready to head back to the house for some cleanup:

IMG_3829.jpg


Luckily I only had about a mile to go, there was a serious case of the tail wagging the dog on this one. I think those axles weigh about twice what my old 4runner wieghs:
IMG_3831.jpg


Also got around to painting/clear coat on the spacers last night:

IMG_3832.jpg
 

heavydoc

New member
Joined
Mar 13, 2016
Messages
644
Reaction score
0
Location
Cruso, NC
You're making me think I need to do this axle swap in my obs dually also.

Sent from my SM-N920V using Tapatalk
 

Strokersace

Well-known member
Joined
May 20, 2011
Messages
4,883
Reaction score
39
Location
Towanda, KS
For the rear driveshaft, swap the pinion yoke between the axles. They'll swap as that's what several of us have done. Allows you to use the obs driveshaft and rear u-joint just like before.
 

JayTee013

New member
Joined
Dec 6, 2016
Messages
61
Reaction score
0
Location
Northeast CT
Spent a little time pressure washing the donor axles today and found the old tag on the front axle under a few layers of what looks like chassis saver or POR15. After a little scratching and scrubbing looks like I have 3:73's in there. Pretty happy with that as I did not want 3:55's. I think the 3:73 will be good with the stock superduty 34.5 tires. I was always pretty happy with 4:10 and 35's and these tires should have a bit less mass

IMG_3843.jpg
 

Latest posts

Members online

Top