Manifolds
First off if your doing a 6.0 manifold upgrade i would highly recommend having your A/C system pumped out and buy new bolts for the manifolds since the old ones are about 1/2" too long. And another thing to do is match the gaskets to the manifolds with a dremmel or something similar.
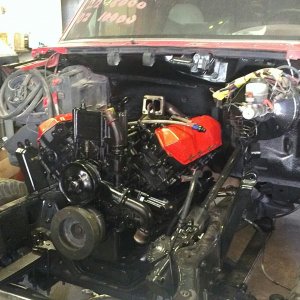
Ok first i removed the down pipe and then the up pipes and egr down pipe. now is where things got fun. Since i was doing the manifolds and studs i wanted to make sure i was going to do it in a way that had the easiest access for both things i was doing so to do the manifolds I’m not saying all of the following steps are absolutely necessary but i did find it made it easier to see/do. Now to get to the driver side manifold i went and removed the driver side inner fender(8mm and a 6mm bolts), the battery tray and coolant reservoir (13mm) (i disconnected both batteries and drained all the coolant) then disconnected the radiator hose, the lower hose from the reservoir, and the small coolant hose on the front of the reservoir. Once that was out of the way i unscrewed the back pressure line and then removed the manifold (10mm). Now for the passenger side manifold i again removed the inner fender(8mm and 6mm) now i took a 3/8 ratchet and a cheater bar to slack the alternator belt and then slid an Allen wrench into the tensioner slot to hold it slacked, then i removed the alternator (13mm). Next thing i did and i don’t know if there is any way around it, but i removed the 2 A/C lines from the compressor and the one upper stud from the compressor. Once that is out of the way i unbolted the heat shield and then the manifold, now its really tight for some of the bolts but i found that a 3/8 air ratchet was really helpful and if you had a 1/4 drive air ratchet you would probably be better off. Now some of the bolts are still hard to get at but a good 12 point wrench is good enough to get the front bottom ones.

