Ad8 PRODIGY
New member
Get that floor pan?

Looks go Matt
Sent from my shoe phone
Coming together nicely!
Sent from my iPhone using Tapatalk
Get that floor pan?
Matt you definitely never cut corners on your projects. Gonna be awesome. You going to wapak this year or heading to ts?
Sent from my iPhone using Tapatalk
Looking darn good. I'm ready to see it all done. It's gonna be sweet.
I need to come up and check this shop out. I need like all of these toys. LOL
I'm really impressed to see how thorough you are being with this. I can imagine the time you have involved. This is definitely one of those builds for only a true die-hard. With everything you've done/plan to do, I could see an easy $100K bill if you were paying somebody to do it. As you know, body restorations on that level get insanely expensive really quick. Keep up the good work.
What's the details on the vintage air unit your using?
Sent from my Pear phone 5 using Tapatalk
Ah ok. Wonder how well that will package in the truck. Might have to do that with mine
Sent from my Pear phone 5 using Tapatalk
That was the big thing I liked was that it cleaned up the engine bay. Makes it look sooo much cleaner.
Sent from my Pear phone 5 using Tapatalk
What unit did you use? I see that there are a few different ones to choose from
Sent from my Pear phone 5 using Tapatalk
Ill have to look again for you.
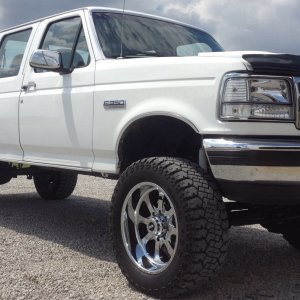
Progress has been slow lately since my buddy doing the paint and body work has to finish up a couple other projects at the moment. I did get the rolling chassis and parts moved over to the shop though. Got the cab in primer as well and set it on the frame last night and we put the doors on and after some work got them fit perfect. Im gonna get all the piping and trac bars tig welded up tonight. My weld in roll pan from grant customs showed up so after that is on and the filler panel for the stake holes on the bed and rear fuel door are on it will be ready for primer.
image by mattpopiel, on Flickr
image by mattpopiel, on Flickr
image by mattpopiel, on Flickr
image by mattpopiel, on Flickr
image by mattpopiel, on Flickr
image by mattpopiel, on Flickr
image by mattpopiel, on Flickr

I think you might want to check the toe out on the front tires. :thumbsup::thumbsup:
Keep up the good work give me hope that someday mine might be done.