Project: WUT D P F

Strictly Diesel

Active member
Joined
Jun 22, 2011
Messages
1,747
Reaction score
8
Location
Phoenix
Discovered something interesting, as I finally drove the truck at night. All of the "warning lights" are about 10-20% lit, all the time. Apparently there is enough voltage on those circuits to partially light the LEDs due to them having no load like a filament type bulb. I guess I'm going to be playing around in a dark shop trying to figure out the best fix for this. Crap!
 
Joined
Mar 31, 2020
Messages
9
Reaction score
0
Discovered something interesting, as I finally drove the truck at night. All of the "warning lights" are about 10-20% lit, all the time. Apparently there is enough voltage on those circuits to partially light the LEDs due to them having no load like a filament type bulb. I guess I'm going to be playing around in a dark shop trying to figure out the best fix for this. Crap!
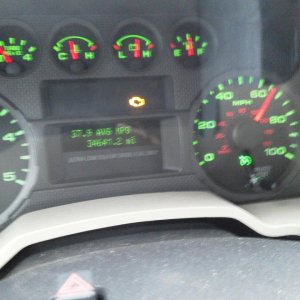
Mine do the same thing I have blue leds and you can barely see them might put the original bulbs back in

Sent from my SM-N950U using Tapatalk
 

sootie

Well-known member
Joined
Oct 3, 2012
Messages
11,854
Reaction score
29
Discovered something interesting, as I finally drove the truck at night. All of the "warning lights" are about 10-20% lit, all the time. Apparently there is enough voltage on those circuits to partially light the LEDs due to them having no load like a filament type bulb. I guess I'm going to be playing around in a dark shop trying to figure out the best fix for this. Crap!

Are you sure they are partially lit? I've seen it where the illumination from the other bright LEDs that are actually on, reflecting thru the cluster
 
Joined
Mar 31, 2020
Messages
9
Reaction score
0
Are you sure they are partially lit? I've seen it where the illumination from the other bright LEDs that are actually on, reflecting thru the cluster
I'll find or take a picture of how mine look to show yall when I get off work

Sent from my SM-N950U using Tapatalk
 

Strictly Diesel

Active member
Joined
Jun 22, 2011
Messages
1,747
Reaction score
8
Location
Phoenix
Are you sure they are partially lit? I've seen it where the illumination from the other bright LEDs that are actually on, reflecting thru the cluster

Yes, because I can see them with the headlilghts off, so it isn't the "illumination" bulbs doing it.
 

uncool

New member
Joined
Jul 22, 2011
Messages
273
Reaction score
0
Location
California
For the mirrors, order the control switch for the 06-07, it is internally different than the 99-05 control switch and the 08+ mirrors will work without taking them apart.

Marc
 

Strictly Diesel

Active member
Joined
Jun 22, 2011
Messages
1,747
Reaction score
8
Location
Phoenix
Taking some time off this week and working on the truck. Yesterday was "Rear Door Day". I started by pulling the power window regulator assemblies out and cleaning the inside surfaces of the doors (inner skin where door panel mounts, and inside of outer skin as well).

img_2485.jpg


Then I changed out the power lock actuators and installed new outer door handles with Jimmy Jammers. Sorry, no pics, didn't seem interesting enough.

Then I put in my sound deadening, on both the inner door skin as well as the inside of the outer door skin.

img_2487.jpg


After installing the New OE power window regulator assemblies, reinstalling the OE vapor barrier and buttoning up the door panel, I installed new (updated) OE weatherstripping on the door opening and upgraded the door strikers to the Mustang units with the rubber bumpers.

img_2489.jpg


The difference in sound when you close the door is so noticeable! I will get to the front doors later this week. It will be nice to have all of the windows and locks working right again, and the sound deadening is such a nice upgrade. Eventually I will make the time to gut the rest of the interior, pull the dash and sound deaden the rest of the cab.
 

Zeb

New member
Joined
Apr 26, 2018
Messages
846
Reaction score
0
Location
Downtown Marrowbone Ky
Taking some time off this week and working on the truck. Yesterday was "Rear Door Day". I started by pulling the power window regulator assemblies out and cleaning the inside surfaces of the doors (inner skin where door panel mounts, and inside of outer skin as well).

img_2485.jpg


Then I changed out the power lock actuators and installed new outer door handles with Jimmy Jammers. Sorry, no pics, didn't seem interesting enough.

Then I put in my sound deadening, on both the inner door skin as well as the inside of the outer door skin.

img_2487.jpg


After installing the New OE power window regulator assemblies, reinstalling the OE vapor barrier and buttoning up the door panel, I installed new (updated) OE weatherstripping on the door opening and upgraded the door strikers to the Mustang units with the rubber bumpers.

img_2489.jpg


The difference in sound when you close the door is so noticeable! I will get to the front doors later this week. It will be nice to have all of the windows and locks working right again, and the sound deadening is such a nice upgrade. Eventually I will make the time to gut the rest of the interior, pull the dash and sound deaden the rest of the cab.


Very nice!

I recently tackled a similar clean and insulate on my semi cab. It is a job that isn’t much fun, but sure worth the results when finished.
 

Strictly Diesel

Active member
Joined
Jun 22, 2011
Messages
1,747
Reaction score
8
Location
Phoenix
Finally finished the front doors. Same deal as the rears, new OE lock actuators, new OE window regulator assemblies, everything cleaned and sound deadening added to the outer and inner surfaces. Fronts also got rear door handles without lock cylinders, Jimmy Jammers, Mustang strikers and new weatherstripping (not pictured). No real new info here, just pictures of the front door work.

img_2511.jpg


img_2512.jpg


img_2513.jpg
 

J98

Active member
Joined
Jan 4, 2019
Messages
186
Reaction score
26
Location
Somewhere Cold
Love seeing the updates on this build. Any recommendations on where could I source that sound deadening insulation that your using?
 

Strictly Diesel

Active member
Joined
Jun 22, 2011
Messages
1,747
Reaction score
8
Location
Phoenix
The company that makes this stuff is local to us. There are multiple brands out there, Dynamat being the most well known. Any local stereo store should be able to sell it to you.
 

Derkperk

Member
Joined
Jun 1, 2013
Messages
717
Reaction score
0
Location
Twin cities
Super cool Dennis. How much weight do you figure you have added in each door?


Sent from my iPhone using Tapatalk
 

Strictly Diesel

Active member
Joined
Jun 22, 2011
Messages
1,747
Reaction score
8
Location
Phoenix
So far, based on how much material I've used, 30# (ish) for all 4 doors.

Where I will go through a bunch more material (and add a bunch more weight) is when get to the floor, back wall and roof. I started with 4 cases of material, which is right about 100#. I'm pretty sure I will need more once I get into the large areas. That's just the "deadener" like you see in the pictures.

I will also be adding an additional later of a sticky backed foam material that blocks sound. That will go on the floor, back wall, roof and hopefully the firewall if I decide to bite the bullet and pull the dash. If I like it, I may go back and add it to the doors as well.
 

03_PSD

Member
Joined
Jun 23, 2011
Messages
618
Reaction score
1
Location
Salado, TX
Great updates!

I want to do the entire cab also, I've only done the doors. I've also installed the updated door strikers and they make a difference, no rattling at all!
 

dsberman94

Well-known member
Joined
Oct 9, 2013
Messages
11,546
Reaction score
56
Location
Pennsylvania
I did the rear wall below the window and the entire floor as far as I could without pulling the dash. It definitely made a different back the, but now I can’t tell.
 

Strictly Diesel

Active member
Joined
Jun 22, 2011
Messages
1,747
Reaction score
8
Location
Phoenix
So, it would appear that my CCV setup will need some additional work. I do think this engine is a bit tired, but it hasn't been worth the time to actually compression test it. It does have a miss that isn't injectors, wiring or IDM. I guess I will reserve judgement on the CCV setup until I get a fresh bullet in place.

img_2520.jpg

The canister is catching some oil. This is about 3000 miles worth.

img_2524.jpg

The problem is, it is still allowing enough of it to make it back up to the intake. No way to really know how much, but enough to be visible.

The canister is mounted down low, behind the drivers front tire. There's a good 3-4' of hose down and then back up. I was really hoping that this would be enough hose and a good enough canister setup to do a better job than this.

Could be that the canister is too small. Could be that running both valve covers to one canister is too much for it. Could be that this old turd has more blowby than this setup can efficiently handle. At some point I will need to remove the charge air tubes, it will be interesting to see how much oil is making it to those.

Not the best update, but all I've got for now.
 

Latest posts

Members online

Top