Haha, na... I was being silly and talking about the literal truck nuts. I figured with how your build is going, and is classy and clean as it is, joking about something as retarded as hanging bull testes off the back would be funny, especially for a SEMA build. I'm loving this build, I can't wait to see what you have in store for it.
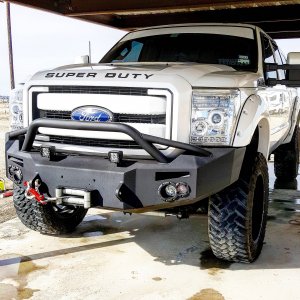
I'm really curious as to how the 54" curved bars are going to look on the truck - hopefully it's wide enough to stretch across the whole windshield. I've been thinking a lot lately about doing that with mine, but the bar mounts would have to be perfect in order for it to work (look good) on my truck.
You guys are doing great! :toast:
You are using an out of date browser. It may not display this or other websites correctly.
You should upgrade or use an alternative browser.
You should upgrade or use an alternative browser.
2014 Sema project
- Thread starter jordan572
- Start date
Finally we got to start throwing some color at these parts, so many small parts. Prepping, tapping and setting them up to spray took forever, I'm glad we decided to do the interior now rather than later as this is time consuming stuff. We had a full booth of parts to spray ruby red, this paint had to be cleared twice. Once with a tinted ruby red clear coat, and once with just a straight clear, this made things a little tight going back together but we'll save that for another post.


Come back tomorrow so you can see some pictures with color involved,
Come back tomorrow so you can see some pictures with color involved,
backwoodsboy
New member
This is how a SEMA build should be. Well done.
Dmstrucks02
New member
Wow talk about the little things. Attention to detail is crazy on this!!
Finally we got to spray that good looking ruby red, I love this color. Bright enough to look cool but not fire engine red either. I think it will look great inside the truck,


Finally things are getting serious, these next few months are gonna be awesome, but stressful.
Finally things are getting serious, these next few months are gonna be awesome, but stressful.
MorganM
Member
Just an opinion, but I'd think a satin finish on the interior pieces would lend itself to a more OEM finish. Just accustomed to seeing a lot of glossy interior panels.
As others have said- awesome work.
As others have said- awesome work.
Just an opinion, but I'd think a satin finish on the interior pieces would lend itself to a more OEM finish. Just accustomed to seeing a lot of glossy interior panels.
As others have said- awesome work.
I see your point, the black pieces I'll post later are toned down with a satin finish. Although I wanted a gloss red scheme for the interior, it is a somewhat difficult color to spray as like I've mentioned before there is a layer of tinted clear coat between the base and the final clear. Throwing in a flattener really complicates matters with this color. Plus I love that metallic, :naughty:.
Super Diesel
New member
That color is definitely growing on me. The more I look at this thread, the more I like it... Great job!
More painting pictures, this time some black. Too much goofing around here, a ton of little pieces that needed to be sprayed. Are we done yet? :morons:

Note: this is not the final tape line for the black,

Two tone, black circles and red plate (taped off), the little things.

Rigid D2 mounts

Yes the fuel and trans coolers :doh:,


PLATINUM!

Note: this is not the final tape line for the black,
Two tone, black circles and red plate (taped off), the little things.
Rigid D2 mounts
Yes the fuel and trans coolers :doh:,
PLATINUM!
Crack85
Active member
Nice!!!!
01pwrstkr
Active member
WHS^^^!
rhygunnar
New member
Man this is going to be one good looking truck :thumbup::
Subscribed opcorn:
Subscribed
NevaEnough
New member
Truck is going to be BA!
Twinturbostroker
New member
I just hope you remember where everything goes.......
dustinz85
Member
That's what I was thinking... these interior piece pictures are such a tease.. awesome buildI just hope you remember where everything goes.......
zporta
Member
- Joined
- Oct 10, 2013
- Messages
- 371
- Reaction score
- 0
Beautiful, can't wait to see it come together

