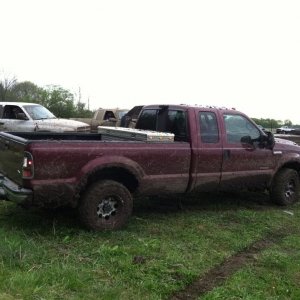
Daily Driver / Tow Pig Build....

mjonesjr

New member
Joined
May 30, 2011
Messages
512
Reaction score
0
Location
Salem, IN
I got the dang thing all together and on the road only to see that an inner axle seal is leaking. So I took it all apart again on Thursday, just to had to wait for Friday to get the seals. I got the Spicer 52148 seals. They are an upgraded seal over the factory seals.

Hopefully I will have the truck put back together tomorrow and back on the road. I've got an appointment on Monday to have a new headliner put in the truck. I can't stand the sagging headliner that the OBS trucks are known for.


photo1-3.png

photo2-3.png

photo3-3.png

photo4.png
 

mjonesjr

New member
Joined
May 30, 2011
Messages
512
Reaction score
0
Location
Salem, IN
Got the new inner axle seals Friday night, but couldn't do anything with the until today.

The difference in the new seal and the old seal can be seen right off the bat.

IMG_0067.png

IMG_0068.png

IMG_0069.png

IMG_0070-1.png


To get the newer seal to work in a '93-'97 Dana 60, you have to do a little modification to the seal itself. The '98-'07 Dana 60's have a larger machined area where the axle slides into the seal than the '93-'97 version. To get it to fit, you have to do a little grinding on the steel lip that sticks out of the inner portion of the seal. Once it is off, the seal will go in the axle like the original seal. Doing this grinding still makes this seal a MUCH better seal than the original.

This grinding will have to be done even if you get the National 710530 as the Spicer seal is made by the same factory and is the exact same seal.

IMG_0071-1.png


The truck is all back together and on the road again. It is setting at the upholstery shop waiting for its new headliner to be installed tomorrow.
 

mjonesjr

New member
Joined
May 30, 2011
Messages
512
Reaction score
0
Location
Salem, IN
The new headliner is awesome. It looks like it did from the factory. They guy who did it said that he took the headliner board out through the doors. Everything I read online said the board had to go out through the rear window; I guess not.

I got the front axle and engine cross member all painted up and looking good.

IMG_0072-1.png

IMG_0073-1.png

IMG_0074-1.png
 

mjonesjr

New member
Joined
May 30, 2011
Messages
512
Reaction score
0
Location
Salem, IN
So I crawled under my truck earlier this week to find that my rear diff cover had rotted allowing gear oil to seep through the cover. At one place on the cover, the steel was so week that you could move it with your finger. It probably didn't help the cover when the rear tank was leaking on it.

IMG_0091.png

IMG_0092.png


So instead of getting a replacement ($50) or an aftermarket ($275), I went with a '08-'11 F-250 & F-350 aluminum diff cover. I picked it up at the local Ford dealer for $79 with a small bottle of Motorcraft friction modifier. The part number for the diff cover is 8C3Z-4033-A. You will have to get new hardware to mount the diff cover as the aluminum one is thicker than the OEM cover. Since they are exposed to the elements, I went with 5/16-18 x 1.5" stainless, stainless flat washer, and a stainless lock washer.

Here is a comparison of the factory cover that came off my truck and the OEM '08-'11 Super Duty cover.

IMG_0094-1.png


The Super Duty cover is installed with black Form-a-Gasket only. I thought since my housing was an older housing, I would be double safe than sorry. I used the black Form-a-gasket along with a Felpro Sterling 10.25 gasket. I put the Form-a-Gasket on the cover first and the gasket on afterwards.

IMG_0095-1.png

IMG_0096-1.png


Got the cover installed and the bolts torqued to 36 ft. lbs. and the fluid installed. I went with 75w90 full synthetic fluid with the 4 oz. of friction modifier.

IMG_0098-1.png

IMG_0099.png

IMG_0100.png

IMG_0101.png
 

CamTom12

Member
Joined
Sep 14, 2011
Messages
821
Reaction score
0
Location
Huntsville, AL
The truck looks great!

I wish I'd posted in time to recommend you had some dynamat put on the roof while you had the headliner out. I haven't done it yet but I heard it's a pretty decent difference in highway noise.

Amazing work!
 

mjonesjr

New member
Joined
May 30, 2011
Messages
512
Reaction score
0
Location
Salem, IN
The truck looks great!

I wish I'd posted in time to recommend you had some dynamat put on the roof while you had the headliner out. I haven't done it yet but I heard it's a pretty decent difference in highway noise.

Amazing work!
I might have to eventually pull the headliner back out and do that. Thanks.
 

mjonesjr

New member
Joined
May 30, 2011
Messages
512
Reaction score
0
Location
Salem, IN
I got it all at Tractor Supply. All the stainless hardware (bolts, washers, and lock washers) cost me $15.
 

mjonesjr

New member
Joined
May 30, 2011
Messages
512
Reaction score
0
Location
Salem, IN
I got the old gauges uninstalled and the ScanGauge installed. I am going to wait till spring to paint the gauge pod to match the interior.

I have to wait for my new boost PSI and fuel PSI sensors to arrive. The ones I got were bad. Hopefully they will be here this week so I can get the full function of this thing going.


Before:
IMG_0108.png

IMG_0277.png


After:
photo5.png

photo3-4.png
 

mjonesjr

New member
Joined
May 30, 2011
Messages
512
Reaction score
0
Location
Salem, IN
Nothing, but I did sell them.

With the added ability of the ScanGauge, I was able to also sell my AE software as well.
 

Latest posts

Members online

Top